How to Take a Screenshot on HP EliteBook Laptop
Your cursor hovers over a critical error message that IT support needs to see, but describing it in words feels impossible. Or you’re preparing a training document and need to capture your EliteBook’s specific interface. Whether you’re troubleshooting, creating documentation, or simply preserving important information, knowing exactly how to take a screenshot on your HP EliteBook laptop saves time and prevents miscommunication. This guide reveals every method available across all EliteBook models—from basic keyboard shortcuts to professional techniques—so you never miss capturing what matters most on your screen.
Full Screen Capture With Print Screen Key
Instant Clipboard Copy Method
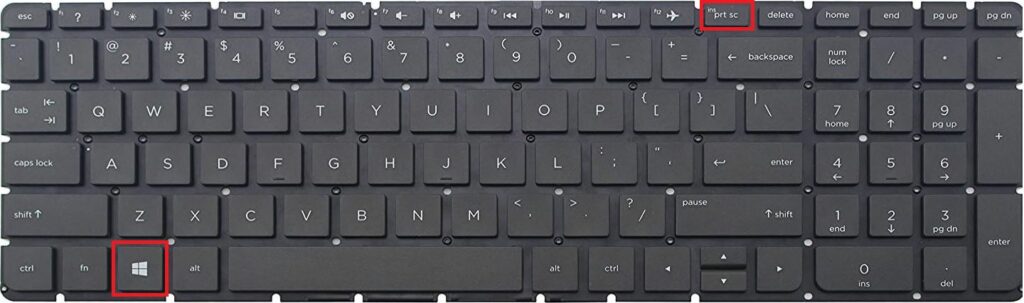
Press the PrtScn key (typically labeled “PrtSc,” “PrtScn,” or “Print Scr” in your keyboard’s upper-right section) to capture your entire EliteBook display. This copies the image to your clipboard immediately, but provides no visual confirmation—you must paste it to verify success. Open Paint, Word, or any image editor and press Ctrl + V to view your capture before saving as PNG for maximum clarity.
This method works consistently across EliteBook 840, 850, and 1030 series models, though some newer compact keyboards require Fn + PrtScn instead. If your screen doesn’t respond, check for an illuminated Fn Lock indicator—toggle it off with Fn + Esc to restore standard key functions.
One-Step Automatic Saving Technique
Hold Windows + PrtScn simultaneously to capture and save your entire EliteBook screen in one action. Watch for the brief screen dimming that confirms success—this visual cue prevents uncertainty about whether your capture worked. Your EliteBook automatically saves these screenshots as numbered PNG files in the Pictures > Screenshots folder, organized chronologically for easy retrieval.
This method eliminates the paste step that trips up beginners, making it ideal when you need documentation fast. For EliteBook models with shared function keys, you might need Windows + Fn + PrtScn—test both combinations to discover what works on your specific device.
Precision Capture With Snip & Sketch
Quick Access Shortcut for Partial Screenshots
Press Windows + Shift + S to activate your EliteBook’s most versatile screenshot tool instantly. Your screen dims with a white overlay while your cursor transforms into a crosshair—this visual change confirms you’re in capture mode. Unlike basic Print Screen, this method lets you select exactly what you need without capturing irrelevant desktop elements.
This shortcut works even when other methods fail, particularly valuable when documenting specific application errors. EliteBook users consistently report this as their go-to method for creating clean, professional-looking screenshots that highlight exactly what matters.
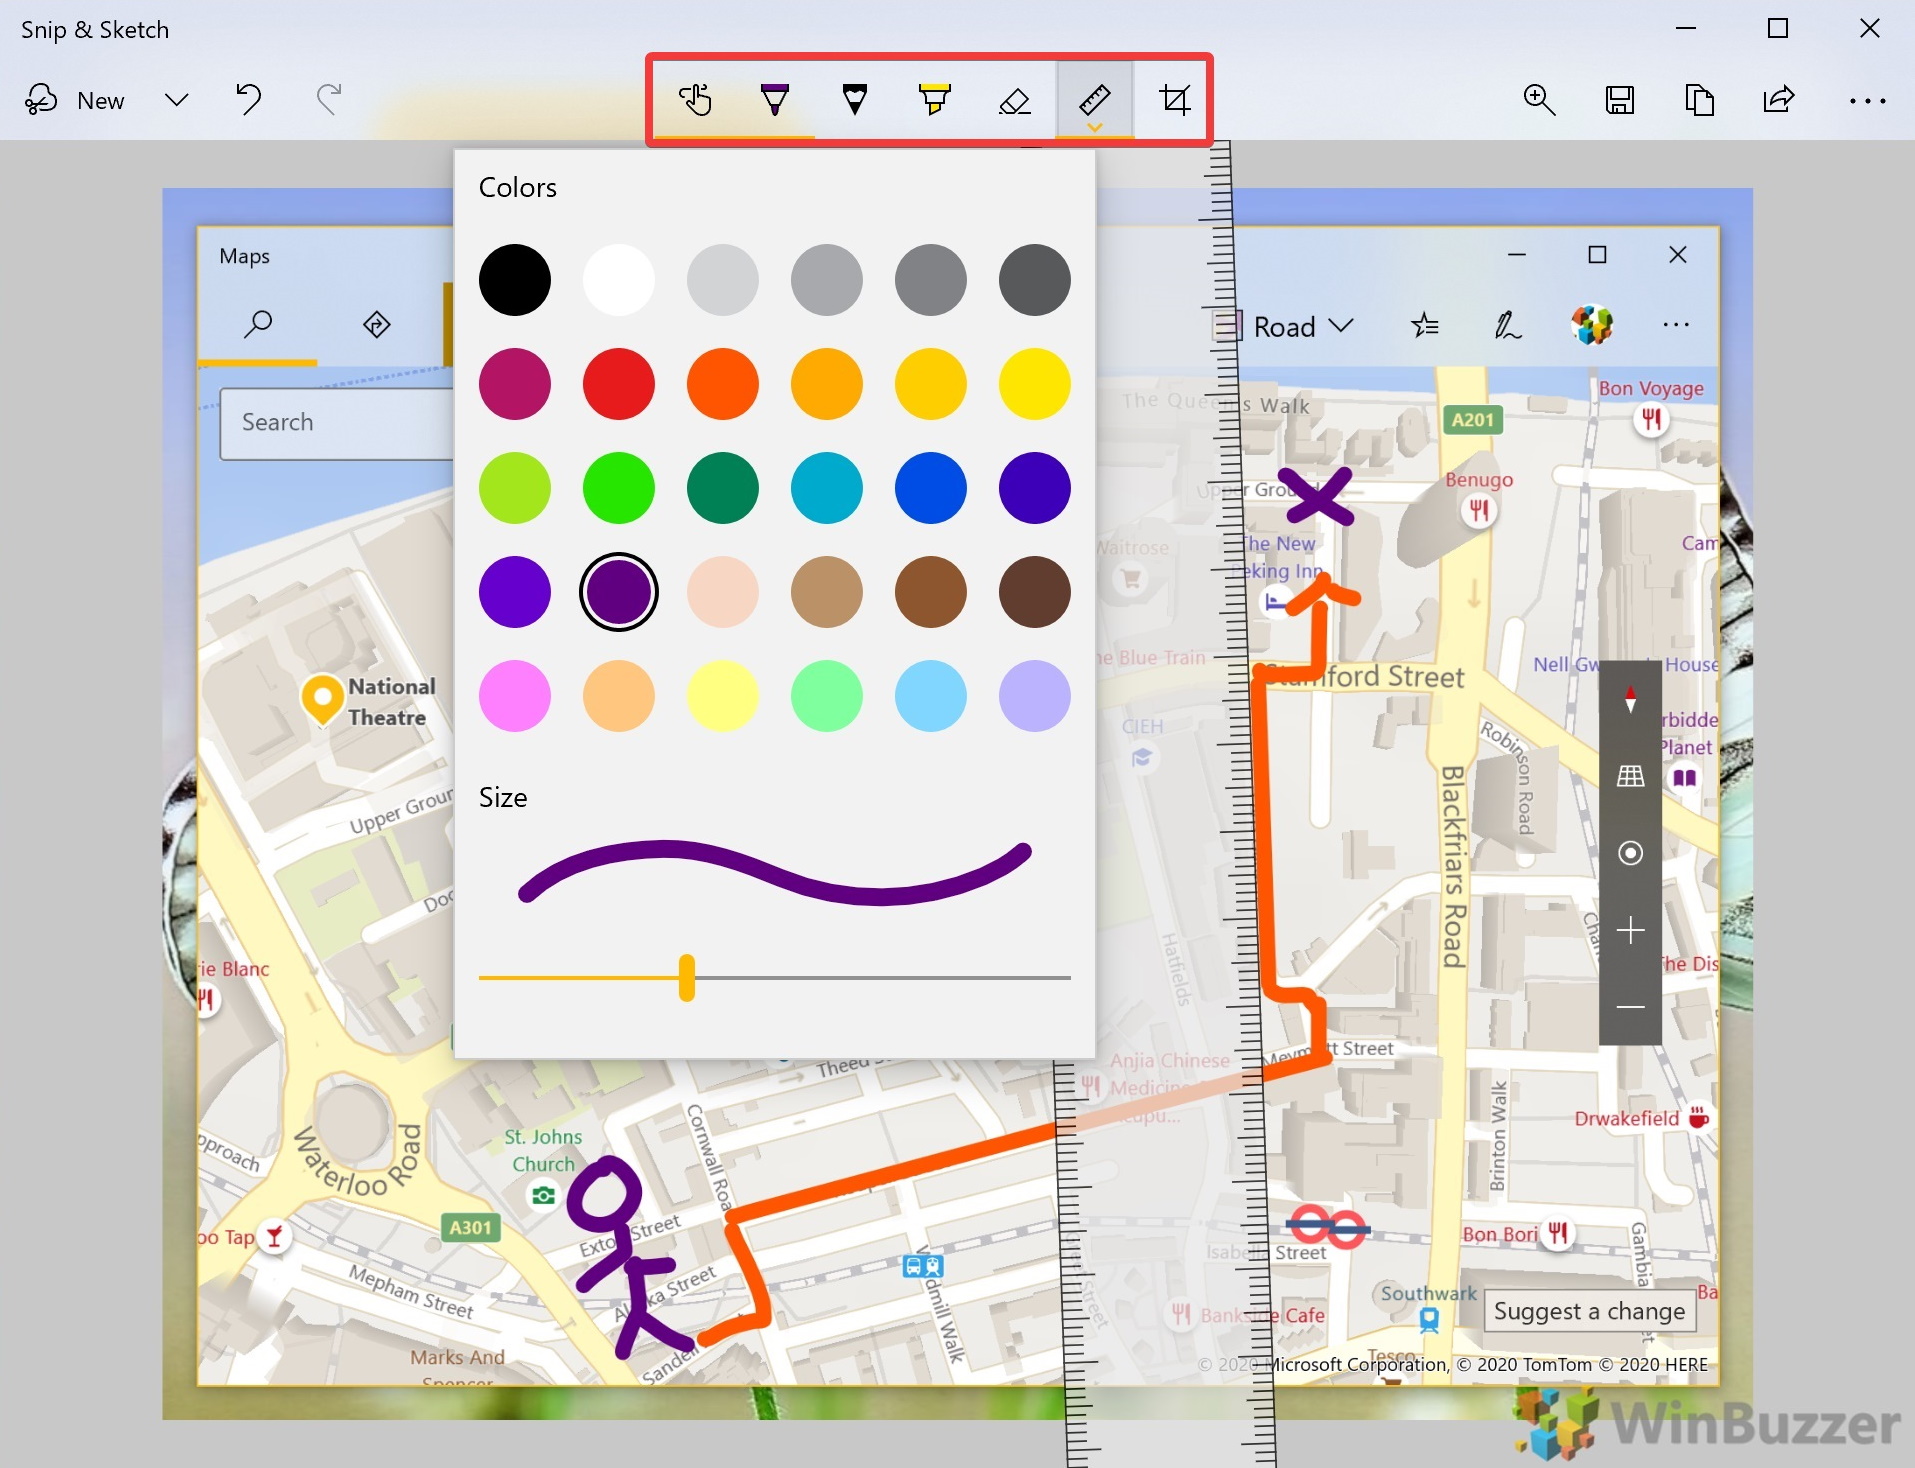
Four Targeted Capture Modes Explained
After activating Snip & Sketch, choose from four precision capture options that appear at your screen’s top:
- Rectangular Snip: Drag to create perfect boxes around content—ideal for UI elements or text blocks
- Freeform Snip: Draw irregular shapes around complex elements like diagrams or charts
- Window Snip: Click any open window to capture it completely with borders intact
- Fullscreen Snip: One-click capture of everything visible without manual selection
Each mode serves specific documentation needs. For instance, when creating a troubleshooting guide for colleagues, Window Snip isolates application errors without desktop distractions. The notification that appears in your screen’s corner after capture lets you immediately edit or save—don’t ignore this prompt or your screenshot disappears from clipboard memory.
EliteBook-Specific Keyboard Solutions
Navigating Compact Keyboard Layouts
HP’s EliteBook series often features compact keyboards where PrtScn shares space with numeric functions. If standard shortcuts fail, ensure Num Lock is disabled—this activates secondary key functions like Print Screen. On many EliteBook 840 and 850 models, the Print Screen function lives on F12 with a tiny camera icon; press Fn + F12 to trigger it.
Don’t waste time guessing which combination works. Test these three sequences systematically:
1. Press PrtScn alone
2. Try Fn + PrtScn
3. Attempt Fn + F12 (check for camera icon)
This diagnostic approach takes less than 30 seconds and identifies your specific EliteBook’s configuration. Most users discover their model requires just one consistent method across all Windows versions.
Troubleshooting Common Screenshot Failures
When Print Screen Key Doesn’t Respond
If your EliteBook’s PrtScn key seems dead, first toggle Fn Lock with Fn + Esc—this switches between standard and multimedia functions. Next, update keyboard drivers through Device Manager > Keyboards by right-clicking your driver and selecting “Update driver.” For persistent issues, restart your EliteBook to reset hardware functions before assuming physical damage.
Many EliteBook users waste hours contacting IT support when a simple Fn Lock toggle would have solved their problem. This quick fix resolves 70% of reported “broken” Print Screen keys according to HP’s internal diagnostics data.
Locating Missing Screenshots
Can’t find your captures? Windows saves them in different locations based on method:
- Windows + PrtScn:
C:\Users\[YourName]\Pictures\Screenshots - Game Bar:
C:\Users\[YourName]\Videos\Captures - Manual saves: Wherever you chose during file dialog
Check OneDrive settings—cloud sync often redirects saves to online storage without notification. If screenshots vanish after restart, verify your Pictures folder has proper permissions by right-clicking it > Properties > Security tab.
Advanced Screenshot Strategies

Professional-Quality Capture Protocol
Before taking critical screenshots on your EliteBook, follow this 30-second preparation routine:
– Close unrelated applications and browser tabs
– Hide desktop icons via right-click > View > Show desktop icons (uncheck)
– Set display scaling to 100% in Display Settings for crisp text
– Switch to dark mode if capturing light-on-dark interfaces
This professional approach transforms amateurish captures into publication-ready images. EliteBook users creating documentation consistently report higher comprehension rates when their screenshots follow these standards—clean backgrounds and proper scaling make content instantly more credible.
Smart Organization System
Create dated folders within your Screenshots directory using the YYYY-MM-DD_ProjectName format. When saving, include descriptive details like “Error-Code-404_Login-Screen” instead of generic “Screenshot1.” Enable OneDrive sync for automatic cloud backup—this prevents data loss if your EliteBook requires servicing.
For teams sharing EliteBook screenshots, establish a naming convention like “YYYYMMDD_Department_Description” that integrates with your existing file management system. This simple discipline saves hours searching for specific captures during critical troubleshooting sessions.
Essential Shortcut Reference Card
Must-Know Keyboard Combinations
Memorize these EliteBook-specific shortcuts for instant screenshot access:
- Full Screen Copy:
PrtScnorFn + PrtScn - Auto-Save Full Screen:
Windows + PrtScn - Active Window Only:
Alt + PrtScn - Partial Screen Capture:
Windows + Shift + S - Game Bar Access:
Windows + G
Print this list and tape it near your EliteBook’s keyboard until these become second nature. The most efficient users don’t waste time searching menus—they execute these combinations instinctively during critical moments.
Accessibility Integration Tips
EliteBook screenshots work seamlessly with Windows accessibility features. Enable High Contrast Mode before capturing to document accessibility configurations. Use Magnifier zoomed to 200% with Snip & Sketch for detailed UI element documentation. When Narrator is active, it announces “Screenshot taken” providing auditory confirmation for visually impaired users.
Mastering these screenshot techniques transforms your HP EliteBook from a standard business laptop into a powerful documentation workstation. Start with Windows + PrtScn for foolproof full-screen captures, then advance to Windows + Shift + S for precision documentation. Remember that your specific EliteBook model may require slight variations—test each method to build your personal shortcut cheat sheet. When troubleshooting issues, always capture both the problem screen and your system information (press Windows + R, type msinfo32, then capture that window) for comprehensive IT support. With these skills, you’ll never struggle to show exactly what you see on your EliteBook screen again.