How to Screenshot on Dell Laptop
Your Dell laptop’s screen holds crucial information—a software error message you need to report, a webinar slide with key takeaways, or a shared meme that needs forwarding. But when you hit PrtScn and nothing happens, panic sets in. How to screenshot on Dell laptop isn’t always intuitive, especially with model-specific quirks like hidden keys or OneDrive redirects. You’ll waste minutes hunting for missing files or pasting blank images into emails. This guide cuts through the confusion with exact steps for every Dell model, proven fixes for common failures, and the one folder where Windows actually saves your screenshots. Stop guessing—start capturing perfectly in under 10 seconds.
Why Your Dell’s PrtScn Key Isn’t Working (And How to Fix It)
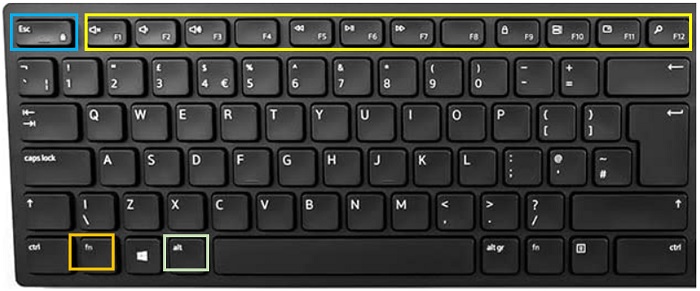
Dell’s keyboard designs vary wildly across models, causing instant frustration when standard shortcuts fail. Most Inspiron, XPS, and Latitude laptops embed PrtScn on F10 or F11, requiring Fn + PrtScn—not the key alone. Compact keyboards like the KM3322W wireless model ditch the dedicated key entirely, forcing Fn + Insert. Backlit function rows add another layer: tap Fn once to illuminate secondary icons, then press PrtScn. If you’re unsure, skip the guesswork—open On-Screen Keyboard with Win + Ctrl + O and click the virtual PrtScn button to trigger an instant capture.
Is Your Fn Lock Sabotaging Screenshots?
Many Dell laptops default to “media key” mode, disabling PrtScn without Fn. Fix this in seconds:
1. Press Fn + Esc (look for a lock icon on Esc) to toggle Fn Lock off.
2. Now PrtScn alone should work.
Pro tip: Permanently disable Fn Lock in BIOS under “Function Key Behavior” for single-key screenshots.
Wireless Keyboard Workaround for KM3322W
No PrtScn key? Use Fn + Insert as your primary shortcut. If Insert is labeled as “Ins” or missing:
– Press Fn + the key with a cursor icon (usually near Delete).
– Test with Fn + Insert, then paste (Ctrl + V) into Paint to confirm.
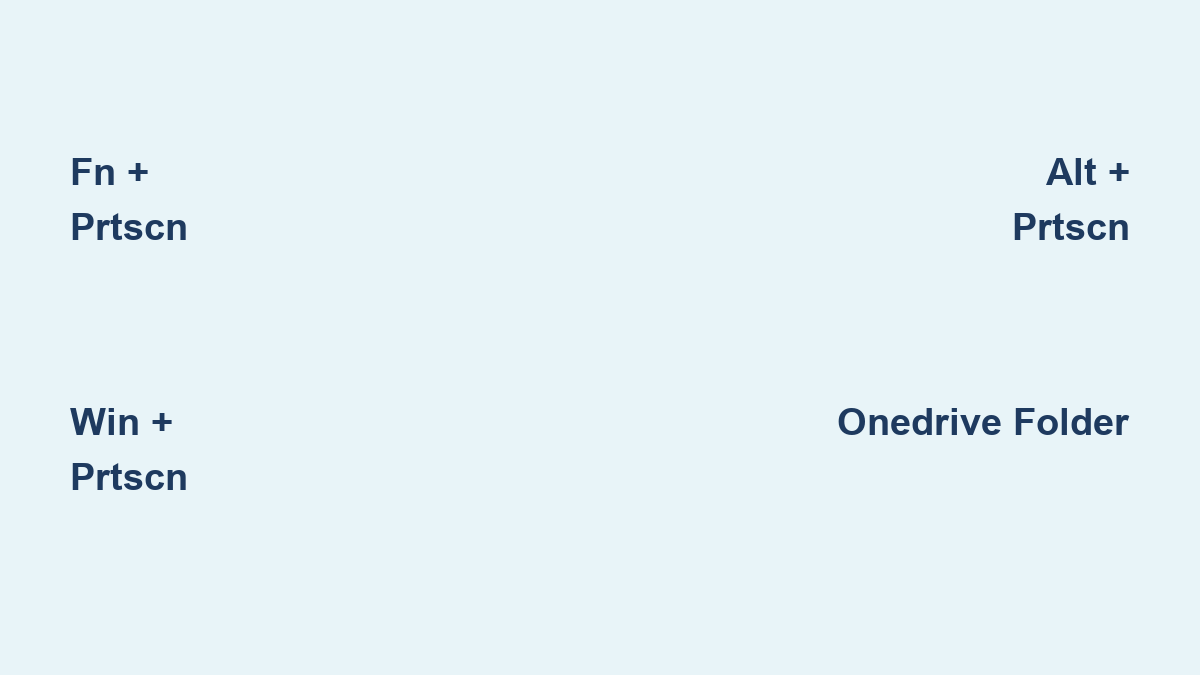
Win + PrtScn Isn’t Saving Screenshots? Solve This Now
The #1 complaint with how to screenshot on Dell laptop is silent failures—pressing Win + PrtScn with no dimming screen or saved file. OneDrive redirects your screenshots by default, hiding them in cloud storage. Here’s how to find or stop this:
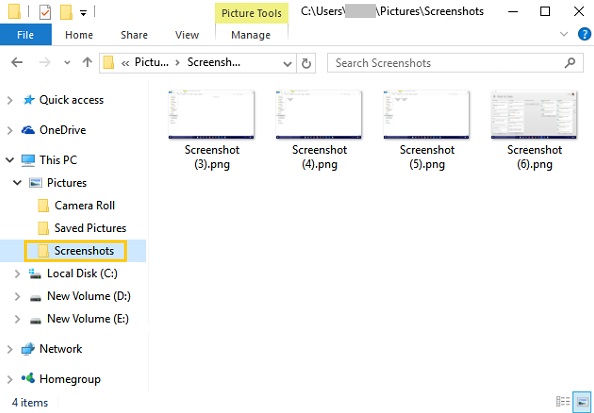
Where Your Screenshots Actually Land
| Method | True File Path | How to Access |
|---|---|---|
| Win + PrtScn | OneDrive\Pictures\Screenshots (if synced) |
Open File Explorer > OneDrive > Pictures |
| Win + Alt + PrtScn | Videos\Captures |
Type %userprofile%\Videos\Captures in Explorer |
| Chrome DevTools | Downloads folder |
Press Ctrl + J to open downloads |
Stop OneDrive hijacking: Right-click OneDrive icon > Settings > Backup > Uncheck “Automatically save screenshots here.”
Critical Clipboard Fixes When Pasting Fails
If PrtScn or Alt + PrtScn gives blank pastes:
– Enable clipboard history: Go to Settings > System > Clipboard > Toggle “Clipboard history” ON. Press Win + V to view recent captures.
– Force-refresh Snip & Sketch: Open PowerShell as admin and run:
Get-AppxPackage Microsoft.ScreenSketch | Foreach {Add-AppxPackage -DisableDevelopmentMode -Register "$($_.InstallLocation)\AppXManifest.xml"}
5-Second Screenshot Methods for Specific Needs
Capture Active Windows Without Background Clutter
Alt + PrtScn copies only the highlighted window—not your messy desktop. Ideal for:
– Sharing error messages without exposing personal files
– Grabbing a single browser tab from 20 open tabs
Paste anywhere with Ctrl + V—no editing needed.
Full-Webpage Screenshots in Chrome/Edge (No Scrolling)
Forget拼接 screenshots. For long articles or PDFs:
1. Press F12 to open DevTools.
2. Hit Ctrl + Shift + P, type “full size screenshot,” select it.
3. Entire page downloads as one seamless PNG to Downloads.
Edge users: Press Ctrl + Shift + S for built-in Web Capture with annotation tools.
Game Bar for High-Quality App Screenshots
Even outside games, Win + Alt + PrtScn captures crisp PNGs of any app:
– Files save to Videos\Captures with timestamps (e.g., Screenshot 2024-06-15 14-30-22.png).
– Enable first: Settings > Gaming > Captures > Toggle “Record desktop apps” ON.
Third-Party Tools That Beat Windows Built-Ins

| Tool | Best For | Dell-Specific Setup |
|---|---|---|
| Greenshot | Redacting sensitive data | Set hotkey to PrtScn; auto-blur credit cards with “Obfuscate” tool |
| ShareX | Scrolling screenshots | Press Ctrl + PrtSc > “Capture scrollable area” for full webpages |
| Lightshot | Instant sharing | Installs via Chrome Store; press PrtScn, draw region, hit Ctrl + C for cloud link |
Why use these on Dell? They bypass Fn key conflicts and save directly to your desktop—no hunting through hidden folders.
Emergency Fixes for Critical Failures
“PrtScn Does Absolutely Nothing” – Hardware Check
- Test keyboard functionality: Open Notepad, hold Fn, press F10/F11. If letters appear (e.g., “P”), your PrtScn key is working.
- Reset keyboard drivers:
– Press Win + X > Device Manager > Keyboards.
– Right-click your Dell keyboard > “Uninstall device” > Restart laptop. - Try external keyboard: Plug in any USB keyboard—PrtScn often works immediately.
Tablet Mode on XPS 2-in-1s: Volume Down + Power Trick
When your Dell flips into tablet mode, standard shortcuts vanish. Hold Volume Down + Power Button for 2 seconds—identical to Android tablets—to capture the full screen as a PNG.
Pro Checklist Before Sending Screenshots
- Redact before sharing: Use Greenshot’s “Obfuscate” tool to blur passwords (never use MS Paint’s blur—it’s reversible).
- Crop aggressively: Trim whitespace with Snip & Sketch’s Ctrl + Shift + X (reduces file size by 70%).
- Format wisely:
- PNG for UI/text (sharp edges, larger file)
- JPEG for photos (smaller file, slight blur)
- Annotate for clarity: Add numbered arrows in Snip & Sketch (Win + Shift + S > “Pen”) to highlight steps.
Mastering how to screenshot on Dell laptop means knowing where your files hide and which shortcut matches your need. Stop wrestling with missing PrtScn keys—use Fn + Insert on wireless keyboards, disable OneDrive redirects, and leverage Win + Shift + S for instant annotations. For critical errors, Alt + PrtScn captures clean window shots in one click. Bookmark this guide, and you’ll never waste time hunting for screenshots again. When in doubt, press Win + Ctrl + O to open On-Screen Keyboard—it reveals exactly which keys work on your specific Dell model.