How to Wipe Your Laptop Clean: Full Reset Guide
You’re about to sell your laptop, donate it, or simply want a fresh start—but how do you ensure every trace of your personal data disappears for good? Simply deleting files isn’t enough; when you need to remove everything from your laptop, you require a complete system reset that permanently erases all personal information. This process reinstalls Windows while destroying every document, photo, application, and setting you’ve ever stored on the device. Whether you’re protecting sensitive financial records or just clearing space for a new owner, understanding how to remove everything from your laptop properly is non-negotiable in today’s privacy-conscious world.
Many users mistakenly believe emptying the Recycle Bin or formatting their drive is sufficient, but specialized recovery software can often retrieve “deleted” files. True data security requires a comprehensive reset that overwrites your information at the deepest level. In this guide, you’ll learn the exact steps to completely wipe your Windows 10 or 11 laptop, ensuring no personal information remains—whether you’re preparing for sale, donation, or simply craving that pristine factory-fresh experience.
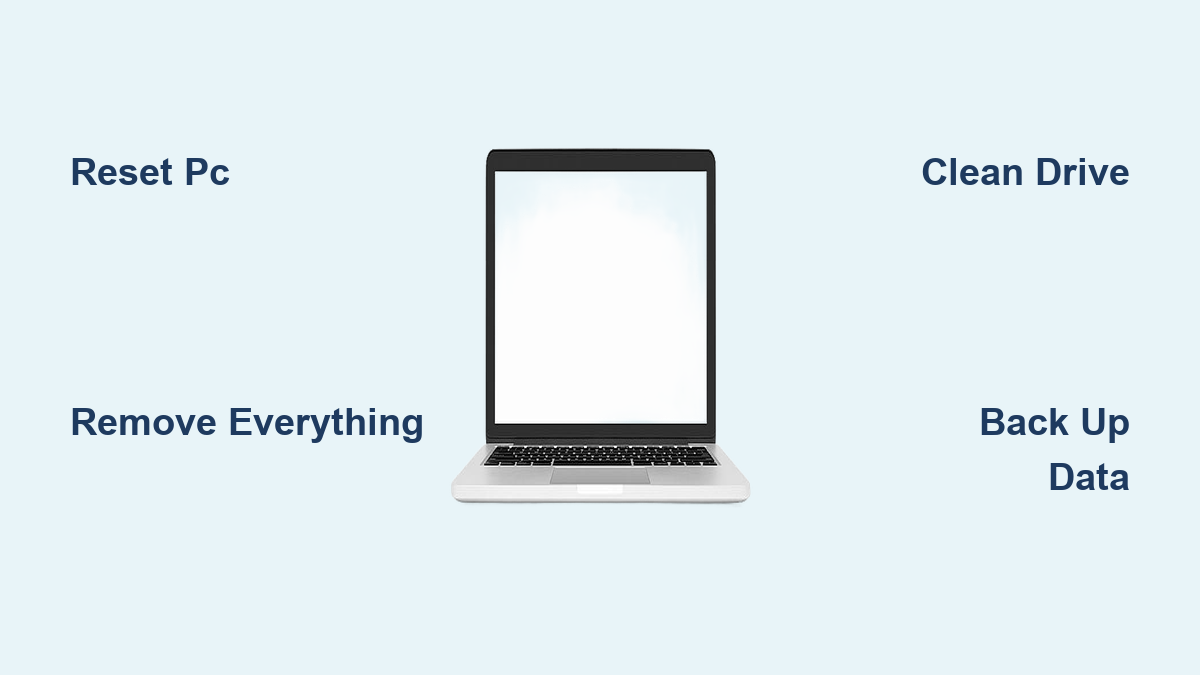
Windows Reset Options That Actually Remove Everything

Remove Everything vs Keep My Files: What’s the Difference?
Choosing the wrong reset option could leave your sensitive data vulnerable. When you select Remove everything, Windows performs a nuclear reset that reinstalls the operating system while permanently deleting all personal files, applications, browser history, and system settings. This is your only safe choice when selling, donating, or recycling your laptop.
The Keep my files option preserves documents, photos, and videos but still deletes applications and settings. Many users mistakenly think this keeps everything intact, but it actually removes all installed programs and personal configurations—making it unsuitable when your goal is to remove everything from your laptop for a new owner.
Secure Data Cleaning: Beyond Simple Deletion
The critical difference between basic deletion and true data security lies in the Clean data option. When enabled during reset, this feature performs multiple overwrites of your drive, rendering data recovery virtually impossible. Standard deletion merely marks storage space as available—recovery software can often reconstruct these “deleted” files.
While this built-in security measure is sufficient for most personal and business data, it doesn’t meet military-grade erasure standards for classified information. For everyday users looking to remove everything from their laptop before selling it, however, this level of security provides complete peace of mind.
Pre-Reset Preparation: Don’t Skip These Critical Steps
Back Up What You’ll Need Later
Before you begin to remove everything from your laptop, complete these essential backup tasks:
- Export browser data: Save bookmarks, passwords, and history to a USB drive
- Document software licenses: Note product keys for Microsoft Office, Adobe Creative Suite, and other paid applications
- Deauthorize streaming services: Sign out of Netflix, Spotify, and other subscription platforms
- Verify critical files: Double-check Documents, Pictures, and Downloads folders for overlooked items
Never skip this step: Even if you’re certain you want everything gone, a quick verification prevents costly regrets when your irreplaceable family photos vanish forever.
Power and Connection Setup
Connect your laptop to a reliable power source before starting the reset process. The complete removal of everything from your laptop can take 2-4 hours, and battery depletion during this critical operation could corrupt your system. Don’t risk creating an unusable device by skipping this simple precaution.
For optimal results, choose your internet approach wisely: Use Cloud download for the freshest Windows version (requires stable connection), or select Local reinstall if your internet is slow or unreliable. Planning this detail upfront prevents mid-process frustration.
Step-by-Step Guide to Remove Everything from Your Laptop
Method 1: Reset from Windows Settings (For Functional Laptops)
This approach works when your laptop still boots normally:
- Press
Windows key + Ito open Settings - Navigate to System → Recovery (Windows 11) or Update & Security → Recovery (Windows 10)
- Click Reset PC under “Reset this PC”
- Select Remove everything—never choose “Keep my files” if your goal is complete data removal
- Choose Remove files and clean the drive for maximum security
- Select Cloud download for latest updates or Local reinstall for faster process
- Click Reset to begin the complete wiping process
Critical warning: Once you confirm the reset, there’s no going back—your data will be permanently gone within minutes.
Method 2: Reset from Recovery Environment (For Non-Booting Laptops)
When Windows won’t start normally, use this alternative method:
- Hold
Shiftwhile clicking Restart from the login screen - Once in Windows Recovery Environment, select Troubleshoot → Reset this PC
- Choose Remove everything and Fully clean the drive
- If prompted, enter your BitLocker recovery key (find it at aka.ms/myrecoverykey)
- Select your installation source and confirm the reset
Pro tip: If you don’t have your BitLocker key, the reset cannot proceed. Check your Microsoft account, printed documentation, or USB drive where you may have saved it.
What Happens During the Complete Reset Process
:max_bytes(150000):strip_icc()/reset-this-pc-windows-10-process-8-percent-56a6fad83df78cf772913fcb.png)
Understanding the Visual Indicators
Don’t panic when your laptop behaves unexpectedly during the reset to remove everything from your laptop. It’s normal for the screen to stay black for 10-15 minutes, for progress percentages to disappear, and for the device to restart automatically 2-4 times. The fan may run loudly during intensive operations—that’s the system working hard to overwrite your data.
Time estimates vary significantly: A local reinstall with quick format takes 30-60 minutes, while a cloud download with clean data can require 2-4 hours. Older laptops with traditional hard drives add roughly 50% more time to these estimates.
Critical Don’ts During Reset
Never:
– Force restart or power off your laptop
– Close the lid or put it to sleep
– Disconnect the power cable
– Remove any connected devices
– Press random keys when the screen seems frozen
Interrupting the process can create an unbootable system requiring professional recovery services—defeating the entire purpose of trying to remove everything from your laptop properly.
Final Verification: Confirming Complete Data Removal
Post-Reset Checklist
After Windows completes setup, verify your data is truly gone:
- Open File Explorer and check Documents, Pictures, and Downloads folders—they should be empty
- Go to Settings → Apps → Installed apps to confirm only Windows defaults remain
- Test basic functionality with built-in apps like Photos and Calculator
Red flag alert: If you see any previous user data or applications, the reset failed—you must repeat the process before handing over your laptop.
Preparing for the New Owner
When selling or donating, leave the laptop ready for its next user:
- Create a basic local account named “NewOwner”
- Ensure Windows activation completes successfully (digital license transfers with hardware)
- Include the original charger and any documentation
- Remove all personal stickers or markings
Windows 10 End-of-Life: Critical Consideration Before Resetting
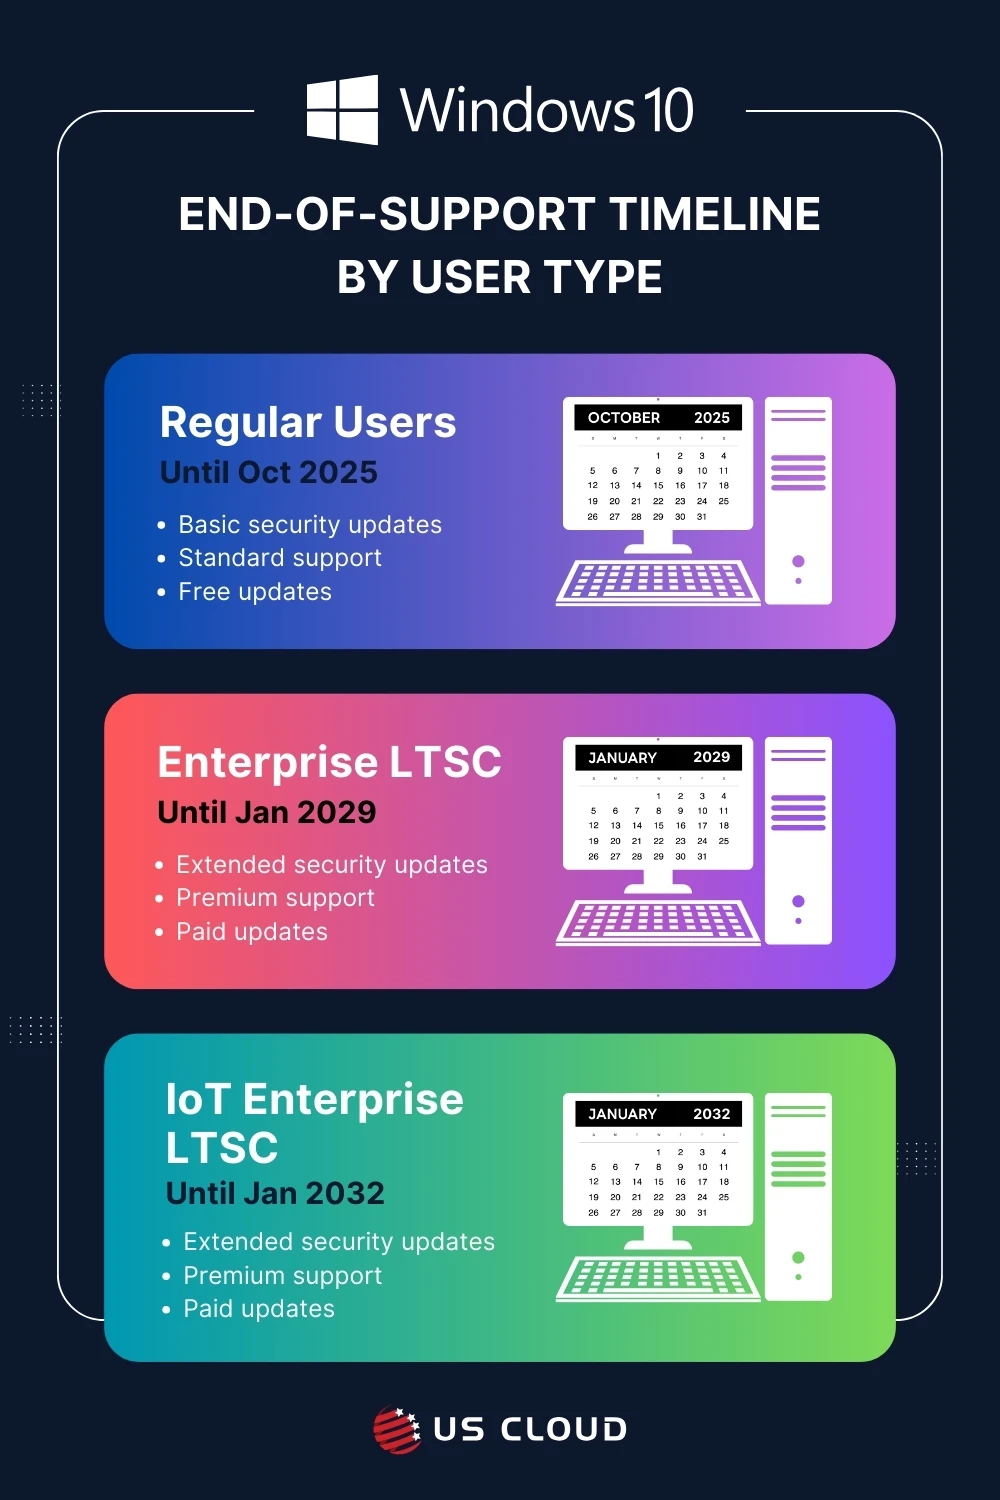
Microsoft will end support for Windows 10 on October 14, 2025. After this date, your laptop will receive no security updates, making it increasingly vulnerable to threats. If your device supports Windows 11, consider upgrading instead of resetting Windows 10—check compatibility at aka.ms/Windows11Upgrade.
Resetting an unsupported operating system creates security risks for the new owner. If Windows 11 compatibility isn’t possible, ensure the buyer understands they’re receiving a device without future security updates.
Completely removing everything from your laptop isn’t just about clicking a button—it’s about understanding the right options, preparing thoroughly, and verifying the results. By following these steps precisely, you’ll ensure your personal data stays protected while giving your device a clean slate for its next chapter. Whether you’re selling for cash, donating to charity, or starting fresh yourself, this complete reset process guarantees your digital footprint disappears for good, leaving nothing behind but a pristine, ready-to-use machine.