How to Use Ducky Keyboard: Quick Guide
Your new Ducky keyboard isn’t just another peripheral—it’s a precision instrument waiting to transform your typing experience. That first rainbow wave lighting sequence when you power it on? That’s your invitation to dive deeper. Whether you’re a gamer chasing millisecond advantages or a coder seeking ergonomic perfection, mastering how to use Ducky keyboard unlocks capabilities most users never discover. In the next few minutes, you’ll move from unboxing to expert-level customization—no prior mechanical keyboard knowledge required.
Unlike basic keyboards that sit idle on your desk, Duckys reward exploration. The keycap puller and switch puller in the box aren’t afterthoughts—they’re your first tools for personalization. And that satisfying clack when you press a key? That’s the sound of Cherry MX or Gateron switches ready to serve you for 50+ million keystrokes. Let’s turn this premium hardware into your ultimate productivity engine.
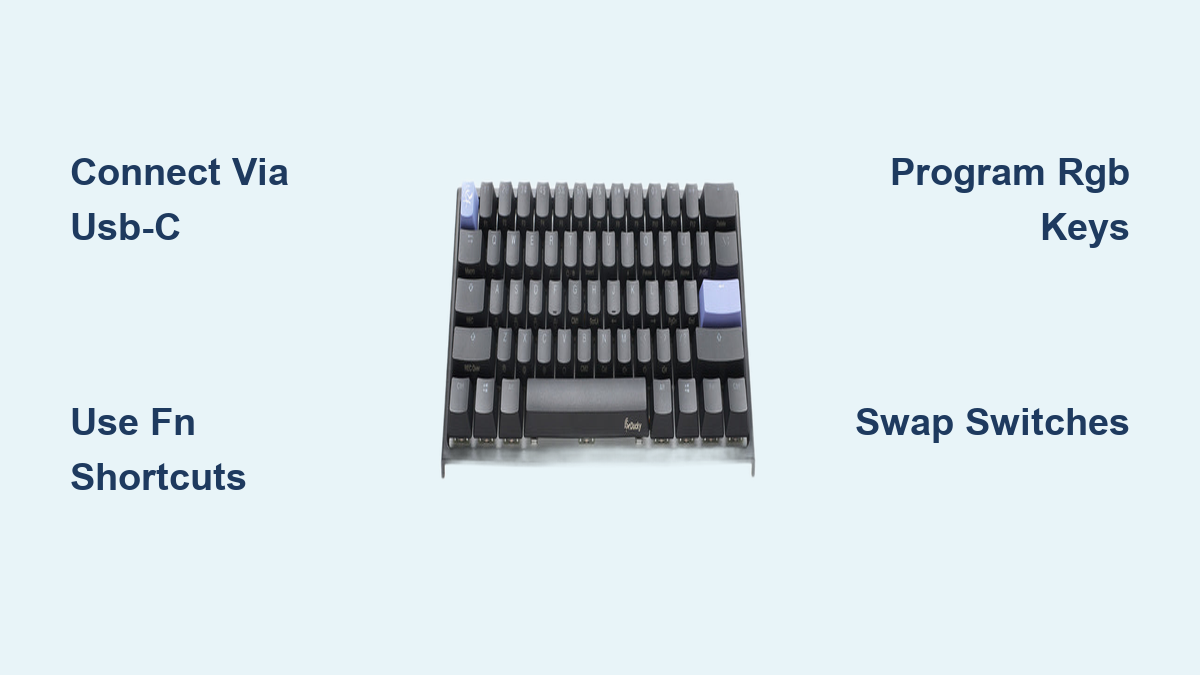
Connect Your Ducky Without Frustration
Skip the “why isn’t it lighting up?” panic by nailing the initial setup. Your Ducky’s USB-C port hides discreetly on the rear underside, flanked by three cable exit channels. Route the cable left, center, or right based on your desk layout—no more messy tangles. When plugged in, expect a 3-second rainbow wave across all keys before default white lighting activates. If darkness persists, try a different USB port; Duckys demand 500mA minimum power (most phone chargers fail this).
Wireless Pairing Done Right
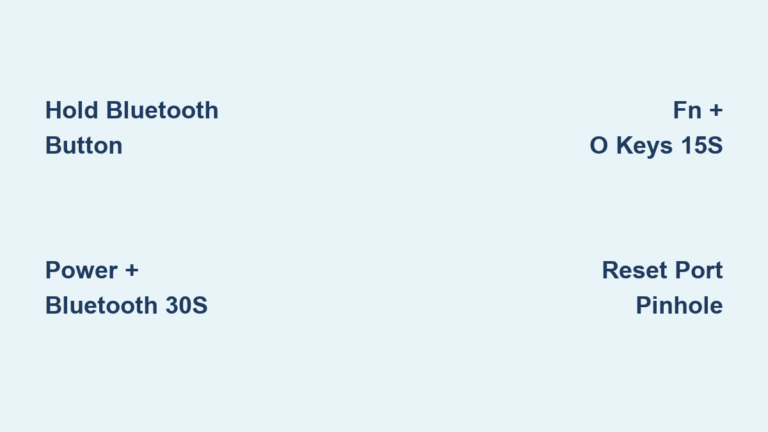
For wireless models (like the Shine 7), flip the power switch under the keyboard to ON, then hold Fn+Z for 3 seconds. Rapid LED flashes mean pairing mode is active. On your device, select “Ducky Keyboard” from Bluetooth settings. Prefer zero-latency dongle mode? Slide open the magnetic compartment underneath, insert the 2.4GHz receiver, then press Fn+X for 3 seconds. Pro tip: Wireless models support four device pairings—use Fn+Z+2 for your second device, Fn+Z+3 for the third.
Master Ducky’s Secret Key Layers
Ducky keyboards operate on a layered system where Fn is your gateway to advanced control. Forget static function keys—here, Fn+F1-F12 transforms your entire experience. Press Fn+F1 to cycle through 10 lighting modes (wave, rain, radar), or Fn+F2 to adjust animation speed from meditative slow to competitive-fast. For true customization, Fn+F5/F6 shifts hues in 15-degree increments while Fn+F7/F8 tweaks saturation.
Critical Gaming Shortcuts
Fn+Windows disables the Windows key mid-battle—no more accidental desktop exits during clutch moments. Competitive players live by Fn+Space to activate 8x repeat rate for rapid-fire key response and Fn+Q to lock polling rate at 1000Hz. Programmers, hit Fn+Esc to toggle function key lock for instant F1-F12 access during coding sessions. These hardware-level adjustments work instantly without software bloat.
Program Per-Key RGB Like a Pro
Ducky’s RGB isn’t decorative—it’s functional. Enter per-key programming with Fn+F12. When a key glows white, use arrow keys to navigate 16.8 million colors, then press Enter to confirm. Save your masterpiece with Fn+F10—it’s stored directly on the keyboard, surviving PC reboots and OS changes.
Game-Specific Lighting Hacks
Activate Fn+Alt+R for reactive lighting: keys illuminate on press and fade over 100ms-5s (adjust via software). For real edge, install Ducky RGB Sync Utility to visualize audio through your keys. But the killer feature? Game integration:
– CS2/Valorant: Health/ammo indicators through key colors
– League of Legends: Summoner spell cooldown timers
– Fortnite: Build material status via WASD cluster
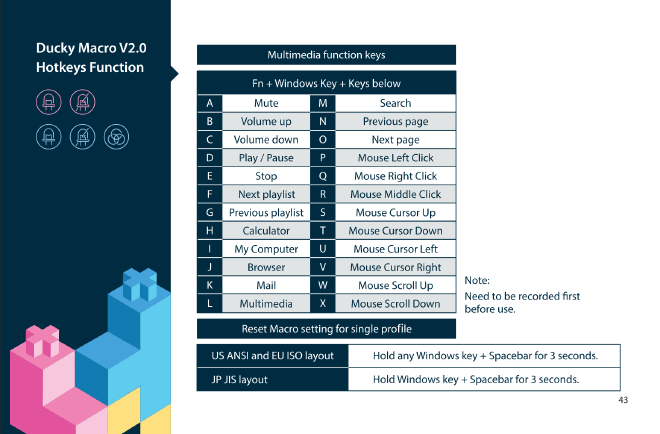
Build Hardware Macros That Actually Work
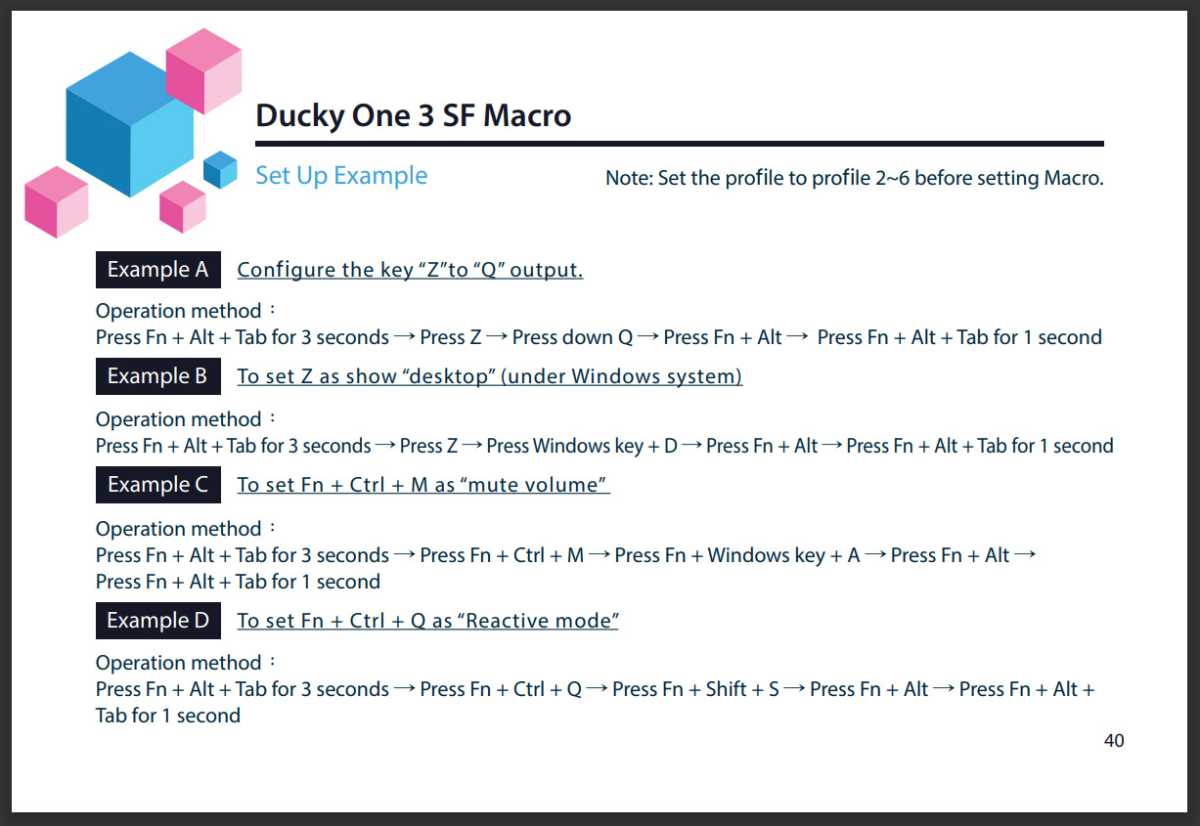
Ducky’s macro system runs entirely on the keyboard—no background software draining resources. Start recording with Fn+Ctrl+Tab (LED flashes red 3x), press your target key (F1-F12), type your sequence, then stop with Fn+Ctrl+Tab (green flash confirms). Standard models handle 32 keystrokes; premium versions support 128.
Advanced Macro Tricks
- Precision timing: Press Fn+Space mid-recording for 50ms delays between keystrokes
- Mouse integration: Add Fn+M for left/right/middle clicks within macros
- Looping macros: Hold Fn+Alt while selecting your macro key for continuous execution
- Macro chaining: Nest macros up to 5 levels deep for complex workflows
Swap Switches and Keycaps in Minutes
Hot-swap compatible models (One 3 series, Shine 7 variants) let you change switches without soldering. Use the included puller to remove a switch with a straight upward motion. Align new MX-style pins (Cherry, Gateron, Kailh) with PCB sockets and press firmly until it clicks. Test before adding keycaps—bent pins cause ghosting.
Keycap Installation Made Foolproof
Position the wire puller over a keycap and lift straight up (wiggle gently for spacebar/shift). When installing new keycaps:
1. Align stems precisely with switch housings
2. Press down firmly until you feel full seating
3. For stabilized keys, ensure wire clips click into place
4. Test travel distance—wobbly keys indicate improper installation
Avoid hot water when cleaning keycaps; warm soapy water preserves dye integrity.
Fix Common Issues Before They Escalate
Monthly maintenance prevents 90% of problems. Use compressed air weekly between keys, and a soft brush for switch housings. For deep cleaning:
– Remove all keycaps
– Soak in warm soapy water (max 30°C)
– Scrub stubborn grime with keycap cleaning solution
– Dry completely before reassembly
Instant Troubleshooting Fixes
Dead key? Remove keycap and check for debris under the switch. Test with a multimeter—if no continuity, replace the switch (hot-swap models only).
RGB malfunction? Reset with Fn+F11. If lights remain dead, verify USB port power output (500mA minimum).
Macro failure? Clear conflicts with Fn+Ctrl+Delete+[key]. Full macro storage? Use software to manage slots.
Optimize for Your Specific Workflow
Gamers should activate the full performance suite:
– Fn+Windows: Disable Windows key
– Fn+Space: 8x repeat rate
– Fn+Q: 1000Hz polling rate
– Fn+Alt+G: N-key rollover anti-ghosting
Programmers, dim RGB to static colors to reduce eye strain during long sessions. Program bracket pairs ({} []) as macros and set Fn+Esc for instant F-key access. For multi-device users, switch between four paired devices with Fn+1-4—each maintains independent lighting and macros.
Update Firmware Without Bricking Your Keyboard
Firmware updates unlock new features but require caution. Download the latest version from Ducky’s support site, connect via USB (disable wireless), close all software, then run the updater as administrator. During the 3-5 minute process:
– LEDs will pulse red: Firmware loading
– LEDs turn solid green: Update complete
– NEVER disconnect until LEDs stabilize
This process fixes critical issues like macro corruption and RGB sync errors.
Your Ducky keyboard is now fully weaponized. From the first rainbow wave at setup to per-key RGB programming and hardware macros, you’ve transformed it from a shiny object into a precision tool. Remember: the real power lies in consistent refinement. Tweak one setting weekly—adjust actuation points, program a new macro, test a switch swap. In six months, you’ll have a keyboard uniquely calibrated to your hands, your workflows, and your ambitions. The journey from standard user to power typist starts with the next key you press.