How to Use a Direct Box for Keyboard
When connecting your keyboard to a sound system, you might encounter frustrating issues like humming noises, weak signals, or distorted audio that undermine your performance. Many musicians don’t realize that a direct injection (DI) box could be the solution to these common problems, transforming your keyboard’s sound from amateur to professional quality. Understanding how to properly use a DI box with your keyboard ensures clean signal transmission whether you’re performing live or recording in the studio.
Connecting audio equipment correctly matters more than most keyboard players realize—improper setups can introduce noise, degrade your tone, or even damage equipment. This guide explains the practical steps to effectively integrate a DI box into your keyboard signal chain, helping you achieve optimal sound quality in any performance or recording situation.
Why Keyboards Benefit from DI Boxes
Keyboards typically output line-level signals that can cause problems when connected directly to mixing consoles, especially over longer cable runs. A DI box solves these issues by converting your keyboard’s unbalanced signal into a balanced signal that travels cleanly to the mixer without picking up interference.
Using a DI box provides several critical advantages for keyboard players. It eliminates noise during long cable runs that would otherwise introduce hum into your signal. The device properly matches impedance between your keyboard and the sound system, preventing signal degradation that affects your tone quality. Additionally, DI boxes isolate grounds to stop electrical hum and buzz caused by ground loops between different pieces of equipment.
Most keyboard outputs use 1/4-inch connections that become problematic when running more than short distances to a mixing board. The DI box serves as the essential bridge between your keyboard and professional audio systems, ensuring your instrument’s true sound reaches the audience without compromise.
Selecting the Right DI Box for Your Keyboard

Active vs Passive DI Box Options
Passive DI boxes work effectively for most modern keyboards because they don’t require external power and handle standard output levels without distortion. These are particularly suitable when using digital keyboards with typical output levels, when phantom power isn’t available at your venue, or when working with budget constraints.
Active DI boxes contain built-in preamplifiers that boost weaker signals, making them the better choice when using vintage keyboards with lower output levels, running extremely long cable distances, or needing additional control over your signal’s gain staging. The extra power requirement is a small trade-off for the improved signal quality in these specific situations.
Essential DI Box Controls for Keyboard Players
The ground lift switch is crucial for eliminating hum caused by ground loops between your keyboard and the PA system. When setting up, start with the ground lift engaged and only switch to the grounded position if you hear buzzing, as this often resolves most common noise issues.
Pad or attenuation controls reduce overly strong keyboard signals that might overload your mixer. Most digital keyboards work well with a -20dB setting, while vintage synthesizers with line-level outputs may require the stronger -40dB attenuation to prevent distortion.
The thru or bypass output sends your unprocessed signal to a stage amplifier while the DI output feeds the main PA system. This feature is essential for maintaining your stage monitoring setup while sending a clean signal to the front-of-house mixer.
Connecting Your Keyboard to a DI Box: Step-by-Step
Basic Mono Keyboard Setup
Begin by powering down both your keyboard and the sound system to prevent electrical spikes. Connect a standard 1/4-inch instrument cable from your keyboard’s main output to the DI box input. Set the pad switch to -20dB for most digital keyboards or -40dB if you’re using vintage equipment with line-level outputs.
Engage the ground lift switch to help prevent hum in the initial setup. Connect an XLR cable from the DI box output to your mixer’s channel input. Before your performance, test the signal at low volume to ensure proper functionality before bringing levels up to performance volume.
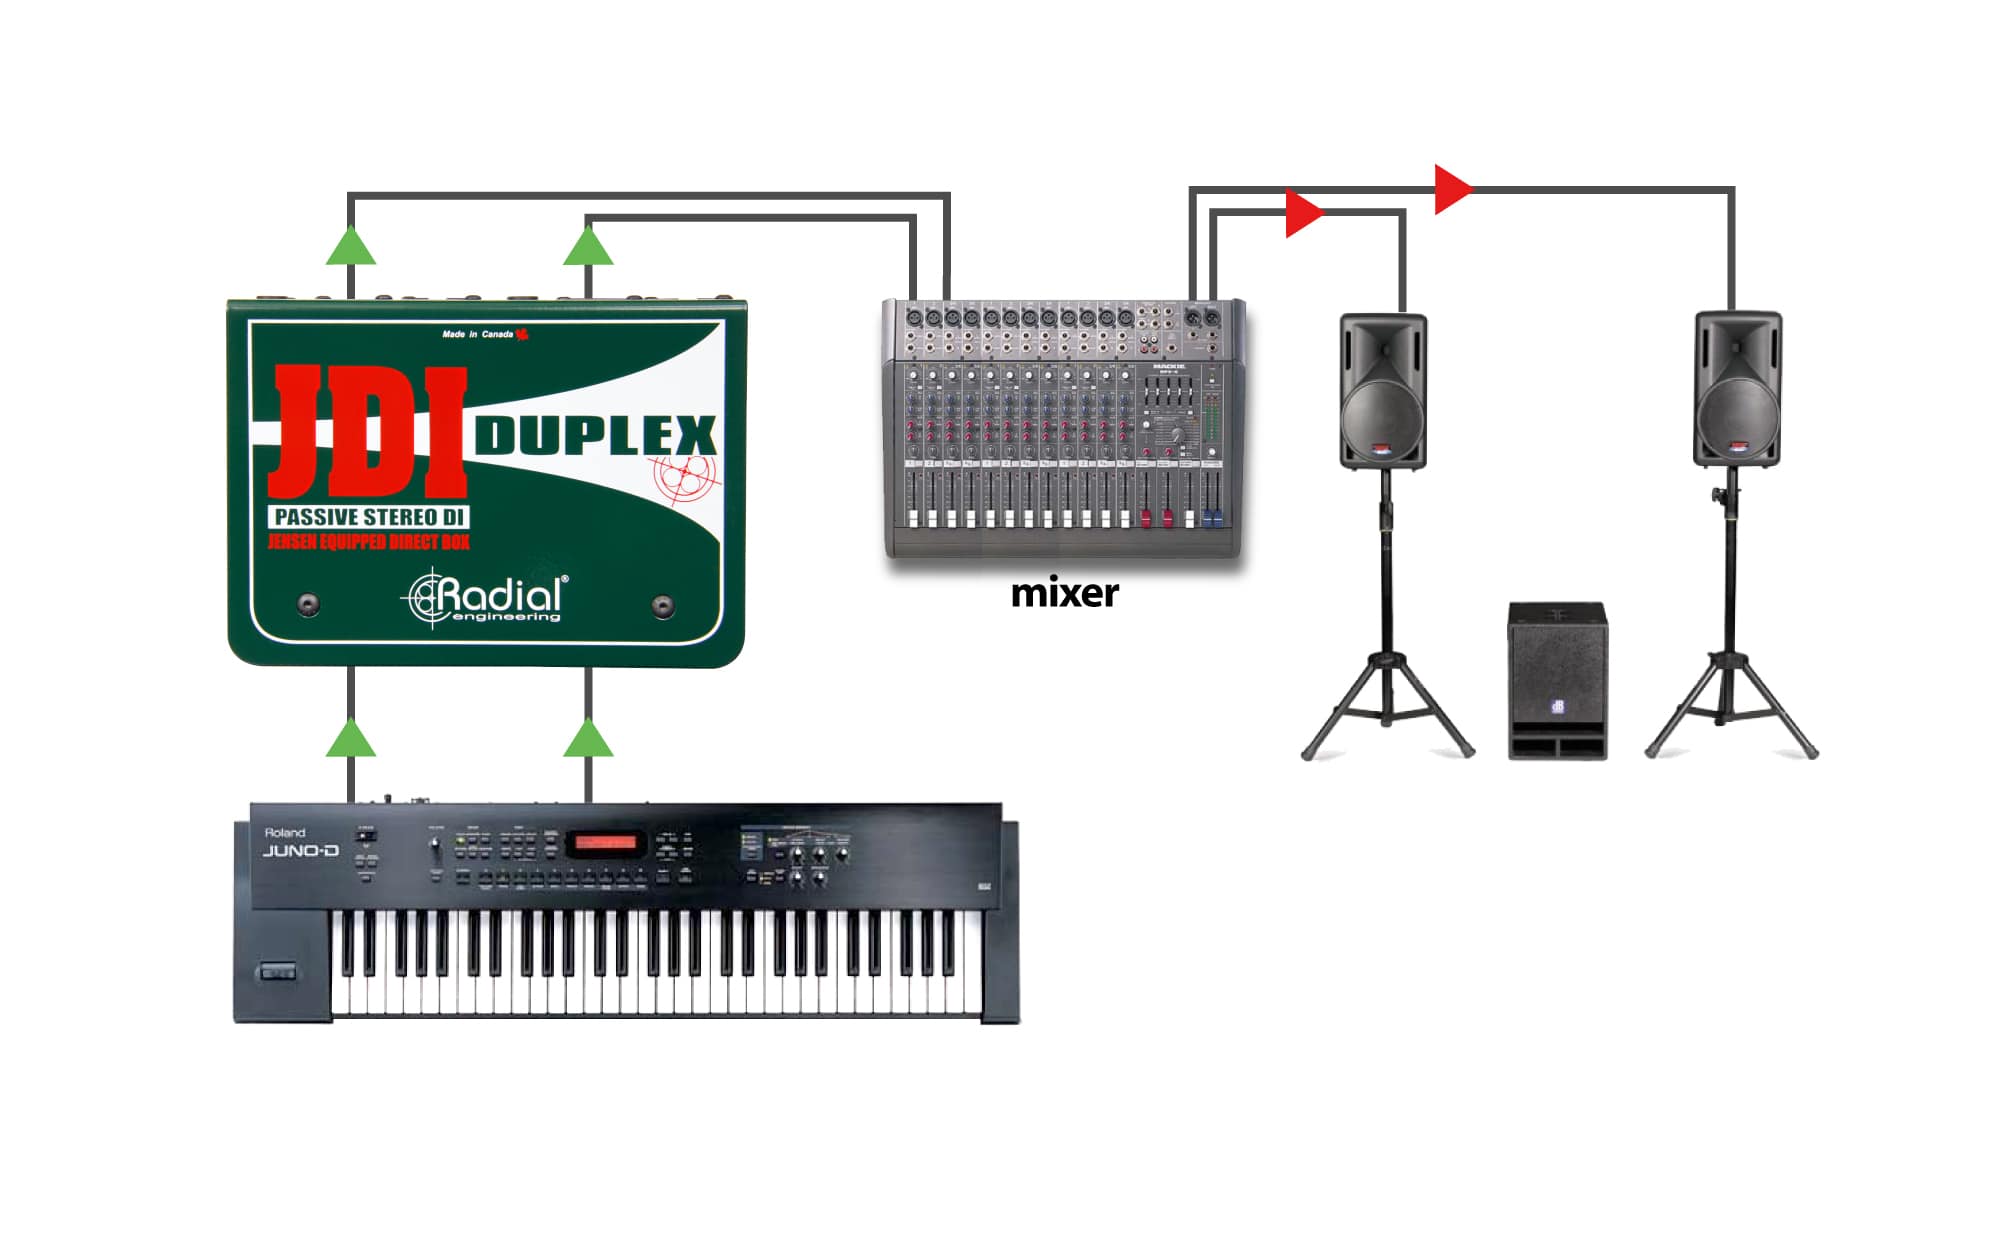
Stereo Keyboard Configuration
For keyboards with separate left and right outputs, use two DI boxes—one for each channel. Connect the left output to the first DI box, which then feeds mixer channel one. Similarly, connect the right output to the second DI box, feeding mixer channel two. In the mixer, pan these channels hard left and right to maintain proper stereo imaging.
Ensure both DI boxes have identical pad settings to maintain consistent signal levels between channels. As a practical tip, label your DI boxes “L” and “R” with tape during setup to avoid channel confusion when connecting multiple pieces of equipment quickly before a show.
Optimizing Your Keyboard Signal for Live Performance
Effective Sound Check Procedure
Follow this efficient 5-minute process to achieve optimal levels: Set your keyboard’s master volume to approximately 75% of maximum. Engage the -20dB pad setting on your DI box. Adjust the mixer gain control until signal peaks register around -12dB on the mixer’s meters. Fine-tune your keyboard’s volume control to achieve your desired tone without compromising signal integrity.
Stage Placement Considerations
Position your DI box within six feet of your keyboard to minimize the length of unbalanced cable running from your instrument. Use balanced XLR cables for the connection from the DI box to the mixer, as this configuration provides maximum noise rejection over distance.
Avoid common stage mistakes such as running unbalanced cables longer than 25 feet, placing DI boxes near power amplifiers or lighting dimmers that generate electrical interference, or connecting your keyboard and PA system to the same electrical circuit, which can create ground loop issues.
Troubleshooting Common Keyboard DI Box Problems
Resolving Hum and Buzz Issues
When encountering hum or buzz, follow this quick diagnostic process: First, unplug your keyboard—if the hum persists, the issue lies with the DI box or cables rather than your instrument. Toggle the ground lift switch, as this resolves approximately 80% of common hum problems. Try connecting to a different electrical outlet to separate your keyboard and PA system onto different circuits. Finally, check your cable integrity by testing with known-good cables.
Addressing Weak or Distorted Signals
If your signal seems too weak, verify that your keyboard’s master volume is set above 50%, consider trying an active DI box for additional gain if using a passive model, and check whether a pad switch is accidentally engaged when not needed.
For distorted signals, engage the appropriate pad switch (-20dB or -40dB), reduce your keyboard’s master volume, and verify that your mixer input isn’t mistakenly set to mic level rather than line level, which would overload the input.
Equipment Recommendations for Keyboard Players

Budget-Friendly DI Boxes ($50-100)
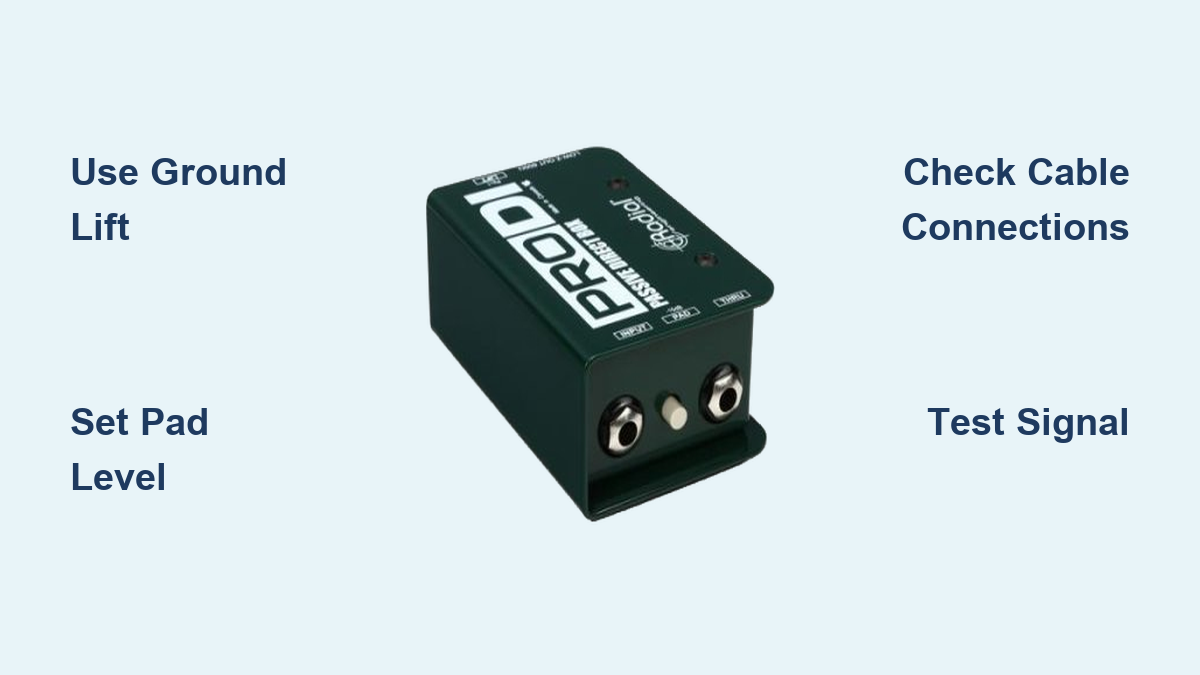
The Radial ProDI offers a durable passive solution that works exceptionally well with digital keyboards. The Whirlwind IMP 2 provides simple, reliable performance and makes an excellent first DI box for keyboardists. The Behringer DI400P delivers an active option with multiple pad settings at an accessible price point.
Professional-Grade Options ($100-300)
The Radial J48 active DI box provides exceptional headroom that’s ideal for vintage synthesizers. The Countryman Type 85 has become an industry standard for studio keyboard work. The Rupert Neve RNDI delivers premium transformer quality for ultimate signal clarity when budget allows.
Essential Maintenance Practices
Wrap your cables using the over-under method to prevent twisting and extend their lifespan. Store DI boxes in padded cases to protect sensitive switches and internal components from impact damage during transport.
Perform monthly maintenance by cleaning 1/4-inch and XLR connections with appropriate contact cleaner, checking ground lift switches for proper operation, inspecting cables for cuts or damaged connectors, and testing pad settings with various keyboard outputs to ensure consistent performance.
Final Setup Checklist
Before every performance, verify that you’ve powered on your keyboard before the PA system to prevent pops and spikes. Check that all connections are secure and properly seated. Confirm you’ve set the appropriate pad level for your specific keyboard type. Engage the ground lift switch and test for hum. Verify signal presence at the mixer. Set initial levels conservatively to avoid distortion. Label all channels and cables for quick identification during the performance.
Mastering DI box usage transforms your keyboard from a practice instrument into a professional sound source ready for any venue. Start with basic connections, then gradually incorporate advanced techniques as your needs evolve. Proper DI box implementation ensures your keyboard sounds its best, delivering clean, professional audio that enhances every performance.