How to Replace Laptop Monitor: Step-by-Step Guide
That ominous crack spreading across your laptop screen during your morning work session can send panic through any user. A damaged display ranks as one of the most common laptop issues, yet many users mistakenly believe professional repair is their only option. Learning how to replace laptop monitor components yourself can save hundreds of dollars—if you approach it with the right knowledge and preparation.
This guide delivers exactly what you need to successfully replace your laptop screen at home. You’ll discover how to verify if replacement is necessary, source the perfect screen for your model, and execute the replacement process without damaging other components. Most importantly, you’ll learn the critical steps professionals use that prevent costly mistakes during installation.
Evaluate Repair vs Replacement Costs Before You Begin
Cost Comparison That Makes Sense for Your Budget
Professional laptop screen replacement typically costs $300-600, including parts, labor, and service fees. The DIY approach slashes this to $80-250 for the screen alone, depending on your laptop model. However, you must factor in additional costs like specialized tools ($15-40) and your time investment (1-3 hours for first-timers).
Hidden Costs to Consider Before Starting:
– Buying incompatible screens due to incorrect specifications
– Purchasing tools you’ll only use once
– Potential damage to other components during installation
– Lost productivity while your laptop sits disassembled
Your Personal Success Factors
Your ability to successfully replace a laptop monitor depends on three critical elements: your laptop model’s complexity, your comfort with electronics, and available time. Business laptops from Dell, HP, or Lenovo generally offer straightforward replacement processes with accessible components. In contrast, newer ultrabooks and MacBooks often require specialized tools and advanced technical skills that make professional service a smarter choice.
Be Realistic About Time Investment:
– Simple models: 30-45 minutes for experienced users
– Mid-complexity: 1-2 hours for careful first-timers
– Complex designs: 2-4 hours with frequent reference to guides
– Your first attempt: Add at least 50% extra time for learning
Diagnose Before You Replace to Avoid Costly Mistakes
Quick Visual Inspection Steps That Reveal True Problems
Before ordering replacement parts, confirm your screen actually needs replacement. Connect your laptop to an external monitor—if the external display shows perfect images, your screen needs replacement. If both displays show problems, investigate graphics card issues instead of wasting money on a new screen.
Physical Damage Indicators You Can’t Ignore:
– Spider-web cracks radiating from impact points
– Black liquid crystal bleeding from cracks
– Distorted colors concentrated around damaged areas
– Touch functionality failure on touchscreen models
Root Cause Analysis Process That Professionals Use
Screen problems don’t always indicate screen failure. Loose cable connections, failing backlight inverters, or graphics driver issues can mimic screen damage. Perform these diagnostic steps before disassembling anything:
- Power cycle test: Hold power button for 30 seconds, then restart
- Brightness adjustment: Cycle through all brightness levels
- Cable wiggle test: Gently move screen while powered on
- Safe mode boot: Check if display issues persist without drivers
Essential Tools and Workspace Setup for Safe Replacement

Required Tool Checklist That Prevents Damage
Gather these tools before starting your how to replace laptop monitor project:
Core Tools You Must Have:
– Phillips #00 and #000 screwdrivers (precision sizes)
– Plastic spudgers or guitar picks (never use metal)
– Small container for screws (ice cube tray works perfectly)
– Anti-static wrist strap (critical for electronics safety)
– Clean microfiber cloth (prevents scratches)
Helpful Extras That Make the Job Easier:
– Magnetic screw mat (prevents losing tiny screws)
– Headlamp or bright desk lamp (improves visibility)
– Tweezers for small connectors (delicate handling)
– Compressed air for cleaning (removes dust before reassembly)
Workspace Preparation That Ensures Success
Create a static-free, well-lit workspace on a hard surface like a kitchen table—never work on carpet. Lay down a large microfiber cloth to protect components and catch small screws. Take detailed photos at each disassembly step for reference during reassembly. Critical Warning: Never work on a laptop that’s plugged in or has battery power—even “off” laptops can retain dangerous voltages.
Find Compatible Replacement Screen Without Guessing
Screen Specification Check That Guarantees Fit
Your replacement screen must match four critical specifications exactly:
- Screen size: Measure diagonally in inches (typically 13.3″, 14″, 15.6″, or 17.3″)
- Resolution: Match existing (1366×768, 1920×1080, 4K, etc.)
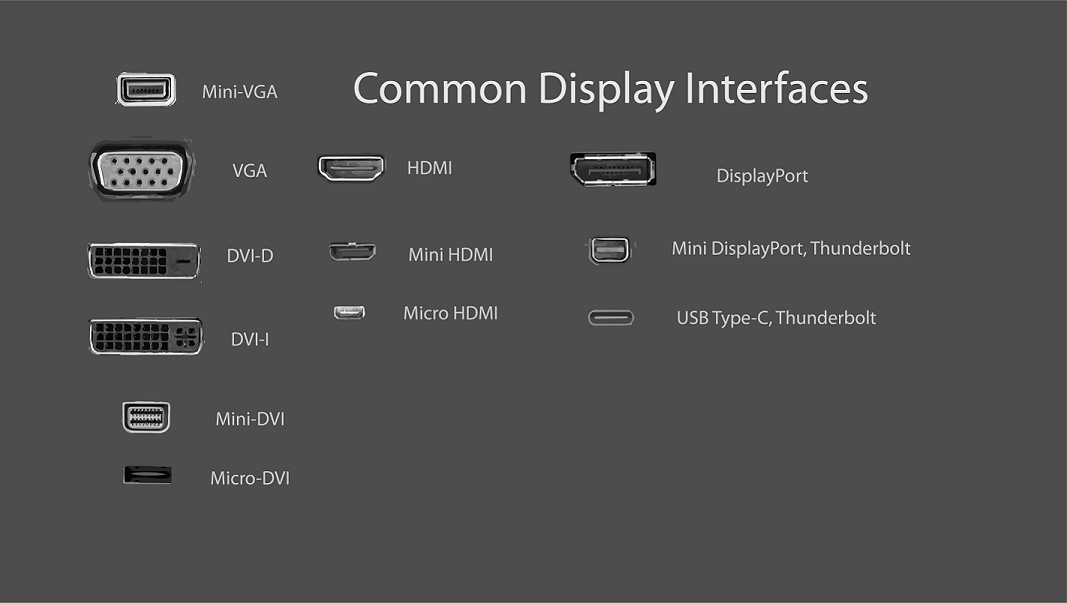
- Connector type: 30-pin eDP, 40-pin, or proprietary connector
- Mounting brackets: Check if brackets transfer or come pre-attached
Compatibility Verification Method That Works:
1. Remove existing screen (carefully following removal steps)
2. Locate manufacturer part number on screen label
3. Search online using exact part number plus “replacement”
4. Cross-reference specifications on retailer websites
Where to Buy Screens That Actually Work
Reliable Sources for Genuine Parts:
– Specialized laptop parts retailers (mid-range pricing, good support)
– Manufacturer parts departments (highest price, guaranteed fit)
– Reputable eBay/Amazon sellers (check ratings and return policies)
Red Flags That Signal Trouble Ahead:
– Screens without exact model specifications
– Prices significantly below market rate
– Generic “compatible” listings without part numbers
– Sellers with poor return policies or negative reviews
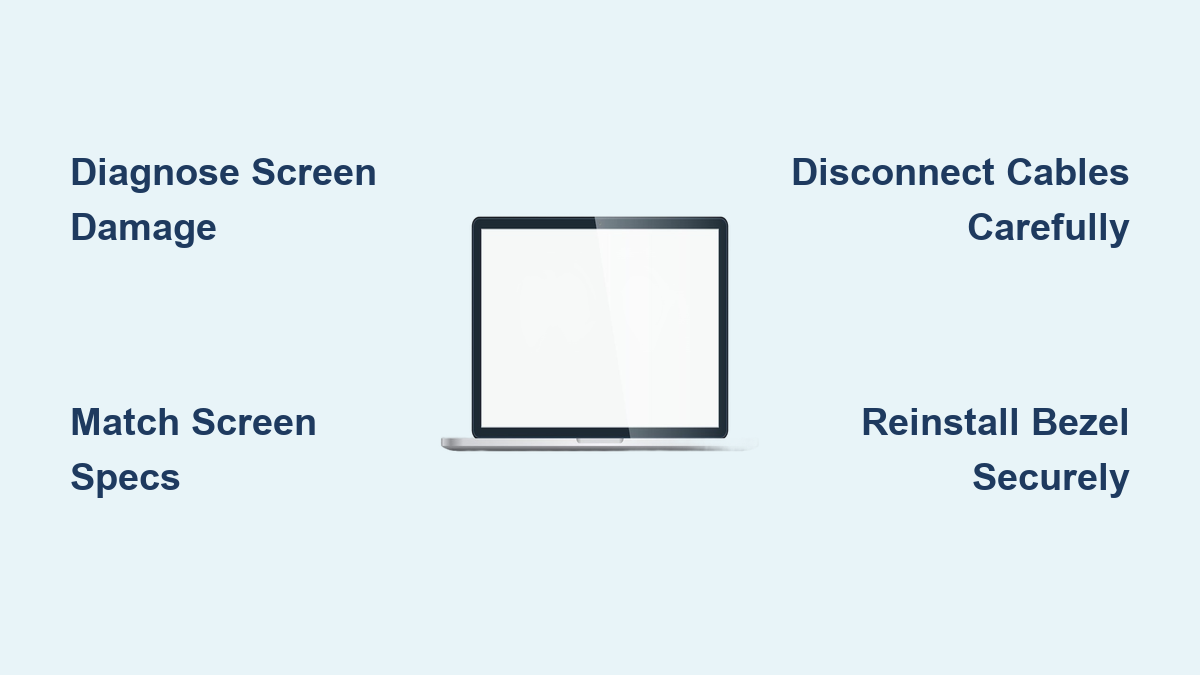
Step-by-Step Screen Removal Without Breaking Anything
Bezel Removal Process That Preserves Your Laptop
Starting at a bottom corner, insert plastic spudger between bezel and screen. Work slowly around edges, listening for plastic clips releasing with soft clicks. Never force the spudger—this common mistake cracks bezels. Support the screen with one hand while removing mounting screws—unsecured screens can fall and shatter.
Critical Connection Points You Must Identify:
– Main video cable: Wide ribbon cable with locking connector
– Backlight cable: Smaller cable for screen illumination
– Touch cable: Additional cable on touchscreen models
Disconnection Technique That Prevents Damage:
1. Flip up locking lever on ribbon cable connector
2. Pull ribbon straight out—never at an angle
3. Label cables with tape and sharpie for reassembly
4. Take close-up photos of cable orientations
Install New Screen Correctly the First Time
Pre-Installation Checks That Avoid Costly Mistakes
Before permanent installation, visually compare new and old screens side-by-side. Verify connector position, mounting bracket locations, and overall dimensions match exactly. Test screen functionality briefly by connecting cables without full installation—this confirms compatibility before you secure everything.
Screen Installation Steps That Work Every Time
Step 1: Connect All Cables Properly
Route cables through original channels, avoiding pinching. Ribbon cables must seat fully in connectors—listen for soft click or feel for resistance change. Lock connectors by flipping down lever completely.
Step 2: Secure Screen Mounting Without Damage
Hold screen in position while hand-tightening screws. Start all screws finger-tight before final tightening to prevent cross-threading. Tighten in cross pattern (top-left, bottom-right, top-right, bottom-left) for even pressure.
Step 3: Replace Bezel Carefully Without Cracking
Align bezel starting at bottom edge, working upward. Press firmly until all clips snap into place—you’ll hear/feel them engage. Replace screw covers last, ensuring they sit flush with the surface.
Troubleshooting Post-Replacement Issues Immediately
Common Problems and Simple Solutions
Screen flickers or goes black: Check ribbon cable connection and seating—most common issue
Colors appear washed out: Verify color profile settings in operating system preferences
Touchscreen not responding: Confirm touch cable connection and driver installation
Screen sits crooked in bezel: Loosen screws, realign carefully, retighten evenly
When to Seek Professional Help Instead
Contact professional service if:
– Screen won’t power on after multiple cable reseating attempts
– Physical damage occurs during installation
– Laptop won’t boot after screen replacement
– You encounter unexpected complications during disassembly
Replacing your laptop monitor successfully requires patience, attention to detail, and the right approach. While DIY replacement saves significant money, knowing when to stop and seek professional help prevents costly mistakes. Take your time, document each step, and test thoroughly after installation. Your laptop’s display should now provide years of clear, bright service—potentially better than the original if you upgraded to a higher-quality panel. Remember that proper screen maintenance, including gentle closing and avoiding pressure on the lid, extends your new screen’s lifespan significantly. With the knowledge you’ve gained about how to replace laptop monitor components, you’ve not only fixed your current issue but gained valuable skills for future repairs.