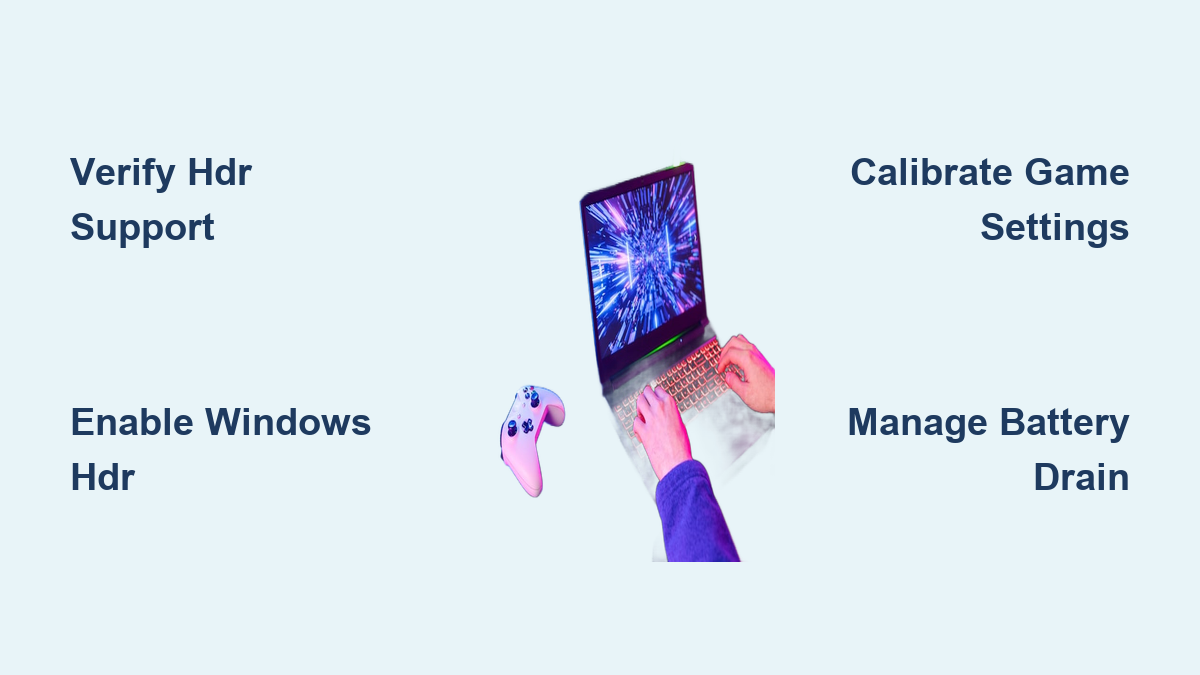
How to Optimize Gaming Laptop for HDR
Your HDR-ready gaming laptop sits on your desk, capable of displaying colors and brightness levels you’ve never experienced—yet you’re still gaming in standard definition. That washed-out sunset in Cyberpunk 2077? It should blaze with fiery oranges and deep purples. Those shadowy corners in Resident Evil? They’re hiding details your display can reveal. Most gamers enable HDR incorrectly, leaving 40% of their display’s potential untapped. This guide transforms your gaming experience in under 15 minutes by showing exactly how to optimize gaming laptop for HDR without technical headaches.
HDR gaming delivers significantly enhanced visuals through expanded color ranges and brightness levels compared to standard SDR. When properly configured, you’ll see intricate details in dark shadows of dimly lit environments and brilliant highlights in bright scenes that SDR completely misses. The difference isn’t just brighter colors—it’s thousands of subtle details emerging from shadows and highlights you never knew existed. Follow these precise steps to unlock your display’s true potential.
Verify Your Laptop’s HDR Hardware Capability
Confirm True HDR Support Before Proceeding
Before you waste time adjusting settings, confirm your laptop actually supports HDR. Right-click desktop → Display settings → Advanced display → look for “HDR” under display capabilities. Many manufacturers misleadingly label displays as “HDR-ready” when they only meet the bare minimum requirements. True HDR gaming requires at least HDR10 certification with 400+ nits peak brightness—anything less delivers “fake HDR” that oversaturates colors without true dynamic range benefits.
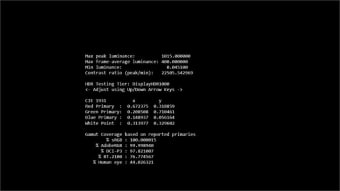
Test Your Display’s Real-World Brightness
Download the free DisplayHDR Test app from Microsoft Store to verify your laptop’s actual performance. Run the brightness test sequence—anything below 400 nits means your HDR experience will be severely limited. Gaming laptops with OLED panels typically deliver 500-600+ nits for stunning contrast, while premium IPS panels hit 500-1000 nits. If your test shows under 400 nits, you’re better off gaming in SDR mode for more accurate colors.
Match Settings to Your Panel Technology
IPS panels handle HDR best with consistent colors at high brightness but struggle with true black levels. OLED displays deliver perfect blacks but may crush shadow details in dark scenes. TN panels rarely support meaningful HDR—consider external monitor upgrade if you own TN-equipped gaming laptop. Pro Tip: Check your specific model’s DisplayHDR certification level (400, 600, or 1000) in manufacturer specs to set realistic expectations.
Activate Windows HDR Without Common Mistakes

Proper Windows 11 HDR Activation Sequence
Windows key + A → click the HDR quick toggle only for temporary testing—never for permanent setup. This shortcut skips crucial calibration steps, causing washed-out colors. Instead, follow this precise sequence: Settings → System → Display → toggle Use HDR to On → immediately click HDR display calibration. The 3-step wizard adjusts minimum luminance (darkest visible grey), maximum luminance (brightest distinguishable white), and color saturation to match your specific display.
Enable Auto HDR for Legacy Game Enhancement
Your GTX 1660-powered laptop can breathe new life into older titles through Auto HDR. Settings → System → Display → HDR → enable Auto HDR. This Windows 11 feature automatically transforms SDR-only games into HDR-enhanced experiences by expanding color range, boosting brightness, and revealing hidden shadow details. It works with DirectX 11 and 12 games, delivering visual improvements often surpassing texture mods for older titles like Skyrim or Witcher 3.
Avoid the Full RGB Range Trap
HDR appearing gray and lifeless? Your laptop probably outputs limited RGB (16-235) instead of full RGB (0-255). Fix this critical error: For Intel GPUs, open Intel Graphics Command Center → Display → Color → Advanced → set Input Range to Full. AMD users: Radeon Software → Display → Custom Color → enable Full RGB. NVIDIA RTX laptop owners: Right-click desktop → NVIDIA Control Panel → Display → Change resolution → set Output dynamic range to Full (0-255) to prevent color banding.
Calibrate HDR for Competitive Gaming Performance
Game-Specific Calibration Over Windows Defaults
Most HDR games include in-game calibration screens—always prioritize these over Windows defaults. Look for critical settings like Paper white (set to 200 nits for comfortable UI visibility), Peak brightness (match your display’s maximum verified in DisplayHDR Test), and Gamma curve (adjust until shadow details remain visible without washing out bright areas). These game-specific settings prevent competitive disadvantages caused by improper HDR configuration.
Balance Visual Fidelity with Input Lag
Competitive players fear HDR increases input lag—it doesn’t when configured properly. Call of Duty players should set Peak brightness to match display specs exactly and adjust Game brightness until enemies in dark corners become visible without overexposing bright areas. Cyberpunk 2077 users: set Tone-mapping midpoint to 1.00 for OLED or 0.90-0.95 for LCD panels, and enable HDR10 while disabling Dolby Vision to maintain responsive controls.
Prevent Battery Drain During HDR Sessions
HDR increases power consumption by 15-30%, rapidly draining your gaming laptop’s battery. Create an efficient power plan: Settings → System → Power & battery → HDR efficiency mode → set On battery: SDR only. This prevents your laptop from struggling with HDR processing when unplugged, automatically switching to SDR for longer gaming sessions away from outlets.
Maintain Optimal HDR Performance Long-Term

Schedule Monthly Calibration Checkups
Display brightness degrades 5-10% yearly, causing HDR drift that makes games look increasingly flat. Recalibrate HDR settings monthly using in-game tools rather than Windows calibration alone. Set calendar reminders—HDR degradation happens gradually until you suddenly realize games look noticeably worse than when you first set up your system.
Manage Thermal Impact on HDR Quality
HDR processing generates significant extra heat that can throttle performance. Monitor GPU temperatures with MSI Afterburner‘s on-screen display. If temperatures exceed 80°C during HDR gaming, reduce Maximum processor state to 95% in Power Options to maintain consistent HDR quality without thermal throttling. Pro Tip: Elevate your laptop on a cooling stand during extended HDR sessions to maintain peak performance.
Prioritize Driver Updates for HDR Improvements
HDR support improves rapidly—update graphics drivers every 2-3 weeks during major game launches. GeForce Experience → Drivers → enable Game Ready Driver notifications for instant HDR improvements. Recent NVIDIA drivers added 20% better tone mapping for HDR gaming, while AMD’s latest releases fixed color banding issues in popular titles.
Your gaming laptop now renders HDR content exactly as developers intended—no more guessing at optimal settings. These precise configurations transform every compatible game into a visual showcase while maintaining competitive performance. Remember: properly optimized HDR isn’t just brighter colors, it’s thousands of subtle details emerging from shadows and highlights you never knew existed. Load up your favorite game and witness the difference immediately—those shadowy alleyways in Cyberpunk will reveal hidden details, and sunset scenes will display colors your SDR setup completely missed. This is how to optimize gaming laptop for HDR the right way.