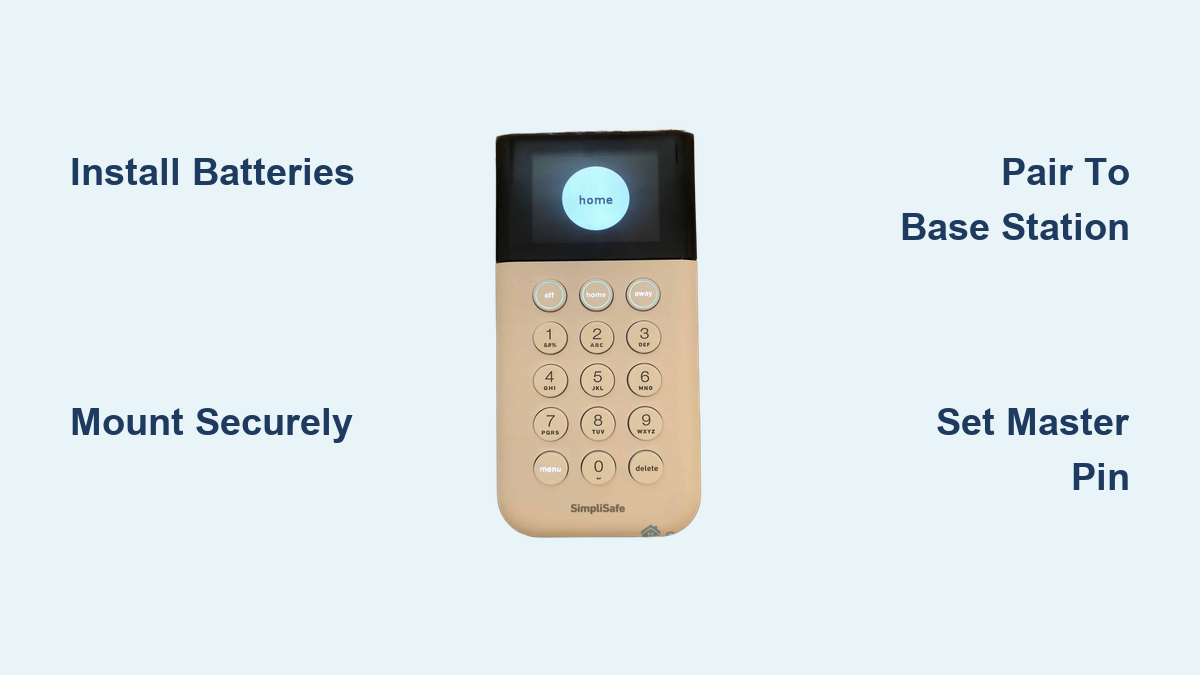
How to Install SimpliSafe Keypad: Quick Setup Guide
Your SimpliSafe keypad has stopped responding or you’re setting up your first home security system—either way, knowing how to install SimpliSafe keypad properly ensures your home stays protected without professional installation fees. Most homeowners waste hours searching for scattered instructions online when the entire process should take less than 10 minutes with the right guidance. This guide eliminates the guesswork with step-by-step instructions verified by SimpliSafe’s official documentation.
Unlike complex security systems requiring wiring expertise, the SimpliSafe keypad connects wirelessly to your Base Station, making DIY installation straightforward. Before you begin, confirm your Base Station is already installed and online—your keypad cannot function without this crucial connection. Whether you’re a tech-savvy homeowner or a first-time renter, this guide walks you through every decision point to get your keypad operational immediately.
Required Items Before Starting Installation
What’s in the Box:
– Keypad unit with integrated mounting plate
– 2 mounting screws (for permanent wall installation)
– Adhesive mounting strips (pre-installed on mounting plate)
Additional Tools You’ll Need:
– 4 fresh AA batteries (not included)
– Phillips head screwdriver (for screw mounting option)
– Isopropyl alcohol and clean cloth (for surface preparation)
Critical Prerequisite Check: Your Base Station must display a solid blue light indicating it’s connected to Wi-Fi. Without this, your keypad installation will fail at the pairing stage. If your Base Station isn’t ready, complete that setup first using the SimpliSafe app before attempting keypad installation.
Choose Your Installation Method Based on Your Living Situation

Option 1: Adhesive Mounting (Best for Renters)
The pre-applied industrial-strength adhesive strips allow damage-free installation in minutes. This method works perfectly on smooth surfaces like painted drywall, glass, or metal. Peel the backing, position carefully, and press firmly—no tools required.
Option 2: Screw Mounting (Ideal for Owners)
Use the included screws for permanent installation on drywall, wood, or concrete. This provides maximum stability for high-traffic areas like main entryways where accidental bumps might dislodge an adhesive-mounted unit.
Decision Guide: Adhesive mounting supports up to 5 pounds and maintains strong hold for years on properly prepared surfaces. Choose screw mounting if you have textured walls, experience frequent vibrations, or want the most secure installation possible.
Install Batteries Before Mounting Your Keypad
Battery Installation Steps:
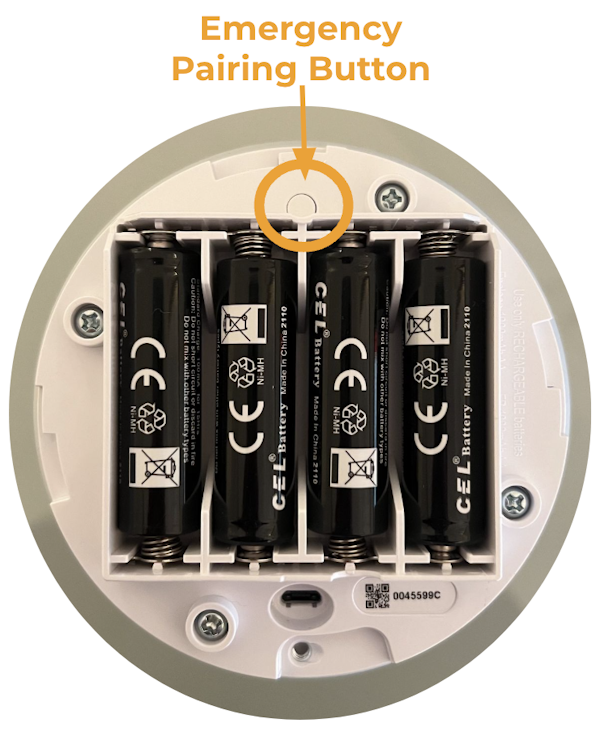
1. Place keypad face-down on a soft surface to protect the screen
2. Slide battery compartment cover downward until it releases
3. Insert 4 AA batteries following the + and – polarity diagram
4. Snap cover back into place with firm pressure
Battery Warning: Never mix old and new batteries or use rechargeable batteries, as inconsistent power delivery causes erratic keypad behavior. Alkaline batteries provide the stable voltage your keypad requires for reliable operation.
Power-Saving Tip: After installation, enable Power Saving Mode through the keypad menu to extend battery life from 8-12 months to up to 15 months. This disables the proximity sensor that lights the keypad when you approach.
Wall Mounting Instructions for Perfect Placement
Prepare Your Mounting Surface for Maximum Adhesion
Surface Cleaning Process:
1. Wipe area with isopropyl alcohol to remove invisible oils
2. Allow 2-3 minutes for complete drying (critical step!)
3. Mark ideal height: 48-54 inches from floor (standard light switch height)
Pro Placement Tip: Hold the keypad against the wall at different heights while standing in your natural approach position. The perfect height lets you enter your PIN comfortably without stretching or bending—a crucial factor for elderly family members or children.
Adhesive Mounting Process for Renter-Friendly Installation
Secure Adhesive Installation Steps:
1. Peel protective backing from both adhesive strips
2. Align mounting plate with your marked position
3. Press firmly for 30 seconds, applying even pressure
4. Wait 60 minutes before attaching keypad for full adhesion strength
Adhesive Warning: Never install on freshly painted walls (wait 30 days) or surfaces with moisture. Cold temperatures below 50°F (10°C) reduce adhesive effectiveness—warm the wall with a hairdryer first if needed.
Screw Mounting Process for Permanent Security
Professional-Grade Installation Steps:
1. Hold mounting plate against wall and mark screw holes
2. Drill 1/8-inch pilot holes at marked positions
3. Insert screws through mounting plate openings
4. Tighten until snug (overtightening cracks drywall)
5. Slide keypad onto mounting plate until it clicks securely
Screw Tip: For concrete or brick walls, use appropriate anchors not included in the package. The provided screws work perfectly for standard drywall installations.
Pair Keypad to Base Station Without Connection Failures
Successful Pairing Process:
1. Press and hold “Test” button on Base Station for 3 seconds
2. On keypad, simultaneously press “Home” and “Away” buttons
3. Release when keypad displays “Pairing…” animation
4. Confirm success with “Ready to Arm” message within 30 seconds
Range Troubleshooting: If pairing fails, move within 6 feet of your Base Station during setup. Walls and metal objects interfere with the wireless signal—temporary proximity ensures reliable connection before final placement.
Critical Warning: Never skip the pairing step thinking the keypad will auto-connect. Without this manual pairing process, your keypad remains useless regardless of battery or mounting quality.
Configure Essential Settings for Daily Convenience
Set Master PIN for System Control
- Press “Menu” on keypad
- Enter default PIN (found on Base Station label)
- Navigate to “Change PIN” using arrow keys
- Enter new 4-digit code twice for confirmation
Adjust Entry/Exit Delays for Family Needs
- Press “Menu” → Enter Master PIN
- Select “Settings” → “Entry/Exit Delays”
- Set entry delay between 30-120 seconds (time to disarm after entering)
- Set exit delay between 45-120 seconds (time to exit before alarm arms)
Family Tip: For households with children, set longer entry delays to prevent accidental alarms when kids arrive home from school.
Test All Keypad Functions Before Finalizing Installation
System Verification Checklist:
– Arming Test: Press “Away” → confirm Base Station siren beeps
– Disarming Test: Enter PIN → check system status light turns green
– Panic Button Test: Press and hold top button for 2 seconds → verify test mode activation
– Range Test: Walk to opposite end of home → ensure consistent response
Range Failure Fix: If you get “Keypad Out of Range” errors during testing, either relocate your Base Station closer to the keypad or purchase a SimpliSafe Range Extender for larger homes.
Avoid These Common Installation Mistakes
Critical Errors to Prevent:
– Mistake 1: Installing before Base Station setup → Keypad won’t connect
– Mistake 2: Mounting at awkward heights → Daily frustration entering PINs
– Mistake 3: Skipping surface cleaning → Adhesive fails within weeks
– Mistake 4: Using rechargeable batteries → Shorter lifespan and erratic behavior
Quick Fix: If your keypad shows “Out of Range” after installation, move your Base Station closer to your Wi-Fi router first—improved internet connection often resolves apparent range issues.
Maintenance Schedule for Reliable Long-Term Operation
Monthly Maintenance Routine:
– Wipe keypad surface with dry microfiber cloth (no liquids)
– Check battery status through SimpliSafe app
– Test panic button response time
– Verify proper mounting stability
Battery Replacement Protocol: When your keypad beeps during use or shows low battery in the app, replace all 4 batteries immediately. Never mix old and new batteries—this causes inconsistent power delivery and system errors.
Expand Your System with Additional Keypads
Adding Secondary Keypads:
1. Follow identical installation process for each new keypad
2. Each pairs independently to the same Base Station
3. Name keypads by location in the SimpliSafe app (Front Door, Bedroom)
4. All keypads share the same Master PIN for consistent access
Strategic Placement Guide: Install your primary keypad at your main entry point, a second at your bedroom entrance for nighttime access, and a third in the garage if you frequently enter through that space. Each location serves a specific security purpose in your daily routine.
Your SimpliSafe keypad installation is now complete and fully operational. Test your system thoroughly before relying on it for security—press each button, arm and disarm the system, and verify all connected sensors respond correctly. The keypad becomes your command center for home security, providing instant access to arm when you leave, disarm when you return, and emergency panic functionality when seconds count. For ongoing reliability, perform weekly tests during the first month to catch any placement or connection issues early. With proper installation following these steps, your SimpliSafe keypad delivers years of trouble-free security control.