How to Remove Battery from Dell Laptop
Your Dell laptop won’t charge past 20%, or maybe it’s swelling dangerously against the keyboard deck. Whether you’re replacing an aging battery or troubleshooting power issues, knowing how to properly remove your Dell laptop battery is essential. Most users don’t realize Dell designs their laptops with model-specific battery removal procedures that can make or break your repair attempt.
This guide delivers the exact steps Dell technicians follow, whether you own an XPS 13, Latitude 7480, or Inspiron 15. You’ll discover which tools prevent costly damage, safety precautions that protect your warranty, and model-specific tricks that save hours of frustration. By the end, you’ll confidently remove your Dell laptop battery without frying sensitive components or voiding your service agreement.
Essential Safety Steps Before Battery Removal
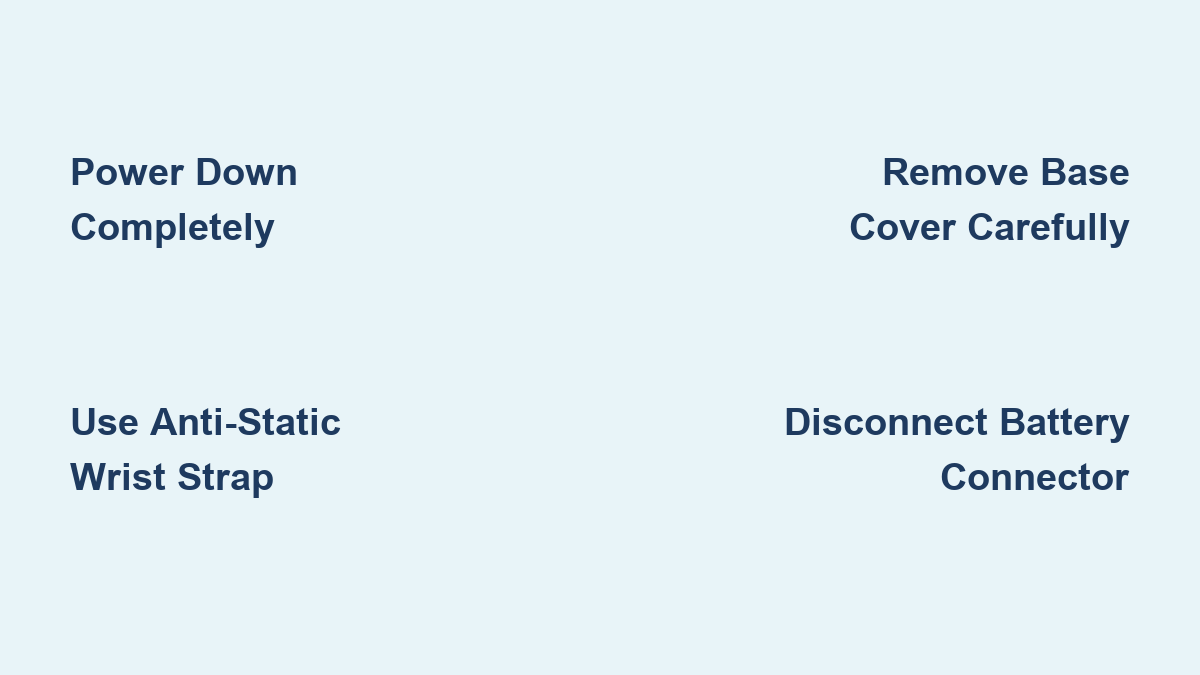
Power Down Completely
Never attempt battery removal with your laptop in sleep mode or hibernation. Save all work immediately, then shut down through Windows—not just closing the lid. Once powered off, disconnect the power adapter and remove all USB drives, external monitors, and docking stations. This critical step prevents electrical shock and data corruption during the removal process. If your Dell has a physical power switch (common on Latitude models), toggle it to the off position for complete isolation.
ESD Protection Protocol
Static electricity can fry your laptop’s motherboard in seconds, even if you don’t feel a shock. Before touching internal components, wear an anti-static wrist strap clipped to an unpainted metal surface like a desk leg. If you don’t have one, touch a metal faucet or radiator to discharge static buildup before starting. Work on a non-carpeted surface and avoid synthetic clothing—cotton shirts reduce static generation by 50% compared to polyester.
Data Backup Priority
While battery replacement rarely affects your files, Murphy’s Law applies to electronics. Create a recovery drive using Windows Backup and Restore, then copy important documents to cloud storage or an external drive. This 10-minute precaution saves weeks of work if something goes wrong. For business models like Latitude series, Dell’s SupportAssist software offers one-click backup options—run it before opening your laptop.
Required Tools for Dell Battery Removal

Basic Toolkit
Most Dell laptops need just three essential tools:
– Phillips-head screwdriver (usually #0 or #00 size—larger screws risk stripping)
– Plastic scribe or spudger (prevents case damage during prying)
– Magnetic parts tray (keeps tiny screws organized—Dell uses multiple screw lengths)
Model-Specific Tools
Some Dell business models require specialized equipment:
– Torx T5 driver for newer XPS models (aluminum chassis needs precision)
– SIM card ejection pin (included with most cellular-enabled laptops)
– Tri-wing screwdriver for select Latitude models (prevents accidental tampering)
Remove SD and SIM Cards Before Accessing Battery
SD Card Ejection
Turn your laptop over and locate the SD card slot—usually on the left side. Gently push the card inward until you feel it click, then release. The card will pop out slightly—pull it straight out without forcing. Forgetting this step can snap the card or damage the slot during base cover removal. Check Dell’s service manual for your specific model if you can’t find the slot—some XPS models hide it under the hinge cover.
SIM Card Removal Process
If your Dell laptop has cellular capability (common in Latitude business models), find the SIM tray on the side. Insert the ejection pin into the small hole next to the tray and press firmly. The tray will slide out—remove the SIM card and store it safely. Some models integrate the SIM tray with the base cover, making this step critical before disassembly. Never use paperclips—they can bend and damage the delicate ejection mechanism.
Base Cover Removal Steps for Dell Laptops
Position Your Laptop
Place your Dell laptop upside-down on a clean, flat surface covered with a microfiber cloth. Ensure the screen is fully closed to prevent stress on the hinges. Remove any stickers covering screws—Dell often hides screws beneath warranty or service tags. For XPS models with carbon fiber bases, use extra care as the material cracks easily under pressure.
Screw Identification
Examine the base cover screws carefully. Dell uses two distinct types:
– Removable screws: Completely unscrew and set aside (usually 8-12)
– Captive screws: Loosen but leave in the cover (they stay attached via spring)
Count the screws before removing—missing one hidden screw can crack the cover during removal. Latitude models often have screw patterns indicating which are captive. Use a magnifying glass if needed to spot tiny markings.
Prying Technique
Insert the plastic scribe at the hinge edge (this varies by model—XPS starts at the front edge). Work systematically around the perimeter, prying gently to release plastic clips every 2 inches. Never use metal tools—they’ll scratch aluminum or break the clips. You’ll hear soft clicks as clips release—proceed slowly until the entire cover is loose. For stubborn models, warm the edges with a hair dryer for 30 seconds to soften adhesive.
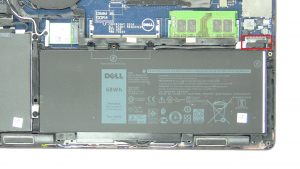
Disconnect Battery Safely
Locate the Connector
Once the base cover is off, find the battery connector—a white plastic plug with red and black wires. On most Dell models, it’s near the trackpad or along the battery’s top edge. Gently pull the connector straight up—never yank the wires. Latitude models often have a small black plastic tab you lift first. If you see a yellow caution sticker, stop—your model may have a different procedure.
Drain Residual Power
After disconnecting, flip your laptop right-side up and press the power button for 15 seconds. This drains capacitors and prevents electrical shorts. You’ll see no response—this confirms the battery is fully disconnected. Skip this step, and residual power could damage components when reassembling.
Unscrew Battery Module
Identify all screws securing the battery to the chassis. Most Dell batteries use 4-6 Phillips screws marked with battery icons. Remove all screws and store them separately from the base cover screws—they’re often different sizes. Some models like the Inspiron 15 have hidden screws under adhesive strips—peel back carefully with your scribe.
Model-Specific Dell Variations
Dell Latitude 5480 Battery Removal
This business model simplifies the process significantly:
1. Remove 8 base screws (all removable—no captive types)
2. Use fingers to pop off the plastic cover—no prying tools needed
3. Disconnect battery cable by lifting the black plastic tab upward
4. Remove 4 battery screws and lift out the battery (no adhesive)
XPS 13/15 Differences
Newer XPS models hide the battery beneath additional components. You’ll need to remove the speaker assembly first, using a T5 Torx driver for the speaker screws. The battery connector is tucked under a metal shield—lift the shield carefully with a spudger to access it. XPS batteries often use strong adhesive—apply isopropyl alcohol around edges to weaken the bond before lifting.
Troubleshooting Common Issues
Laptop Won’t Power On After Battery Removal
If your Dell shows no signs of life after reassembly:
– Double-check battery connector—it may not be fully seated (listen for a click)
– Verify base cover screws—missing one can prevent power-on (count against your photo)
– Test with power adapter only—remove battery to isolate the issue
Battery Not Detected After Installation
Windows shows “no battery detected” after replacement:
– Power cycle completely: Shut down, unplug, hold power 30 seconds
– Update BIOS: Download the latest from Dell.com/Support (critical for XPS)
– Re-seat the connector: Remove base cover and reconnect battery cable firmly
Maintenance and Prevention
Battery Care Tips
Extend your new battery’s lifespan by:
– Keeping charge between 20-80% for daily use (avoid full discharges)
– Avoiding extreme temperatures—hot cars kill batteries faster than usage
– Running Dell’s battery calibration monthly for accurate charge reporting
When to Replace Again
Plan for replacement every 2-3 years or when:
– Battery health drops below 70% in Dell Power Manager
– Runtime decreases below 2 hours for basic tasks
– Laptop shuts down unexpectedly at 30-40% charge
Removing your Dell laptop battery isn’t complicated when you follow the right process for your specific model. Take your time with each step—rushing causes 80% of repair failures—keep screws organized in labeled containers, and always handle components gently. Your laptop will thank you with improved battery life and reliable performance. For model-specific videos, visit Dell.com/Support and search your exact service tag—Dell’s official guides prevent costly mistakes most DIY tutorials miss.