How to Fix Laptop Keyboard Issues: Quick Repair Guide
Your laptop keyboard suddenly stops responding mid-email, sticky keys turn writing into gibberish, or coffee spills across your morning reports. These scenarios happen daily to millions of laptop users, often at the worst possible moments. Before you panic about expensive repairs or replacement costs, most keyboard issues can be solved with basic tools and patience.
This comprehensive guide walks you through diagnosing, repairing, and preventing common laptop keyboard problems. Whether you’re dealing with stuck keys, liquid damage, or complete keyboard failure, you’ll learn practical solutions that save money and restore functionality.
Why Your Laptop Keys Stop Working Properly
Physical Damage Assessment
Start with a visual inspection under good lighting. Look for cracked keycaps, bent or missing pieces, and any discoloration that might indicate liquid damage. Press each key individually—working keys should have consistent travel and return smoothly. Keys that feel mushy, stick halfway, or require excessive force indicate underlying issues.
Use a flashlight at a shallow angle to spot debris accumulation beneath keycaps. Even tiny crumbs or hair can jam mechanisms. Check for corrosion around key edges, especially after liquid exposure. Green or white buildup signals serious damage requiring immediate attention.
Functional Testing Procedures
Boot into BIOS/UEFI by pressing F2, Del, or your laptop’s specific key during startup. If keys work here but fail in Windows, you’re dealing with software issues. Test in Safe Mode to eliminate driver conflicts. Create a text document and systematically press every key, noting failures or repeating characters.
Test modifier combinations like Ctrl+C and Alt+Tab. Non-working combinations often indicate specific key failures rather than broad keyboard issues. Document everything—this diagnostic log guides your repair approach.
Essential Tools for Laptop Keyboard Repair

Basic Toolkit Assembly
Gather precision screwdrivers including Phillips #000 through #0 and Torx bits T5-T8. Plastic spudgers or guitar picks prevent case damage during disassembly. Fine-point tweezers handle tiny screws and components. Stock 3-4 cans of compressed air—one won’t suffice for thorough cleaning.
Use 99% isopropyl alcohol only—lower percentages leave conductive residue. Microfiber cloths must be lint-free to avoid adding debris. Organize screws using a magnetic mat or small containers labeled by location. An anti-static wrist strap prevents component damage from static discharge.
Fix Sticking Laptop Keys in 15 Minutes
Debris Removal Sequence
Hold your laptop at 75 degrees and spray compressed air in short bursts parallel to the keyboard surface. Direct downward spraying drives debris deeper. For stubborn particles, use a soft brush in gentle sweeping motions. Apply 99% isopropyl alcohol to cotton swabs for sticky residue removal.
Allow 2-4 hours complete drying time—rushing this step causes permanent damage. Test keys only after complete evaporation. Never use water or household cleaners—they leave conductive films that create new problems.
Keycap Cleaning Method
Insert a plastic spudger at the keycap’s top edge—most laptop keys hinge from the bottom. Apply gentle upward pressure while wiggling side-to-side. Once removed, clean the scissor mechanism with alcohol-dampened swabs. Check for broken plastic clips or damaged scissor arms—these require complete mechanism replacement.
Reinstall by aligning bottom hooks first, then pressing the top until you hear two distinct clicks. Test key travel and responsiveness immediately. Verify backlight passes through the keycap properly—blocked LEDs indicate misalignment.
Liquid Spill Recovery: Save Your Keyboard in Minutes
Immediate Emergency Response
Power off instantly and disconnect all power sources. Invert the laptop onto absorbent towels for 30 minutes minimum. Remove the battery if possible and open the screen to 180 degrees. Use a hair dryer on cool setting for 20-30 minutes—heat causes more damage.
Never use rice—it creates dust and rarely reaches internal components. Acting within minutes dramatically improves recovery odds. Delayed response often means permanent damage requiring complete keyboard replacement.
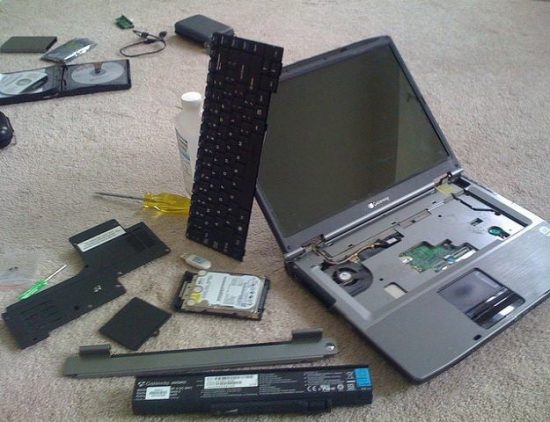
Professional Disassembly Drying
Remove bottom panel screws—typically 8-12 Phillips head screws, some hidden under rubber feet. Disconnect the keyboard ribbon cable from the motherboard carefully. The keyboard may lift out directly or require removing the entire top case.
Separate keyboard layers noting original positions. Clean corrosion with isopropyl alcohol and a soft brush. Test key traces with a multimeter—these should show continuity. Any breaks require trace repair or keyboard replacement.
Replace Individual Laptop Keys Without Damage
Safe Keycap Removal
Identify your key type first—scissor-switch dominates most laptops, butterfly mechanisms appear in newer models. Insert the plastic spudger at the top-left corner for scissor switches. Apply gentle upward pressure while wiggling side-to-side.
Butterfly switches require specialized keycap pullers—improvised tools damage the delicate mechanism. Note spring position and orientation before removal—incorrect reassembly causes permanent key failure.
Precision Installation Steps
Align the new keycap over the empty mechanism carefully. Position the bottom edge first, ensuring proper hinge engagement. Press the top edge firmly until you hear two clicks indicating secure attachment. Test key travel immediately—wobbly or uneven keys indicate improper installation.
Verify backlight passes through the replacement keycap correctly. Blocked illumination suggests misalignment requiring removal and reinstallation.
Complete Laptop Keyboard Replacement Guide
Pre-Disassembly Research
Identify your exact laptop model using system information or the bottom label. Download the service manual PDF from the manufacturer’s website—this saves hours of frustration. Determine if your keyboard is a separate module or integrated into the top case.
Check if replacement requires palm rest removal or can be accessed from above. Verify the replacement part number matches your original—this appears on the keyboard’s flex cable. Wrong part numbers guarantee incompatibility.
Systematic Disassembly Process
Remove all bottom panel screws, documenting positions—some are longer and must return to exact locations. Disconnect the battery connector from the motherboard as a safety precaution. Remove any components blocking keyboard access—RAM, SSD, or WiFi cards in some models.
Locate the keyboard cable connection near the motherboard’s center. Release the cable retention flap carefully—it either slides or flips upward. Remove keyboard retaining screws, often hidden under rubber feet or warranty stickers. Extract the keyboard assembly noting alignment posts or brackets.
Software Fixes That Restore Keyboard Function
Driver Reset Process
Open Device Manager by pressing Windows key + X, then selecting Device Manager. Expand the “Keyboards” section and right-click your keyboard device. Select “Uninstall device” and check “Delete the driver software for this device.” Restart your laptop—Windows reinstalls default drivers automatically.
Test all keys and functions after restart. If issues persist, visit the manufacturer’s support website for specific driver updates. BIOS updates sometimes resolve keyboard controller firmware issues—ensure AC power connection during updates.
Windows Settings Optimization
Navigate to Settings > Ease of Access > Keyboard. Toggle “Filter Keys” off if accidentally enabled—this common setting causes apparent key failures. Adjust repeat delay and repeat rate in Control Panel for typing comfort.
Check keyboard language and layout settings for mismatches. Verify Num Lock and Fn key behaviors are configured correctly. These simple checks solve many “broken” keyboard reports.
Prevent Future Laptop Keyboard Problems
Weekly Maintenance Routine
Use compressed air weekly to remove surface debris before it accumulates. Wipe keys with a microfiber cloth slightly dampened with water—never dripping wet. Check for developing sticky keys or unusual wear patterns. Clean the screen and palm rest to reduce oil transfer to keys.
Remove 3-4 keycaps monthly from high-use areas like spacebar, Enter, and Shift. Clean underneath with cotton swabs and isopropyl alcohol. Check for hair or debris accumulation and inspect for developing cracks.
Professional Repair Decision Guide
Attempt DIY repair for individual keycap replacement or cleaning. Software and driver issues fall within DIY capabilities. Minor debris removal requires basic tools and patience. Individual key mechanism replacement is moderately challenging but achievable.
Seek professional service for liquid damage requiring internal cleaning. Integrated keyboard replacement on ultrabooks demands specialized tools and expertise. Motherboard-level keyboard controller failures require advanced diagnostics.
Cost Analysis for Laptop Keyboard Repair
Individual keycaps cost $2-8 each—economical for minor damage. Complete keyboard assemblies run $30-150 depending on laptop model. Professional labor adds $50-150 per hour, with 1-3 hours typical for keyboard replacement.
Order from manufacturer-authorized parts distributors for guaranteed compatibility. eBay offers cost savings with OEM part numbers from high-rated sellers. Amazon provides convenience with exact model compatibility verification.
Most laptop keyboard repairs succeed with patience and proper tools. Start with least invasive solutions—software fixes and cleaning often restore full functionality. Document everything during disassembly, test thoroughly after repairs, and maintain regular cleaning schedules to prevent future issues. When in doubt, photograph each step and consult your laptop’s service manual for model-specific guidance.