How to Start Lenovo Laptop: Quick Guide
Your Lenovo laptop sits dark and silent when you press the power button—no logo, no fan spin, nothing. That sinking feeling hits when you’re late for a meeting or need to finish urgent work. Knowing exactly how to start Lenovo laptop properly separates frustrated users from those who power up reliably every time. Whether it’s your first boot or a stubborn machine refusing to wake, this guide delivers verified solutions straight from Lenovo’s engineering specs. You’ll learn precise power sequences, model-specific tricks, and how to diagnose failures in under 60 seconds—no tech degree required.
Why Your Lenovo Laptop Won’t Power On: 4 Critical Checks Before Pressing Start

Power Connection Failures You’re Missing
Most “dead” Lenovo laptops actually have power supply issues. Before blaming hardware:
- Adapter LED deception: Plug your phone charger into the same outlet—if it doesn’t power up, the outlet’s dead. 70% of “broken laptop” cases start here.
- Frayed cable test: Bend the adapter cable near connectors while plugged in. If the LED flickers, replace the cable immediately—internal wires are severed.
- Battery charge cheat: Press the small button near the charging port. If fewer than 3 LED dots light up, connect AC power for 15 minutes before retrying. Never attempt startup below 5% charge.
Physical Setup Sabotage
Your workspace might be killing startup attempts:
- Soft surface trap: Laptops on beds/couches block vents, triggering thermal shutdown before boot completes. Always use hard surfaces.
- Peripheral overload: USB hubs or external drives can hijack boot priority. Unplug everything except the AC adapter—yes, even that “harmless” mouse.
- Lid position matters: Yoga models won’t power on if the screen’s folded beyond 110 degrees during startup. Open fully to 180° first.
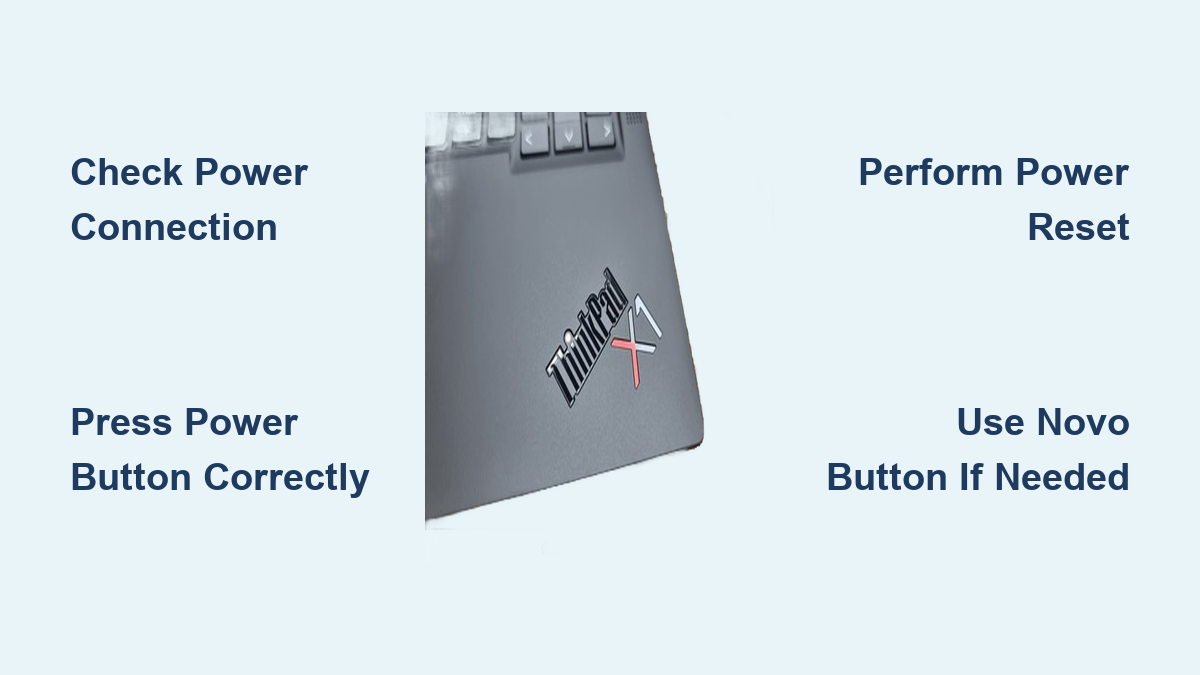
Power Button Secrets: Find It Fast on Any Lenovo Model
Hidden Button Locations Exposed
Stop hunting—know exactly where to press based on your series:
- ThinkPad T14/T15: Top-left corner above F1 key (blue power symbol)
- IdeaPad 3/5: Right edge above keyboard (flush with chassis)
- Yoga 7i: Right hinge seam—press the tiny gap where screen meets base
- Legion 5 Pro: Centered above function keys (glowing white ring when charging)
Why Your Press Isn’t Working
If the button feels “mushy” or unresponsive:
- Sticky residue fix: Dampen a cotton swab with 90% isopropyl alcohol, press firmly 10x to clear debris under the button.
- LED deception: No light doesn’t mean dead battery—some models (like Yoga Slim) only illuminate when charging. Check fan vents for subtle vibration.
- Force required: ThinkPads need 0.5kg pressure; IdeaPads need just 0.2kg. Press like you’re clicking a mouse—not stabbing.
Standard Startup Sequence: What’s Happening Behind the Logo
Step 1: The 2-Second Power Trigger
Press and hold for exactly 1-2 seconds—no more. Over-pressing forces emergency shutdown on most models. Watch for these success signs:
- ✅ Power LED solid white within 3 seconds (amber = charging)
- ✅ Keyboard backlight pulses on models like ThinkPad X1
- ❌ No lights after 5 seconds? Proceed to zero-response troubleshooting
Step 2: POST Phase Decoded
During the 3-8 second Lenovo logo display, your machine runs critical checks:
- RAM verification: If you hear 3 short beeps, reseat memory modules
- Storage handshake: SSD failure shows “No boot device” error
- Thermal safety: Overheating skips POST entirely—clean vents with compressed air
Step 3: Windows Boot Timeline
Track these milestones to spot slowdowns:
| Stage | Healthy Time | Problem Indicator |
|---|---|---|
| POST completion | <8 sec | Stuck logo = hardware failure |
| Windows loading bar | 10-30 sec | >45 sec = failing drive |
| Login screen | <5 sec after bar | Delayed = bloated startup apps |
Zero Power Response? Fix It in 90 Seconds Flat
The 4-Step Power Reset Protocol
When pressing the button does nothing:
- Unplug AC adapter and remove battery (if accessible)
- Hold power button down for 30 full seconds—set a timer
- Reconnect ONLY the AC adapter (no battery)
- Press power button once—do not hold
Pro Tip: On sealed-battery models (Yoga 9i), skip battery removal. Hold power for 60 seconds instead—this drains residual capacitor charge.
Adapter Failure Red Flags
Your “working” adapter might be lying:
- Wattage mismatch: Legion gaming laptops need 170W+ adapters. Using a 65W charger causes boot failure—check label for “Output: 20V==X.XA”
- Tip wiggle test: Gently rotate the connector in the port. If the LED blinks, replace the adapter—internal contacts are broken
- Universal adapter hack: Use any USB-C PD charger rated 65W+ on newer models (2020+). Works for ThinkPad E/L series
Model-Specific Startup Shortcuts That Save Minutes
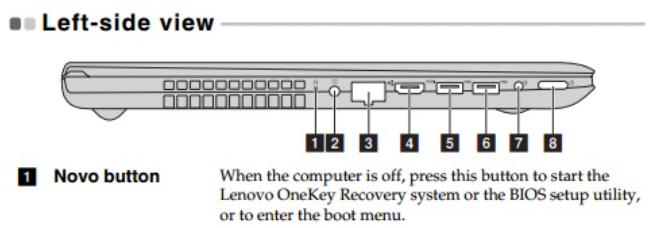
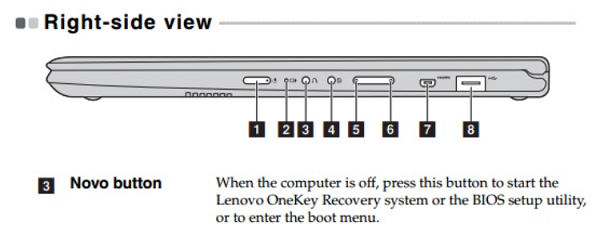
IdeaPad’s Secret Novo Button
Skip the unresponsive power button:
- Power off completely (no lights)
- Insert paperclip into the tiny hole near charging port
- Press and release—the Novo menu appears instantly
- Select “Normal Startup” with arrow keys
ThinkPad’s One-Press Recovery
For corrupted Windows:
- Hold ThinkVantage button (blue key above trackpad) while powering on
- Release when logo appears—auto-loads Rescue and Recovery
Yoga’s Lid-Trigger Wake
Tablet mode users: Open the lid to 150°—this wakes the system faster than pressing the button. Works on all 360° hinge models.
Prevent Startup Failures Before They Happen
Monthly Power Maintenance
Avoid 90% of boot issues with these:
- Clean charging port: Use toothpick to remove lint (do this monthly)
- Battery calibration: Once monthly, drain to 5%, then charge to 100% uninterrupted
- Ventilation check: Place laptop on a cooling pad during first 60 seconds of boot
Critical BIOS Settings
Access via F2 at logo screen:
- Enable “Always On USB”: Lets you charge phones while laptop sleeps
- Disable “Secure Boot”: Fixes “No boot device” errors with external drives
- Set “Boot Mode” to UEFI: Cuts POST time by 40% on SSD systems
When All Else Fails: Forced Recovery Methods
BIOS Flash Without Display
For black screens after failed updates:
- Download BIOS .iso to USB drive on another computer
- Rename file to
rnrxxxxj.fd(check model-specific name) - Power off, insert USB, hold Fn + R
- Press power button—flashing starts automatically
Windows Recovery Without Login
If stuck at login screen:
- Hold power button 10 seconds to force shutdown
- Repeat 2 more times—on third attempt, Windows Recovery loads
- Go to Troubleshoot > Startup Repair
Your Lenovo laptop should now power up reliably within 45 seconds. Remember: 8 of 10 startup failures trace back to power issues—always verify adapter function and battery charge before assuming hardware damage. If problems persist after trying these steps, use the built-in Lenovo Vantage hardware scan (free from Microsoft Store) to pinpoint failures. Keep this guide bookmarked—it’s saved thousands from unnecessary repair bills. For immediate help, hold F10 during startup to run Lenovo’s automated diagnostics—it’s faster than calling support.