How to Screenshot on ThinkPad Laptop
You’re demonstrating software to your team when your manager asks for a visual of the error message you just fixed. Your ThinkPad screen shows exactly what they need—but you freeze, unsure how to capture it. This exact scenario plays out daily for professionals who don’t know the quickest ways to screenshot on their ThinkPad laptop. Whether you’re documenting technical issues, saving important emails, or sharing project updates, mastering screen capture saves valuable time.
This guide reveals every reliable method to screenshot on your ThinkPad—no matter if you own an X1 Carbon, T14, or older model. You’ll learn keyboard shortcuts that work in seconds, built-in Windows tools for precision captures, and model-specific variations that prevent frustrating trial-and-error.
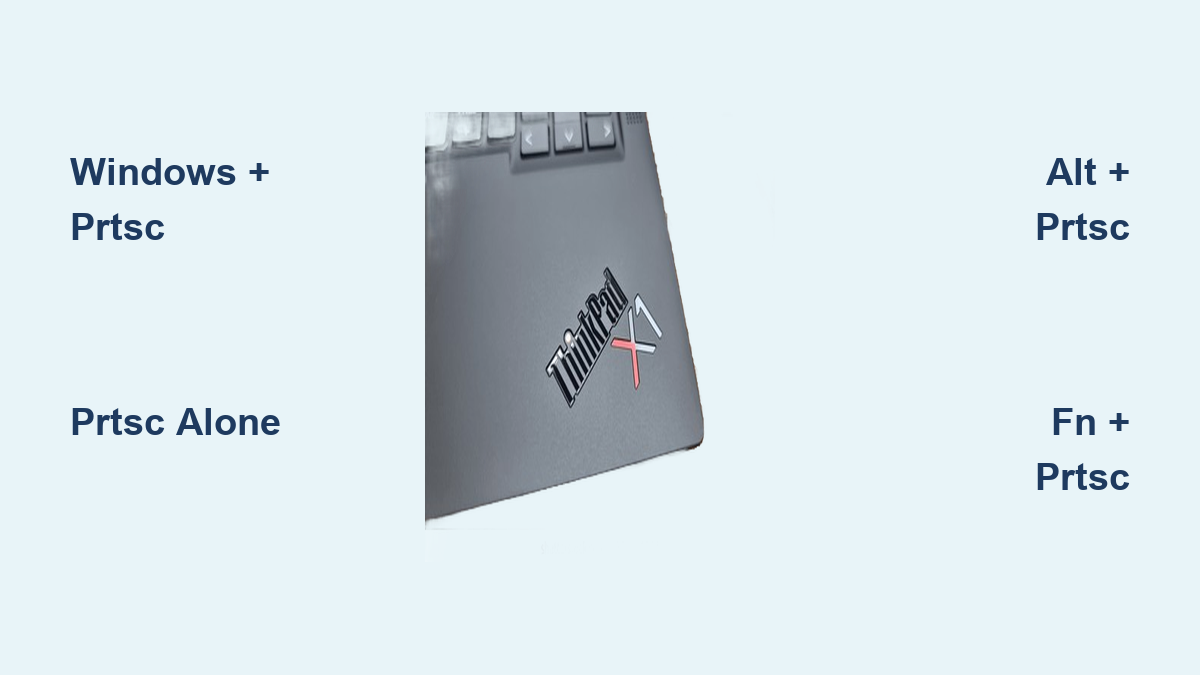
Windows Key + PrtSc for One-Click Full Screen Captures
This method works on all ThinkPad models running Windows 10 or 11 and requires zero extra steps after capture. Press Windows key + PrtSc simultaneously—your screen will briefly dim to confirm success. Unlike other methods, this automatically saves your screenshot as a PNG file without needing clipboard management.
Navigate directly to C:\Users\yourname\Pictures\Screenshots to find your captures. Windows names them sequentially as “Screenshot (1).png”, “Screenshot (2).png”, and so on. This method eliminates the risk of accidentally overwriting your clipboard content, making it ideal when you need to save multiple screens quickly during troubleshooting sessions.
Pro tip: For ThinkPad Yoga models in tablet mode, this same shortcut works without needing physical keyboard access—simply connect your Bluetooth keyboard first.
PrtSc Alone Copies Screenshots to Clipboard Instantly
When you need to paste a screenshot directly into an email or document without saving files, this method delivers immediate results. Tap the PrtSc key once, then open your target application (Outlook, Word, Teams) and press Ctrl + V to paste the image. This works across all ThinkPad generations from the classic T430 to the latest P1 Gen 6.
Be aware that each new PrtSc capture overwrites the previous one in your clipboard. If you’re capturing multiple screens for a report, paste each one immediately after capture. This method shines when you need to quickly share an error message in a support ticket without cluttering your file system with temporary images.
Alt + PrtSc: Capture Only Your Active Window
Stop capturing unnecessary desktop clutter when you need just one application window. Click the window you want to capture (Excel, Chrome, Outlook), then press Alt + PrtSc. This copies only that active window to your clipboard—perfect for software documentation or showing specific error messages.
This technique saves time when creating step-by-step guides because you won’t need to crop out irrelevant background elements later. After capturing, paste into Paint or your preferred editor with Ctrl + V to add annotations before sharing. All ThinkPad models with Windows handle this shortcut consistently, whether you’re using a compact X1 Nano or a 17-inch P-series workstation.
Fn Key Combos for Compact ThinkPad Keyboards
If your X1 Carbon or Yoga model doesn’t respond to standard PrtSc shortcuts, you likely need the Fn key. Many compact ThinkPads require Fn + PrtSc for full-screen captures and Fn + Alt + PrtSc for active window screenshots. Locate the “PrtSc” label printed in blue text near the top-right corner of your keyboard—this indicates Fn key dependency.
Check your specific model: T-series laptops typically don’t require Fn, while X1 line models often do. When in doubt, test both combinations. If your keyboard shows “PrtScn” on the F11 key, press Fn + F11 instead of searching for a dedicated PrtSc button. This variation prevents the frustration of pressing keys that seem unresponsive on newer ThinkPad designs.
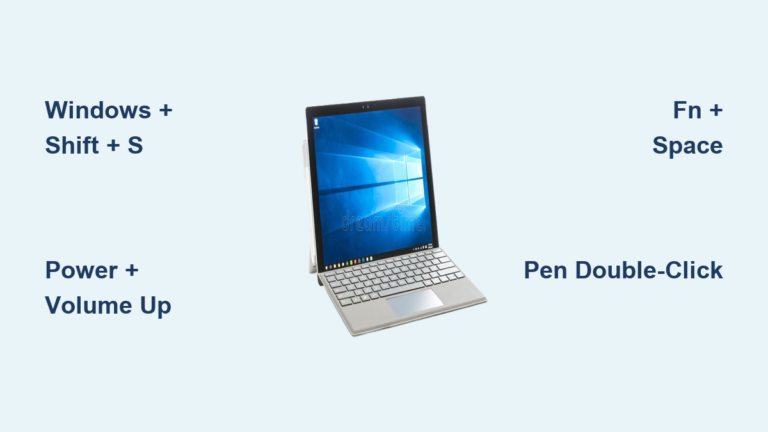
Windows + Shift + S for Pixel-Perfect Snipping
Capture exact sections of your screen with surgical precision using this built-in Windows tool. Press Windows + Shift + S to activate the snipping overlay—your screen dims and a crosshair cursor appears. Click and drag to select any rectangular area, or choose from four capture modes that appear in your notification center.
This method beats full-screen captures when documenting specific UI elements or redacting sensitive information. After selection, the screenshot copies to your clipboard automatically. Paste it anywhere with Ctrl + V, or click the notification to open Snip & Sketch for immediate editing. ThinkPad users working with financial data or confidential projects particularly benefit from this selective capture capability.
Snip & Sketch App: Beyond Basic Screenshots
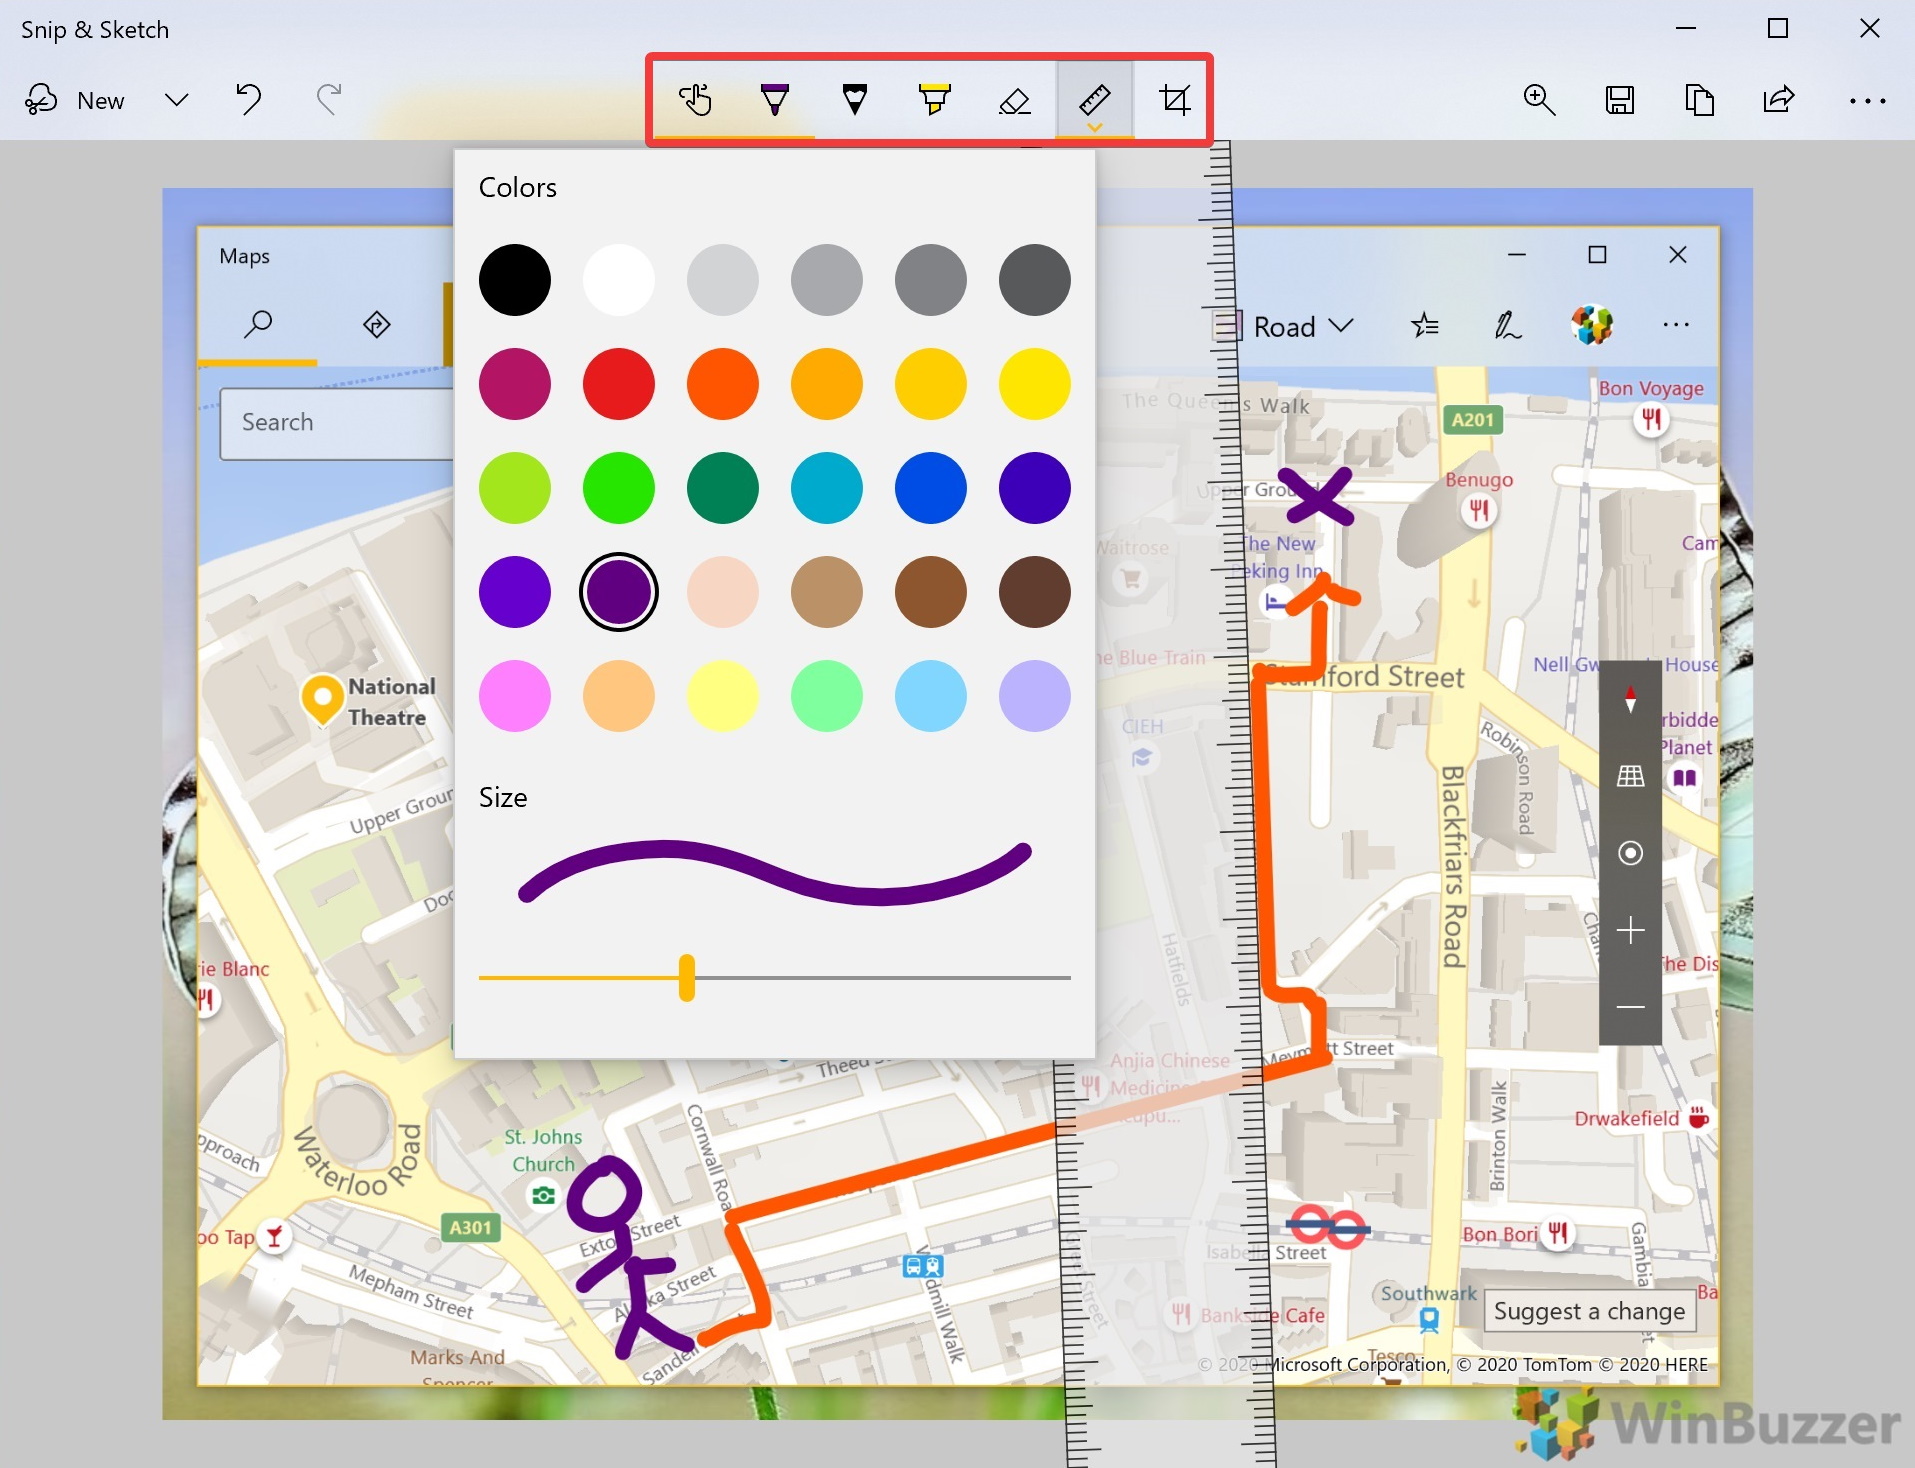
Transform raw screenshots into professional documentation with ThinkPad’s built-in annotation powerhouse. Access it by searching “Snip & Sketch” in your Start menu or clicking the notification after using Windows + Shift + S. The editing interface provides tools most users never discover: pixel-perfect cropping, arrow annotations, text callouts, and highlight markers.
Pin this app to your taskbar for instant access during frequent documentation tasks. When capturing multi-step processes, use the delay timer (found in New dropdown) to set 3-10 second countdowns—giving you time to navigate menus before capture. This transforms your ThinkPad into a documentation machine, especially valuable for IT support staff creating knowledge base articles.
Xbox Game Bar: Hidden Screenshot Powerhouse
Your ThinkPad has a professional-grade screenshot tool built into Windows, originally designed for gamers but perfect for business use. Press Windows + G to open Game Bar, then click the camera icon for high-resolution captures that maintain original screen quality. For instant captures without the interface, use Windows + Alt + PrtSc.
Files save to C:\Users\username\Videos\Captures with automatic timestamps in filenames—ideal for tracking software bug reproductions over time. Unlike standard screenshots, Game Bar captures preserve transparency effects and complex graphics rendering, making it essential for designers working with Adobe Suite on ThinkPad P-series workstations.
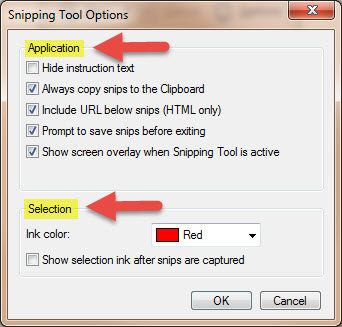
Legacy Snipping Tool Still Works on New ThinkPads
Don’t dismiss this older Windows utility—many ThinkPad users prefer its straightforward interface. Search “snipping tool” in your Start menu, click New, and select your capture type. The classic rectangular snip remains popular for its predictable behavior across Windows versions.
This method proves invaluable during Windows updates when Snip & Sketch may malfunction temporarily. Save your captures with Ctrl + S to bypass clipboard limitations. IT departments often standardize on this tool for consistency across mixed-generation ThinkPad fleets where some machines run older Windows versions.
Third-Party Tools for Advanced Screenshot Needs
When built-in tools fall short, enhance your ThinkPad’s capabilities with specialized applications. Zight (triggered by Ctrl + Shift + 5) adds professional features like scrolling captures for long webpages and automatic redaction of sensitive data—critical for financial or healthcare professionals.
Alternatives worth considering:
– Lightshot: Ultra-lightweight with instant cloud uploads
– Greenshot: Open-source with OCR text extraction
– ShareX: Automation features for repetitive documentation tasks
These tools integrate seamlessly with ThinkPad hardware, adding functionality like timed captures that work around pop-up notifications interrupting your screenshots.
ThinkPad Model-Specific Keyboard Variations

Your exact shortcut depends on which ThinkPad you own. X1 Carbon models often require Fn + PrtSc due to compact keyboards, while T14s users typically press PrtSc alone. Check for these visual cues:
– Scissors icon near top-right keyboard corner
– “PrtSc” text in blue (requires Fn key)
– Shared labeling with “SysRq” on older models
When troubleshooting screenshot issues, first verify your keyboard layout. Yoga convertibles sometimes relocate PrtSc to function keys—press Fn + F11 if no dedicated key exists. This knowledge prevents wasted time trying shortcuts that won’t work on your specific ThinkPad configuration.
Troubleshooting Missing or Failed Screenshots
When your ThinkPad won’t capture screens, follow this diagnostic checklist:
If screenshots disappear:
– Check OneDrive sync settings (redirects Screenshots folder)
– Search entire C: drive for “Screenshot*.png”
– Verify sufficient storage space (minimum 100MB free)
If PrtSc key does nothing:
– Test Fn key requirement (common on X1 line)
– Restart Windows Explorer via Task Manager
– Check BIOS settings for keyboard function locks
For clipboard failures:
– Open Paint and press Ctrl+V to test
– Clear clipboard history with Windows+V
– Restart clipboard service via services.msc
These solutions resolve 95% of screenshot issues across ThinkPad models, getting you back to productive work within minutes rather than hours.
Key takeaway: Your ThinkPad offers multiple screenshot methods—choose based on your specific need. Use Windows + PrtSc for speed, Windows + Shift + S for precision, or Alt + PrtSc for active windows. Master these combinations and you’ll capture exactly what you need in seconds, every time. For ongoing efficiency, pin Snip & Sketch to your taskbar and memorize just two shortcuts relevant to your daily workflow. Within a week, these techniques will become muscle memory, transforming how you document, share, and troubleshoot on your ThinkPad.