How to Reset ASUS Laptop: Quick Steps
Your ASUS laptop has become sluggish, apps crash constantly, or you’re preparing to sell it. Whatever the reason, knowing how to reset a laptop ASUS properly can restore your machine to peak performance. This guide walks you through two proven methods to reset any ASUS laptop running Windows 10 or 11, from quick file-preserving resets to complete data-wiping restorations. Whether you own a ZenBook, ROG, TUF Gaming, or VivoBook model, these steps will get your system back to factory condition.
Critical Pre-Reset Checklist for ASUS Laptops
Before initiating any reset procedure, take these essential steps to protect your data and ensure a smooth restoration process. Skipping these could result in permanent data loss or incomplete reset.
Immediate Backup Actions You Must Take
Save these critical items before proceeding:
– Personal files: Documents, photos, videos, and music from your user folders
– Browser data: Export bookmarks and saved logins from Chrome, Firefox, or Edge
– Software licenses: Product keys for paid applications like Microsoft Office
– ASUS-specific drivers: Download latest versions from ASUS support site for your exact model number
Fast backup method: Connect an external drive and manually copy your Documents, Pictures, and Desktop folders. While Windows has built-in backup tools, manual copying gives you complete control over what gets saved.
Power and Connection Requirements
Keep your ASUS laptop plugged into a stable power source throughout the entire reset process. A power interruption during reset can corrupt your system and require more complex recovery. Maintain a reliable internet connection too—Windows needs to download fresh installation files during restoration. For models with ASUS Battery Health Charging enabled, you might need to temporarily disable it in BIOS to ensure sufficient power during the reset.
Windows Built-in Reset Method: Quick Factory Restoration
This is the fastest way to reset your ASUS laptop without creating additional recovery media. Perfect when Windows boots normally but performance has degraded.
Accessing Reset Options on Your ASUS Laptop
- Click Start → Settings (or press
Windows + I) - Navigate to System → Recovery
- Click Reset PC under “Reset this PC”
Choosing the Right Reset Type for Your Situation
Keep my files option:
– Removes apps and settings only
– Preserves personal files in Documents, Pictures, Desktop
– Takes 10-20 minutes
– Best for when you need a performance boost but want to keep personal files
Remove everything option:
– Complete factory reset
– Erases all files, apps, settings
– Ideal for selling your ASUS laptop or severe issues
– Takes 15-30 minutes
Secure Drive Wiping Options (For “Remove Everything” Only)
When preparing to sell your ASUS laptop, choose the appropriate data removal depth:
Just remove my files – Fast option, 10-20 minutes
– Basic data removal
– Files potentially recoverable with specialized software
– Suitable only if you’re keeping the laptop
Remove files and wipe drive – Secure option, 30-60 minutes
– Military-grade data destruction
– Prevents any data recovery
– Required when selling or disposing of your ASUS laptop
Monitoring Your ASUS Laptop Reset Progress
After confirming your choices:
– System restarts automatically
– Clear percentage completion displays on screen
– Multiple restarts are normal
– Total time: 10-30 minutes based on your selections
– If process freezes at same percentage for 30+ minutes, power cycle and retry
Clean Install via Recovery Media: When Standard Reset Fails
Use this method when Windows won’t boot or you want a completely fresh installation without ASUS bloatware.
Creating ASUS Laptop Recovery USB Drive
Requirements:
– 8GB+ USB drive (16GB recommended)
– USB 3.0 for faster installation
– All USB data will be erased
Steps:
1. Download Windows Media Creation Tool from Microsoft
2. Run tool → “Create installation media”
3. Select language, Windows edition, 64-bit architecture
4. Choose USB drive when prompted
Booting Your ASUS Laptop from USB
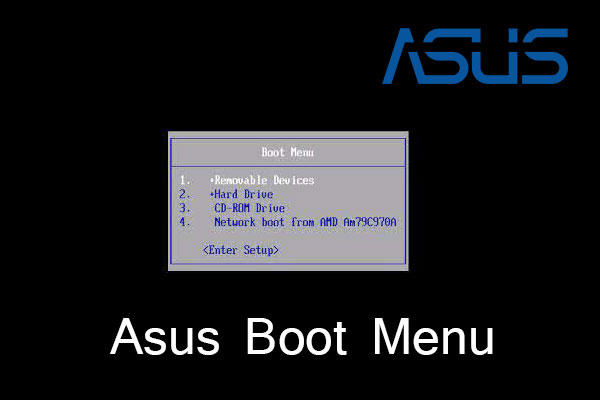
BIOS Method:
1. Insert USB, power on laptop
2. Press F2 repeatedly to enter BIOS
3. Navigate to Boot menu
4. Move USB to first boot position
5. Save and exit (F10)
Quick Boot Menu Method:
1. Power on, immediately press Esc repeatedly
2. Select USB drive from boot menu
Clean Installation Process for ASUS Hardware
- Windows Setup: Select language, time, keyboard
- Install Now: Click and accept license terms
- Product Key: Skip if Windows was previously activated
- Custom Installation: Choose “Custom: Install Windows only”
- Drive Selection: Delete all existing partitions → Select unallocated space → Next
- Completion: System auto-restarts several times
Post-Reset Configuration for ASUS Laptops
Your ASUS laptop restarts to a fresh Windows installation. These immediate actions ensure proper functionality.
Critical Driver Installation Sequence
Install drivers in this priority order for optimal performance:
1. Chipset drivers (Intel/AMD) – Download from ASUS support site
2. Graphics drivers (Intel/NVIDIA/AMD)
3. Network drivers (Wi-Fi and Ethernet)
4. Audio drivers (Realtek/ASUS)
5. Touchpad drivers (ASUS Precision/Synaptics)
6. Function keys (ATK Package/ASUS System Control)
Essential Software Setup After Reset
- Windows Updates: Run immediately for security patches
- Antivirus: Install before browsing
- ASUS Utilities: MyASUS, Battery Health Charging from Microsoft Store
- Productivity apps: Office, browsers, PDF readers
ASUS-Specific System Optimization
- Power plan: Configure balanced or ASUS-specific power modes
- Display: Adjust brightness, color temperature, and scaling
- Touchpad: Configure ASUS Precision Touchpad gestures
- Keyboard backlight: Set preferences for keyboard lighting
Troubleshooting Common ASUS Laptop Reset Problems
Reset Fails or Freezes at Same Percentage
Quick fix: Hold power button 10 seconds to force shutdown, then restart reset. If built-in reset repeatedly fails, switch to recovery media method. ASUS laptops with dual drives sometimes require disconnecting secondary storage before reset.
Laptop Won’t Boot After Reset
Boot repair process:
1. Boot from recovery USB
2. Select “Repair your computer”
3. Choose “Startup Repair”
4. If unsuccessful, access Command Prompt and run:
bootrec /fixmbr

   bootrec /fixboot

   bootrec /rebuildbcd
Missing Drivers After Reset
Identify missing drivers:
1. Press Windows + X → Device Manager
2. Look for yellow exclamation marks
3. Visit support.asus.com for model-specific drivers
4. Windows Update often auto-installs many drivers
Windows Activation Issues on ASUS Hardware
Most ASUS laptops use digital licenses tied to hardware. If activation fails:
1. Settings → Update & Security → Activation
2. Click “Troubleshoot”
3. Contact Microsoft support if issues persist
Time Estimates by ASUS Laptop Model Type
| Scenario | ASUS ZenBook (SSD) | ASUS TUF Gaming (SSD) | ASUS VivoBook (HDD) |
|---|---|---|---|
| Keep files | 10-15 min | 12-18 min | 15-25 min |
| Remove files | 15-20 min | 18-25 min | 25-35 min |
| Secure wipe | 20-30 min | 25-40 min | 45-60 min |
Pro tip: ASUS laptops with PCIe NVMe SSDs reset 2-3x faster than traditional SATA SSDs or HDDs.
Security Best Practices When Resetting ASUS Laptops
Before Selling Your ASUS Laptop
Always select “Remove files and wipe drive” when preparing for sale. This prevents data recovery even with forensic tools. For maximum security on business laptops, consider third-party wiping tools that meet DoD 5220.22-M standards.
Post-Reset Security Setup
- Install all Windows updates immediately
- Enable Windows Defender or install reputable antivirus
- Create regular backups using File History or cloud storage
- Configure ASUS Battery Health Charging to 60% for extended battery life
ASUS Recovery Partition: The F9 Method
Press F9 during startup to access the ASUS factory recovery environment. This restores your laptop to original factory state including all ASUS software. Note that this option may not be available on newer Windows 11 models where Microsoft has limited OEM recovery partitions.
When to use this method:
– You want all original ASUS utilities restored
– Your Windows installation won’t boot at all
– You prefer ASUS’s recovery interface over Windows’ built-in reset
Final Note: Knowing how to reset a laptop ASUS properly gives you powerful troubleshooting capability for any Windows 10 or 11 ASUS model. The Windows built-in method works for 90% of reset scenarios, while recovery media handles more complex situations. Always backup first, keep your power connected, and install critical drivers immediately after reset. If you’re selling your ASUS laptop, the secure wipe option is non-negotiable for protecting your personal data. For persistent issues after reset, contact ASUS support with your model number for manufacturer-specific assistance.