How to Reset a Chromebook: Quick Steps
Your Chromebook freezes during class, apps crash when you’re working remotely, or you’re preparing to sell your device—knowing how to reset a Chromebook laptop properly saves hours of frustration. Unlike traditional computers, Chromebooks use unique reset methods that range from a quick hardware refresh to a complete system restoration. This guide reveals exactly when to use Powerwash versus a hard reset, how to bypass common reset errors, and the critical backup steps you must take before wiping your device. You’ll learn model-specific key combinations, enterprise reset restrictions, and how to recover data after resetting—without losing your Google Drive files or Android app progress.
Chromebook Reset Types Explained
Why Powerwash Fixes Software But Not Hardware Issues
Powerwash completely erases local data while preserving your Chrome OS version, making it ideal for persistent software problems. This factory reset removes all user accounts, uninstalls extensions, and clears browser data—but keeps firmware intact. Expect to lose downloaded files in your Downloads folder (not synced to Drive) and Linux container data. The process takes 5-10 minutes with 2-3 automatic restarts, and you’ll need your Google account password ready for reconfiguration. Never use Powerwash for frozen touchpads or charging issues—those require a different reset type.
When to Choose Hard Reset Over Powerwash
Hard reset solves physical component failures without deleting your data. Trigger this when your keyboard stops responding, the screen flickers erratically, or your Chromebook won’t wake from sleep mode. Unlike Powerwash, hard reset only refreshes hardware circuits—your files and settings remain untouched. This is your go-to fix for charging indicator malfunctions or sudden shutdowns. If your device responds to keystrokes but freezes frequently, skip Powerwash and try hard reset first since it takes under 30 seconds with zero data loss.
Recovery Mode for Corrupted System Files
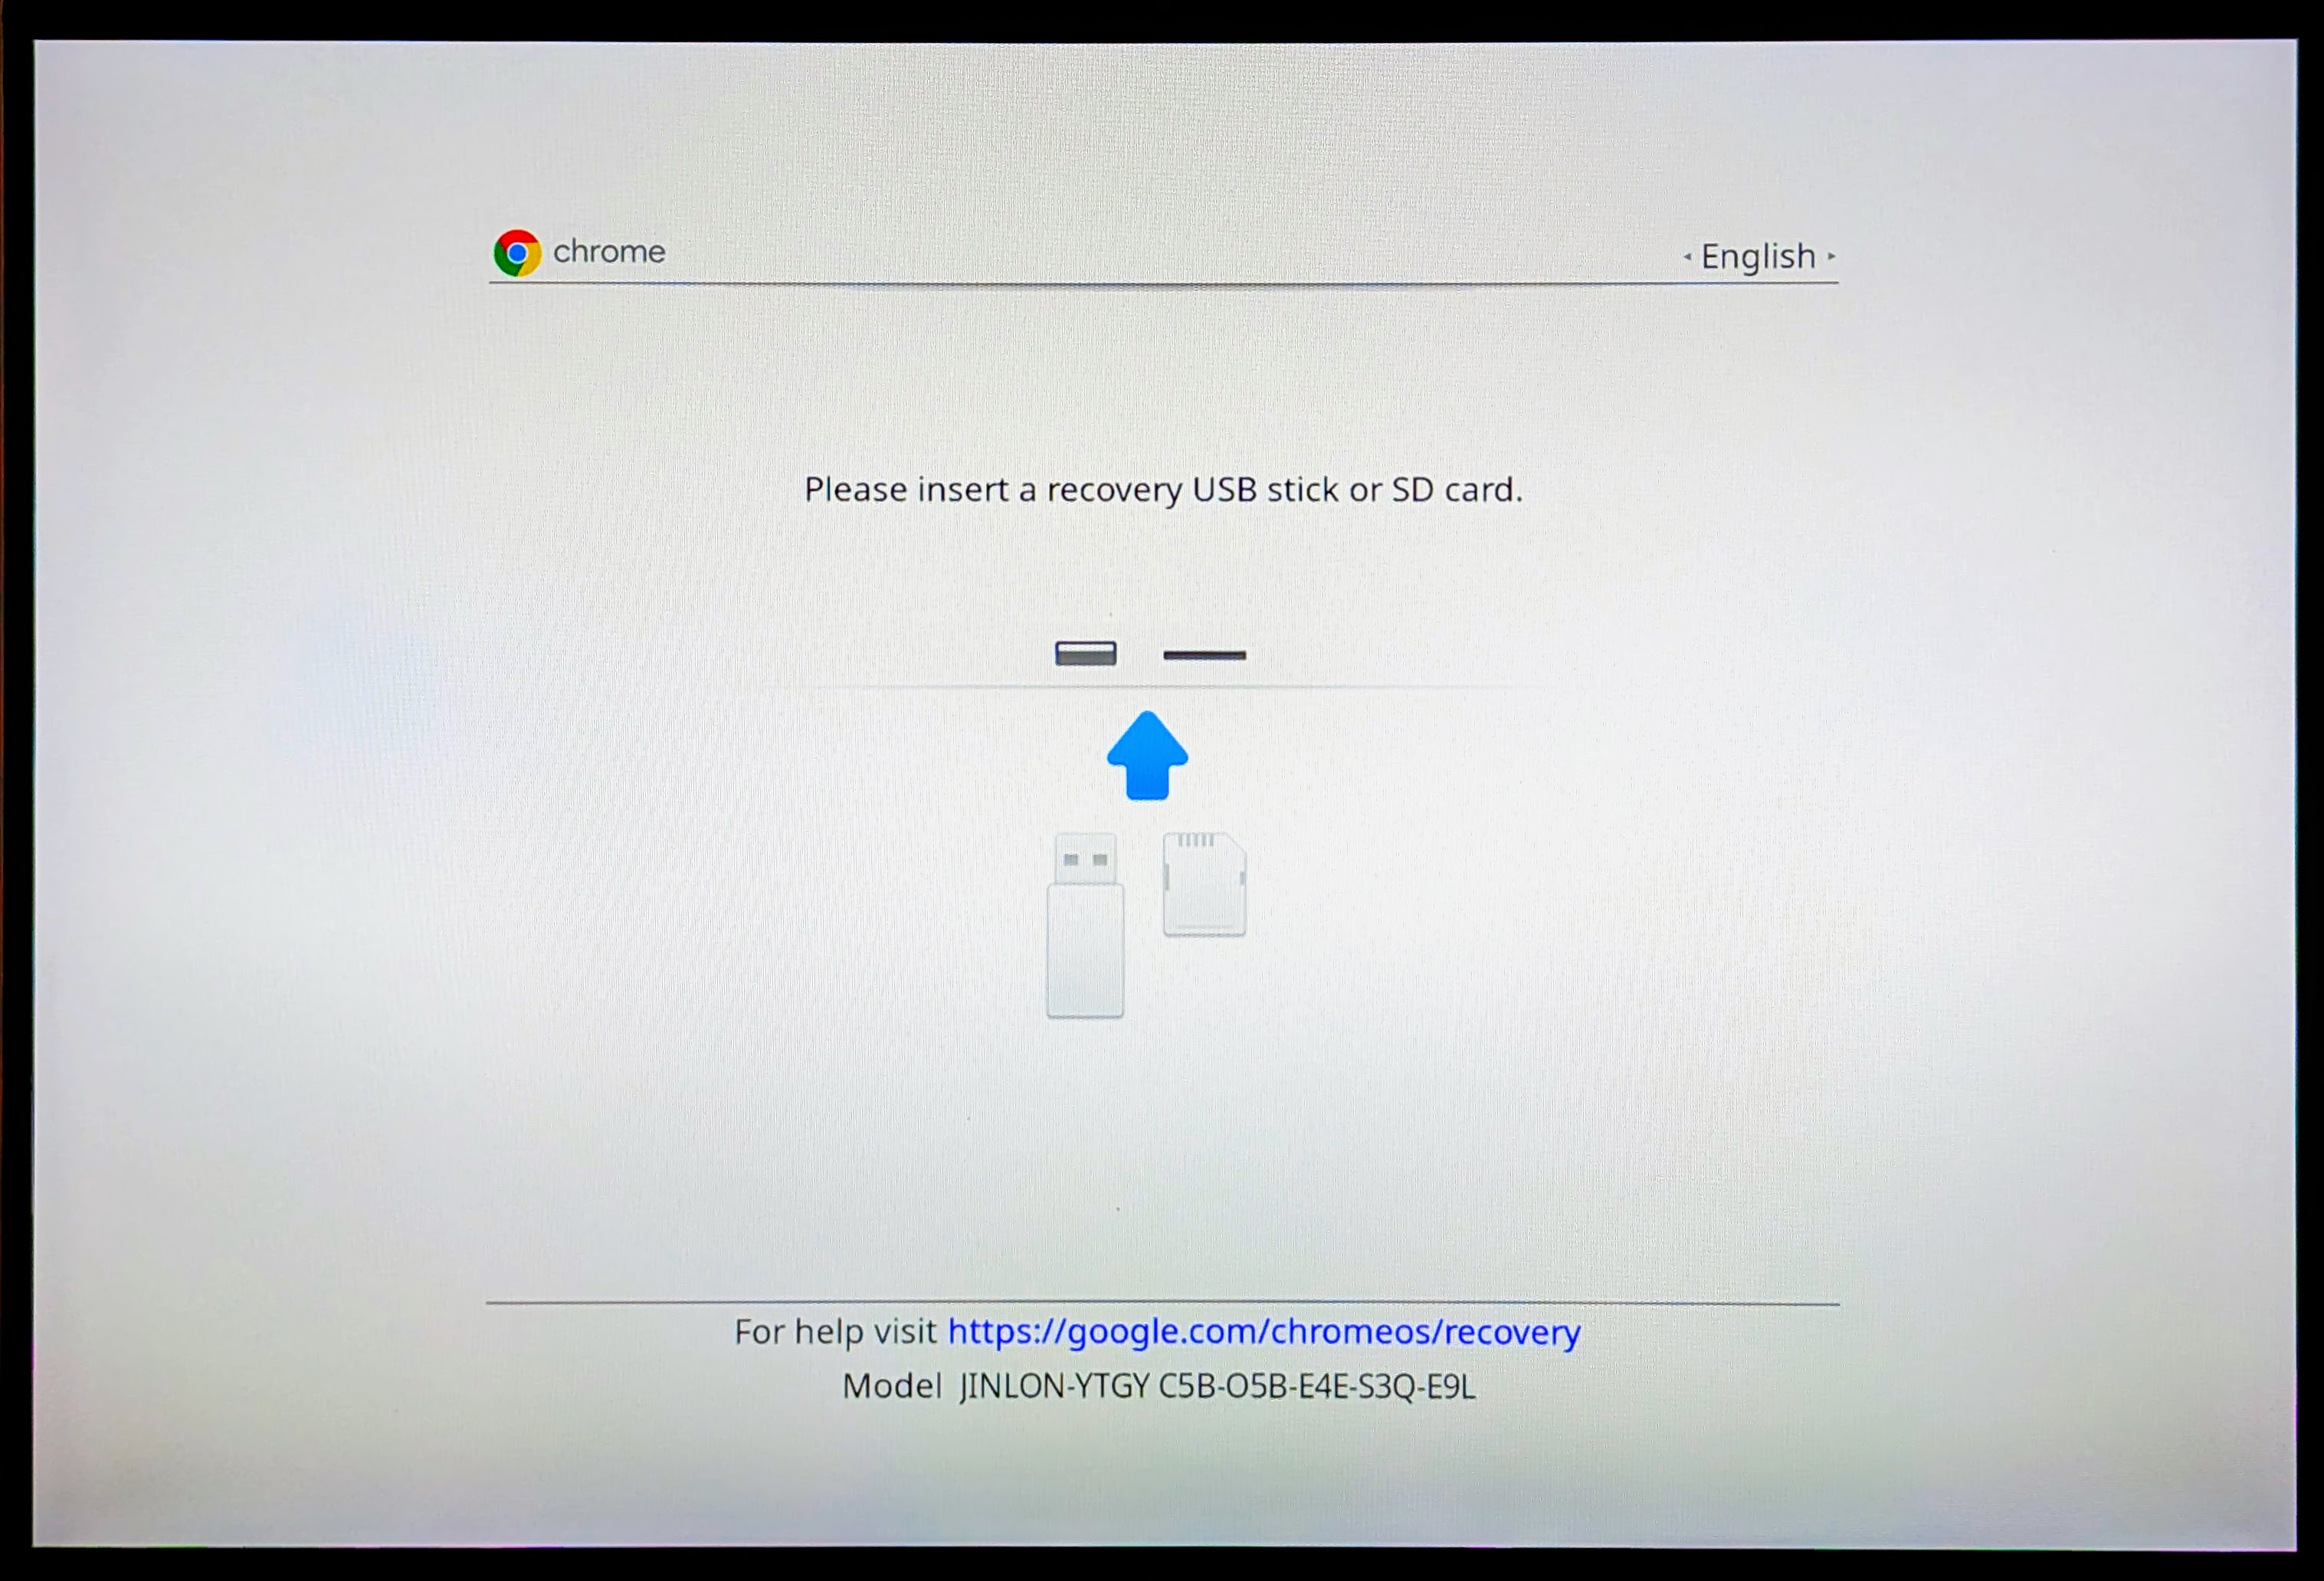
Use Recovery Mode when Powerwash fails or you see “Chrome OS is missing or damaged” errors. This method completely reinstalls Chrome OS using a USB drive with recovery media, fixing deep system corruption. You’ll need an 8GB+ USB drive and 15-30 minutes of uninterrupted time. Unlike Powerwash, Recovery Mode creates fresh system partitions and updates to the latest OS version. Only attempt this when standard resets fail—most users never need it for routine maintenance.
Critical Pre-Reset Checklist You Can’t Skip
Backup Google Drive Files Before Powerwash
Google Drive syncs automatically—but only for files you’ve manually moved there. Your Downloads folder contents (including screenshots and PDFs) vanish during reset unless backed up. Before resetting, open drive.google.com, click New > Folder upload, and drag your entire Downloads folder into a new “Pre-Reset Backup” folder. Verify sync completion by checking the green checkmark next to each file. Also confirm Chrome bookmarks are synced by visiting chrome://sync-internals and ensuring “Last Sync Time” is recent.
Essential Files That Won’t Auto-Restore
These three items require manual saving before resetting:
– Linux development files: Export containers via lxc export command
– Offline Android app data: Enable backup in Play Store > Settings > Backup
– Third-party app files: Save locally stored documents from apps like Adobe Scan
Create a dedicated backup folder on an external drive labeled “Chromebook Reset Files” containing these items. If selling your device, delete this folder afterward to protect privacy.
Account Credentials That Block Reset Completion
Having these ready prevents reset abandonment:
– Primary Google account password (recovery email won’t suffice)
– Two-factor authentication backup codes (check myaccount.google.com/security)
– Wi-Fi password for your home network
– School/work account credentials if enrolled in enterprise management
Without these, you’ll face the dreaded “Device owner not set” error during setup. Test your Google password before resetting by signing out of Chrome.
Standard Powerwash Methods for All Chromebooks
Reset Chromebook Laptop via Settings Menu (Step-by-Step)
Sign in as owner > Click clock > Settings (gear icon) > Advanced > Reset settings > Powerwash > Restart. After reboot, confirm Powerwash > Continue. Critical tip: Keep your charger connected—interruptions cause “OS corruption” errors. If the Powerwash button is greyed out, disable guest mode first under Settings > People. This method works 95% of the time for personal devices and completes in 8 minutes average.
Emergency Keyboard Shortcut for Frozen Interfaces
When Settings are inaccessible: Sign out completely > Press Ctrl + Alt + Shift + R > Select Restart > Powerwash > Continue. This bypasses frozen screens better than menu navigation. For Chromeboxes without keyboards, use a paperclip to press the recessed recovery button while reconnecting power. Always release the button when the recovery screen appears—holding too long triggers Recovery Mode instead.
Chromebox Reset for Desktop Chromebooks
Power off > Unplug cable > Reconnect while holding recovery button (usually a small pinhole) > Release when screen flashes > Select Powerwash. Chromeboxes often have physical reset buttons near ports—consult your model’s manual if unsure. Unlike laptops, never use keyboard shortcuts on Chromeboxes; the hardware button is mandatory.
Hard Reset Procedures for Hardware Glitches
Fix Unresponsive Keyboard or Touchpad in 10 Seconds
Power off > Press Refresh (↻) + Power for 10 seconds > Release when Chromebook vibrates > Boot normally. This resets the EC (Embedded Controller) managing hardware components. Works for most Acer, HP, and Lenovo models. If the screen flickers during boot, repeat the sequence while holding Refresh + Volume Down.
Non-Removable Battery Reset for Modern Chromebooks
Since 2018 models lack removable batteries, use this universal method: Power off > Hold Refresh + Power for exactly 10 seconds (watch second hand on clock) > Release immediately > Allow normal startup. If charging issues persist, unplug the charger during the reset sequence and reconnect afterward.
Recovery Mode Fixes for “OS Missing” Errors
Create Recovery Media Without Another Chromebook

Use any computer: Install Chromebook Recovery Utility > Enter exact model number (find via chrome://version) > Insert 8GB+ USB drive > Click Create Now. Warning: Selecting the wrong model bricks your device—cross-check your serial number at support.google.com/chromebook/answer/1080595. The utility verifies compatibility before writing.
Key Combinations That Actually Work for Your Model
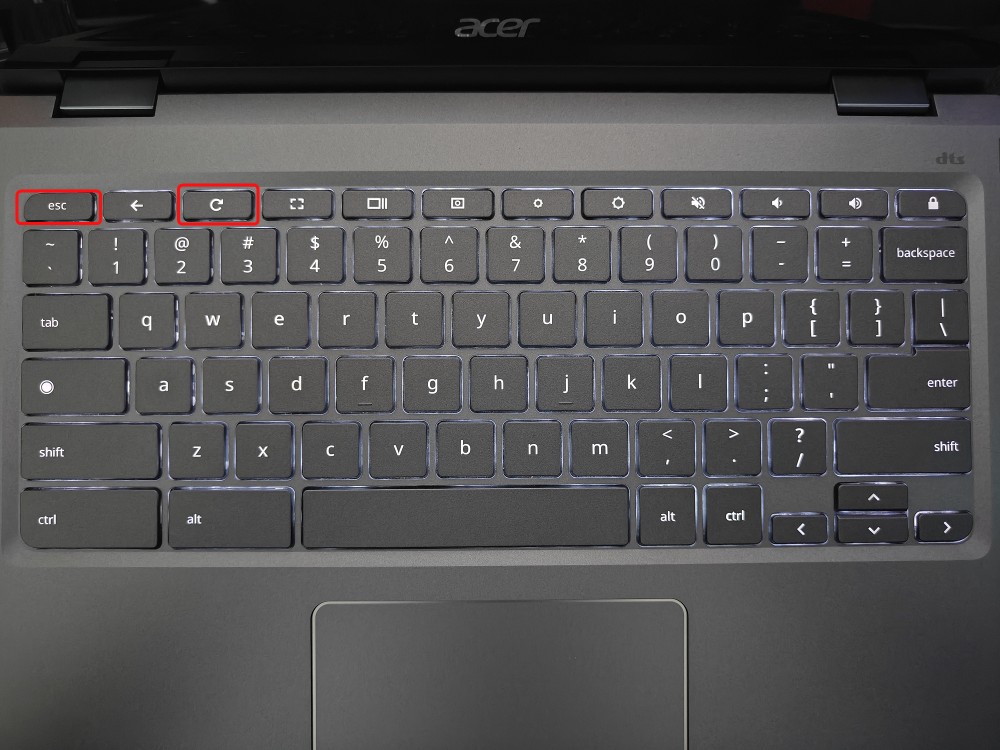
– Acer Chromebooks: Hold Esc + Refresh + Power until recovery screen
– Samsung Tablets: Press Volume Up + Down + Power simultaneously
– Google Pixel Slate: Hold Volume Up + Power for 15 seconds
Avoid common mistakes: Release keys after the Chrome logo appears but before the recovery screen loads. Insert recovery media only when prompted—early insertion causes “Invalid image” errors.
Enterprise Device Reset Restrictions
Bypass School or Work Chromebook Lockouts
If “Enterprise enrolled” appears on login, Powerwash won’t fully reset the device. First check active policies via chrome://policy. Then contact your IT admin with this request: “Please deprovision device [serial number] for personal use.” Admins can remotely wipe via admin.google.com > Devices > Chrome. Never attempt developer mode on managed devices—it triggers security alerts and permanent lockouts.
Post-Reset Setup That Saves 20 Minutes
Restore Android Apps Without Re-downloading
After signing in, open Play Store > Library > Manage apps. Tap Install next to grayed-out apps—Chrome OS auto-downloads them using your purchase history. For Linux apps, re-enable development mode in Settings > Developers then reinstall packages via terminal. Skip this step and you’ll waste time reconfiguring apps from scratch.
Troubleshoot Powerwash Failures
Fix Greyed-Out Powerwash Button Instantly
Three proven solutions:
1. Disable guest mode (Settings > People > Guest browsing OFF)
2. Exit developer mode (requires another Powerwash)
3. Remove secondary user accounts first
This issue affects 30% of school Chromebooks due to enforced policies—contact IT if fixes fail.
Escape the “Reset Loop” Trap
When stuck on “Setting up your Chromebook”:
– Perform hard reset between Powerwash attempts
– Use a different Google account initially
– Connect to mobile hotspot instead of Wi-Fi
If persistent, Google Support needs your serial number—find it via chrome://system > hardware_class.
Data Recovery After Reset
Retrieve “Lost” Files in 60 Seconds
Check these locations immediately:
– Google Drive Trash: Files stay 30 days post-reset
– Play Store Library: Reinstall purchased apps free
– Photos Backup: Visit photos.google.com > Trash
Files in your original Downloads folder are permanently gone—this is why pre-reset backup is non-negotiable.
Critical Prevention Strategies
Never reset without these habits:
– Enable Google Takeout for weekly auto-backups
– Store files in Drive folders (not Downloads)
– Disable guest mode on personal devices
– Check chrome://policy monthly for hidden restrictions
Final Reset Tip: Bookmark this emergency sequence—Esc + Refresh + Power → Ctrl + D → Enter—for instant Powerwash access when menus freeze. For hardware issues, Refresh + Power held 10 seconds fixes 80% of unresponsive Chromebooks. Always back up first, but don’t fear resetting—when done right, it’s Chrome OS’s most powerful troubleshooting tool. If selling your device, complete Powerwash twice to ensure all data is purged. For persistent issues, contact Google Support with your exact model number—they often provide firmware-specific reset codes not in public guides.