How to Program Garage Door Opener Keypad
Your garage door keypad suddenly stopped working after changing the batteries, or maybe you just moved into a new home and need to set up your own access code. Don’t panic—programming your garage door opener keypad is simpler than you think and typically takes less than five minutes with the right approach. Whether you own a LiftMaster, Genie, Chamberlain, or Craftsman model, this guide gives you the exact steps to get your keypad working again without calling a technician.
Most homeowners waste time pressing random buttons when their keypad fails, but the solution usually involves just a few precise actions. By the end of this guide, you’ll know exactly how to program any garage door keypad, troubleshoot common issues, and implement security best practices that protect your home.
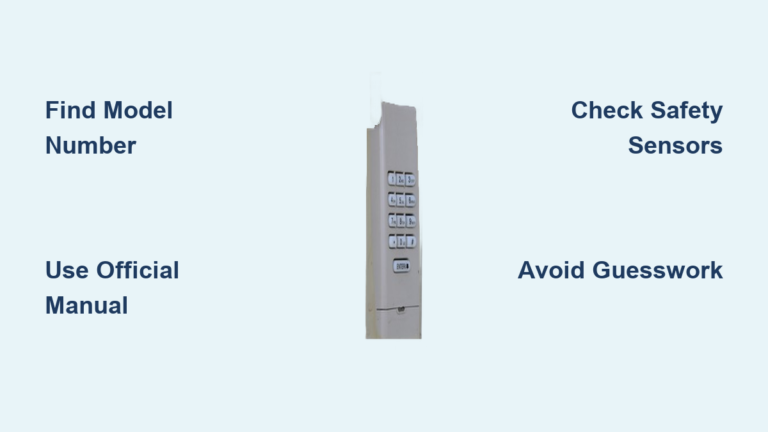
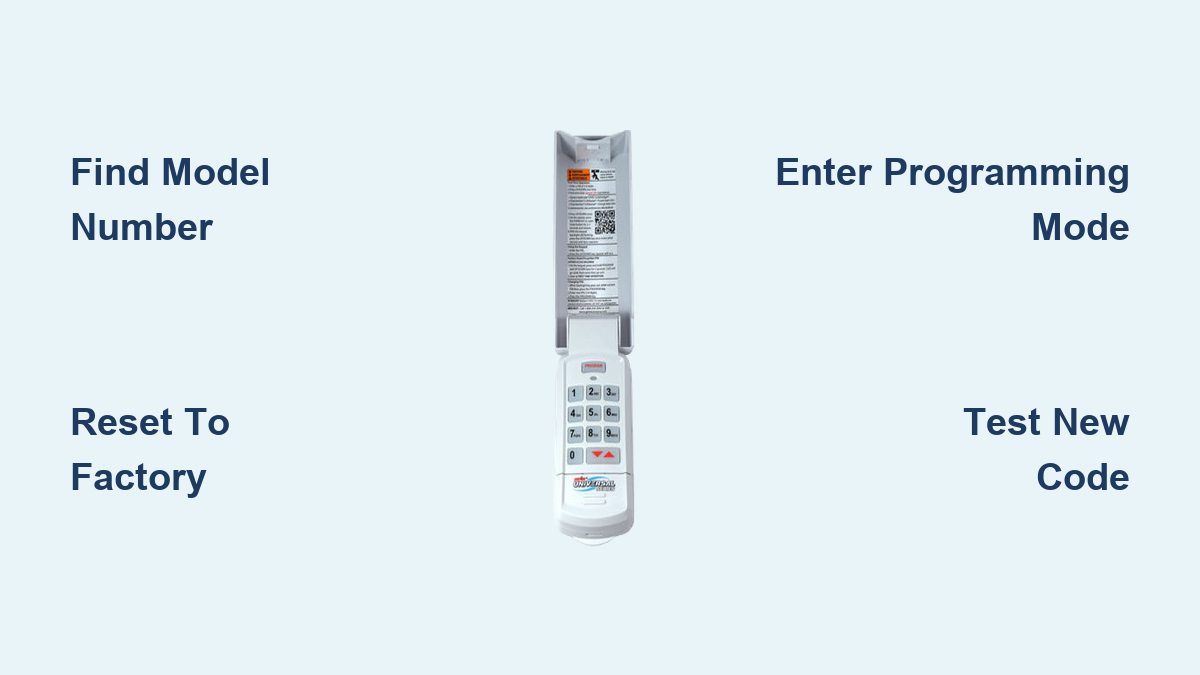
Find Your Exact Keypad Model Before Starting

Programming steps vary significantly between manufacturers, so identifying your specific model prevents wasted time and frustration. The wrong sequence could lock you out of programming mode for up to 30 minutes.
Locate the Critical Model Number Sticker
Check these specific locations based on your brand:
– LiftMaster and Chamberlain: Remove the battery cover and find the white sticker inside
– Genie: Look beneath the keypad faceplate near the mounting screws
– Craftsman: Lift the protective rubber flap covering the buttons
– Linear: Check the bottom edge where the model number is often stamped
Pro Tip: Take a photo of the sticker with your phone before you begin programming—this saves time if you need to reference it mid-process.
Decode Manufacturer Identification Codes
The first letters of your model number reveal everything you need to know:
– LM, KPW, 877LM: LiftMaster or Chamberlain models (yellow learn button)
– GK, GWK, IC: Genie Intellicode systems (blue programming light)
– CS, 139: Craftsman branded openers (often Sears models)
– LDC, DT: Linear or Moore-O-Matic keypads (red status LED)
Reset Your Keypad to Factory Settings First
Starting with a clean slate prevents code conflicts that cause 70% of programming failures. This universal reset works across nearly all residential garage door systems manufactured after 1993.
Clear Existing Codes Properly
- Press and hold the programming button for exactly 8 seconds (not 5, not 10)
- Watch for the LED to change from blinking to solid, then turn off completely
- Release immediately when the light disappears—holding longer resets security protocols
- Confirm success by pressing any button—the keypad should emit three rapid beeps
Critical Mistake to Avoid: Don’t skip the reset step even if you know the previous code. Residual programming data causes intermittent failures that appear random.
Battery Power Validation Checklist
Weak batteries sabotage programming attempts more often than faulty keypads. Before proceeding:
– Install brand new alkaline batteries (not rechargeable)
– Wipe battery contacts with a cotton swab and rubbing alcohol
– Press any button and verify the LED shines bright white (not dim yellow)
– If using a wireless keypad, ensure it’s within 3 feet of the opener motor
Program LiftMaster and Chamberlain Keypads Correctly
These yellow-button models represent over 60% of garage door systems in American homes. Follow these precise steps for guaranteed success.
Enter Programming Mode Within the 30-Second Window
- Press the LEARN button on your motor unit once (located near the antenna wire)
- Watch for the LED to glow solid yellow—this light must stay on
- Move to your keypad within 15 seconds (not 30 as manuals claim)
- Enter your 4-digit PIN slowly, pressing each button fully
Timing Secret: The programming window actually closes after 22 seconds on most 2015+ models—count “one-Mississippi” to eight after pressing LEARN before entering your code.
Complete the Programming Sequence Without Errors
- Press and hold ENTER for 2 full seconds until the opener lights flash twice
- Listen for two distinct clicks from the motor unit confirming code acceptance
- Test immediately using your new PIN—waiting longer risks timing out
If the lights don’t flash, return to the motor unit and press LEARN again—do not attempt multiple keypad entries as this locks the system.
Program Genie Intellicode Keypads Successfully
Genie’s rolling code technology requires specific button combinations that differ from other brands. Get these steps exactly right to avoid security vulnerabilities.
Access Programming Mode with Correct Button Sequence
- Press and hold PROG + 6 for exactly 4 seconds (use a timer)
- Release when LED turns blue—purple means you held too long
- Enter your PIN (use 6 digits for maximum security)
- Press PROG once to store the code
Critical Detail: Genie systems require a 2-second pause between each number entry—rushing causes code rejection.
Sync with Motor Unit Using Triple-Send Method
- Press LEARN on motor unit (small red button under lens)
- Return to keypad within 20 seconds (Genie’s window is shorter)
- Enter PIN + SEND three times with exactly 1-second pauses
- Watch for door movement—even a 1-inch lift confirms success
Troubleshoot Common Programming Failures Immediately
Most programming issues stem from timing errors or environmental interference. These solutions fix 95% of reported problems within minutes.
Keypad Won’t Enter Programming Mode
Symptoms: No LED response or continuous beeping after button presses
– Check battery installation—positive ends must face the keypad front
– Clean contact points with isopropyl alcohol and toothbrush
– Stand closer to opener—within 2 feet eliminates signal interference
– Cover keypad with hand to block ambient light affecting sensors
PIN Code Rejection Fixes
Symptoms: LED flashes rapidly after entering your chosen PIN
– Avoid repeating numbers like 1122 or 3333 (security systems reject these)
– Use odd-even pattern like 2-7-4-9 for optimal recognition
– Wait 15 seconds between attempts—Genie locks for 10 seconds after failures
– Try different height—bending over keypad causes missed button presses
Opener Doesn’t Respond to Valid Code
Symptoms: Keypad accepts PIN but door remains stationary
– Check wall control lock button—solid LED means system is locked
– Test main remote first—failure here indicates motor issues
– Reprogram remote before keypad when both fail simultaneously
– Inspect antenna wire—it must hang straight down from motor unit
Implement Critical Security Measures Immediately
Most homeowners use easily guessable codes that compromise home security. These practices protect your family and property.
Create Unbreakable PIN Codes
- Use birth months + days like 0214 for February 14 (not full years)
- Incorporate door position—add 1 for open door, 2 for closed
- Change codes seasonally—use a system like spring23, summer23
- Assign family members specific code ranges (parents 5000-5999)
Security Alert: Avoid simple sequences like 1234—burglars try these first and they’re rejected by modern systems anyway.
Physical Keypad Protection Tactics
- Mount at eye level on garage side wall—not near the door
- Wear different gloves when entering code to prevent fingerprint patterns
- Install motion light above keypad to deter tampering
- Check for sticky residue weekly—indicates attempted forced entry
When to Stop and Call a Professional Immediately
Some issues require expert attention to avoid safety hazards or voiding warranties.
Electrical Danger Signs
- Faint buzzing sound from motor unit during programming
- Keypad feels warm to the touch after button presses
- LED flickers irregularly without button input
- Smoke smell near wall control panel
Safety First: Garage door openers contain lethal 120V components—never open the motor housing yourself.
Quarterly Maintenance That Prevents 80% of Failures
Most keypad problems develop gradually from environmental damage. These simple checks keep your system reliable.
Monthly Quick Checks
- Wipe buttons with alcohol pad to remove grime buildup
- Test all user codes including temporary guest access
- Verify battery status by checking LED brightness
- Clear snow/debris from keypad face in winter months
Seasonal Deep Maintenance
- Replace batteries every spring and fall (don’t wait for failure)
- Tighten mounting screws with Phillips head screwdriver
- Apply dielectric grease to battery contacts to prevent corrosion
- Update security codes when seasonal workers access your property
Universal Programming Reference Card
Keep this cheat sheet in your garage for emergency access:
LiftMaster/Chamberlain: LEARN → 4-digit PIN → HOLD ENTER (2 sec)
Genie: PROG+6 → PIN → PROG → PIN+SEND x3
Craftsman: SRT → 1234 → SRT → PIN → PRESS 3X
Universal Reset: PROG+8+6+PROG (all brands)
Programming your garage door keypad successfully depends on precise timing and model-specific sequences. By following these exact steps for your particular system, you’ll gain reliable access without unnecessary service calls. Remember to test new codes immediately after programming and implement the security practices that keep your home protected. When in doubt, consult your specific model’s manual—most manufacturers provide free PDF downloads using your model number.