How to Connect Wireless Keyboard to MacBook
Your fingers hover over your MacBook’s built-in keyboard, but something feels off. Whether you’re upgrading to Apple’s sleek Magic Keyboard or switching to a third-party option, connecting a wireless keyboard to your MacBook transforms your workflow. The good news? Most connections take under two minutes once you know the right steps.
This guide walks you through every connection method, from automatic Magic Keyboard setup to troubleshooting stubborn Bluetooth keyboards. By the end, you’ll type comfortably on your new wireless setup without confusing error messages or pairing failures. Let’s get your wireless keyboard communicating perfectly with your MacBook.
Magic Keyboard Auto-Setup for New Mac Purchases
New MacBook Bundled Keyboards
When your Magic Keyboard arrives with a new MacBook, Apple handles everything automatically. Flip the power switch on the back until you see the green indicator beneath it—that’s your visual confirmation the keyboard is alive and connecting.
No menus to navigate, no pairing codes to enter. Your MacBook recognizes the keyboard immediately, making this the fastest setup possible. This seamless pairing happens because both devices come from the factory with matching Bluetooth identifiers that communicate without user intervention.
Manual Pairing Required When Lightning Cable is Needed

Lightning Cable Method (Most Reliable):
1. Connect the included Lightning to USB-C cable between keyboard and MacBook
2. Turn on the keyboard—green light appears beneath the power switch
3. Wait 5-10 seconds for automatic pairing while the battery charges
4. Navigate to Apple menu > System Settings > Bluetooth
5. Verify “Magic Keyboard” appears as “Connected”
6. Disconnect the cable to switch to wireless mode
This wired connection method works even when the keyboard battery is completely dead, making it the most reliable approach. Many users skip this step and wonder why their keyboard won’t pair wirelessly—always start with the cable if you’re having connection issues.
Pure Wireless Setup (Cable-Free):
1. Ensure the keyboard has charge (green power indicator visible)
2. Turn on the keyboard
3. Open Apple menu > System Settings > Bluetooth
4. Click “Connect” next to “Magic Keyboard”
5. Type the displayed passcode on your new keyboard, then press Return
Legacy Apple Wireless Setup Without Lightning Ports
Battery-Powered Keyboards That Need Manual Pairing
Older Apple wireless keyboards without Lightning ports follow a different process. Turn on the keyboard and watch for the LED—it should blink steadily to indicate discoverable mode. This blinking light is your crucial visual cue that the keyboard is ready to pair.
When LED Doesn’t Blink:
– Replace the batteries immediately
– Check if the keyboard paired to another nearby Mac
– On the other Mac: Apple menu > System Settings > Bluetooth > click “i” next to keyboard > “Forget This Device”
This troubleshooting step solves most legacy keyboard connection failures. Many users don’t realize their keyboard might still be connected to a previous device, preventing new pairing attempts.
Connection Steps:
1. Turn on keyboard—LED should blink
2. Navigate to Apple menu > System Settings > Bluetooth
3. Click “Connect” when the keyboard appears
4. Enter displayed passcode using the new keyboard, press Return
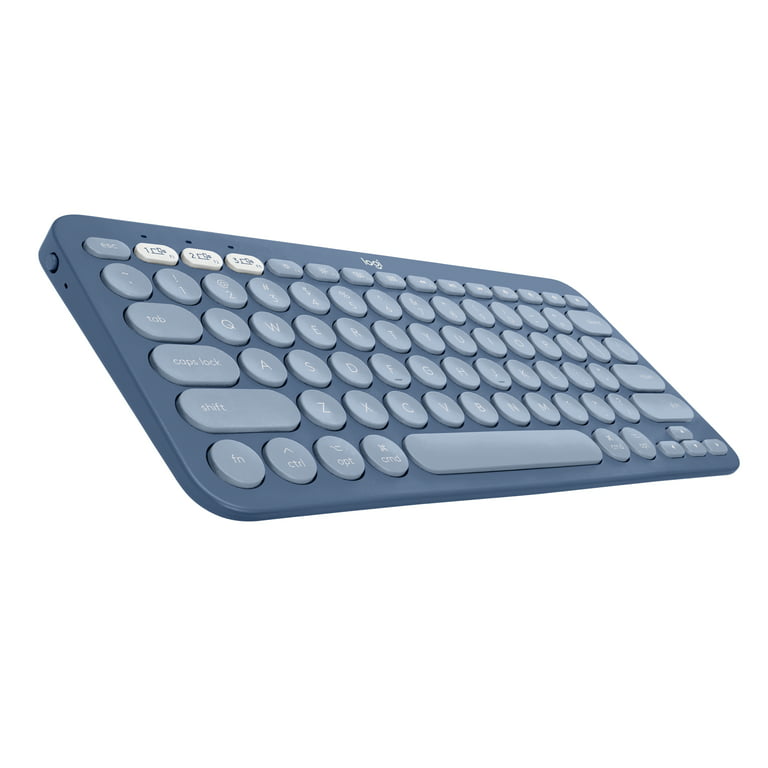
Third-Party Bluetooth Pairing Without Apple Branding
Standard Connection Process for Non-Apple Keyboards
Every third-party keyboard has unique pairing buttons, but the MacBook side remains consistent. Consult your keyboard’s manual for specific button combinations—usually a small button on the underside or back labeled “Pair” or “Connect.”
Primary Method:
1. Activate pairing mode on the keyboard (usually a small button on the underside)
2. On MacBook: Apple menu > System Settings > Bluetooth
3. Ensure Bluetooth is enabled
4. Click “Connect” next to your keyboard’s name
5. Accept the connection or enter the passcode using the new keyboard
Control Center Shortcut:
1. Click Control Center icon (top-right menu bar)
2. Click the Bluetooth icon
3. Select your keyboard from available devices
4. Follow on-screen prompts
This alternative method saves you from navigating through System Settings, especially helpful if you’re in the middle of work and need to connect quickly.
Fix Connection Failures Before They Ruin Your Workflow
Magic Keyboard Won’t Respond? Try These Fixes
No Power Issues:
– Connect charging cable for 15 minutes
– Check different USB-C port
– Try different cable if available
If your keyboard won’t turn on at all, the battery is likely completely drained. Many users don’t realize Magic Keyboards can take several minutes of charging before showing any signs of life.
Green Light But No Connection:
– Unpair from previous Macs using the “Forget This Device” process
– Reset by holding power switch off for 10 seconds, then on
– Restart MacBook’s Bluetooth from System Settings
Bluetooth Discovery Problems That Block Pairing
Keyboard Not Appearing:
– Hold the pairing button for 5-10 seconds
– Check keyboard battery level (replace if low)
– Move closer to MacBook (within 3 feet)
– Turn Bluetooth off and on: System Settings > Bluetooth > toggle switch
This proximity tip is critical—Bluetooth has a limited effective range, especially during initial pairing. Many connection failures happen because users try to pair from across the room.
Frequent Disconnections:
– Check for interference from WiFi routers or microwaves
– Move away from other 2.4GHz devices
– Remove and re-pair the keyboard completely
Wrong Characters Appearing:
– Navigate to System Settings > Keyboard > Input Sources
– Verify correct keyboard layout is selected
– Try different keyboard types (ANSI, ISO, JIS)
Verify Connection Success With One Quick Check
Quick Status Check After Pairing
After pairing, open Apple menu > System Settings > Bluetooth. Your keyboard should display as “Connected” with a battery percentage if supported. Test typing in any text field—if characters appear correctly, you’re set.
This verification step prevents frustration later when you discover halfway through writing that your keyboard isn’t actually connected properly. Always test all keys, especially special function keys.
Battery Monitoring Without Guessing
Magic Keyboard Users:
– Battery percentage appears in Bluetooth settings
– Low battery warnings appear automatically
– Charge while using with USB-C cable
Third-Party Keyboards:
– Check manufacturer’s app for detailed battery info
– Look for LED indicators on the keyboard
– Replace batteries or charge as directed
Switch Between Multiple Macs Without Constant Re-Pairing
Manual Device Switching for Productivity
One keyboard cannot connect to multiple Macs simultaneously. To switch devices:
- On current Mac: Apple menu > System Settings > Bluetooth > click “Disconnect”
- On target Mac: Follow standard pairing process
- The keyboard will remember the last connected device
Pro Tip: Keyboards with multi-device support (like Logitech’s Easy-Switch) let you toggle between Macs with dedicated buttons—ideal for users with both work and personal MacBooks.
Proper Disconnection Methods for Maintenance
Temporary vs Permanent Removal
Quick Disconnect:
1. Apple menu > System Settings > Bluetooth
2. Hover over keyboard name
3. Click “Disconnect”
4. Keyboard remains paired for easy reconnection
Use this when you’re moving between locations but plan to reconnect to the same MacBook later. Your MacBook remembers the keyboard for seamless reconnection.
Complete Removal:
1. Control-click the keyboard in Bluetooth settings
2. Select “Forget”
3. Confirm removal—requires full re-pairing later
Only use this option when troubleshooting persistent connection issues or when selling your keyboard.
Essential Setup Tips Most Guides Don’t Mention
Cable Requirements by Model
- Modern Magic Keyboard: Lightning to USB-C (included)
- 2015-2019 MacBooks: May need Lightning to USB-A cable
- Third-party keyboards: Use included charging cable
Battery Best Practices
- Charge Magic Keyboards overnight monthly
- Replace third-party keyboard batteries at 20% charge
- Store keyboards at 50% charge for extended periods
Feature Limitations That Affect Your Experience
- Touch ID keyboards: Full functionality only with Apple Silicon MacBooks
- Function keys: May map differently on third-party keyboards
- Backlighting: Check manufacturer software for customization options
Your wireless keyboard should now connect seamlessly to your MacBook. Remember: Magic Keyboards pair fastest with the Lightning cable method, while third-party keyboards need their specific pairing button. Keep Bluetooth interference low by staying close to your MacBook during initial setup. With these steps mastered, you’ll never struggle to connect a wireless keyboard to your MacBook again—just power it on, pair it quickly, and enjoy the freedom of wireless typing.