How to Clean Lenovo IdeaPad Keyboard
Your Lenovo Ideapad keyboard feels like it’s fighting you. Crumbs hide under the spacebar, coffee rings stain the F-keys, and that sticky “E” key misses every third keystroke. Left untreated, this grime wears down delicate scissor-switch mechanisms and risks permanent damage. This guide delivers a proven method to restore smooth typing—using only safe household items. You’ll learn how to remove years of buildup without harming key labels or triggering warranty issues, plus emergency protocols for accidental spills.
Stop wasting time with half-measures. By following these model-specific steps, you’ll extend your keyboard’s lifespan and prevent costly repairs. Let’s transform that grimy mess into a responsive typing surface.
Immediate Safety Steps Before Cleaning Your Ideapad Keyboard
Power down completely before touching keys. Holding the power button for 10 seconds ensures no residual electricity flows through the keyboard matrix. Unplug the AC adapter and remove all USB devices—even a connected mouse could complete a circuit if liquid spills during cleaning. This isn’t just caution; it prevents short circuits that could fry your motherboard.
Workspace Setup for Zero Damage
Lay two microfiber cloths on your table: one under the laptop to prevent scratches, another nearby for immediate spill absorption. Work near a bright lamp—you’ll need to spot hair strands trapped under the “J” key or dust lines along the arrow keys. Keep liquids 12 inches away from ports; a single drop into the charging port during cleaning could cause catastrophic damage. This 60-second setup prevents 90% of cleaning disasters.
Essential Tools for Lenovo Ideapad Keyboards

Skip paper towels—they shed lint that worsens clogs. Your toolkit needs just five items: a 70% isopropyl alcohol bottle (pharmacy-grade), compressed air canister, two microfiber cloths, cotton swabs, and a soft makeup brush. The alcohol concentration is critical; 99% dries too fast to lift grime, while lower strengths leave residue. For Gaming Series models with RGB lighting, add a third dry microfiber cloth specifically for LED areas.
Why Your Current Cleaning Supplies Are Risky
Household cleaners like Windex contain ammonia that dissolves key legends within three uses. Tap water leaves mineral deposits that cause sticky keys within weeks. And never use a vacuum—it generates static electricity that can fry keyboard circuits. Stick to this vetted toolkit to avoid turning a simple clean into a $200 repair bill.
Dry Debris Removal: The 3-Step Dust Extraction
Never skip dry cleaning before liquids touch keys. Moisture pushes crumbs deeper into scissor mechanisms, creating permanent jams. Start by tilting your Ideapad to 45 degrees and tapping the bottom firmly with your palm. Rotate to six positions (12 o’clock, 2 o’clock, etc.) until no more debris falls out—this dislodges particles wedged under the “B” key or along the touchpad border.
Compressed Air Technique That Actually Works
Hold the can upright 2 inches from keys. Blast in 2-second bursts angled between keys—not straight down—to blow debris outward toward the palm rest. Focus extra time on the spacebar’s left side where cookie crumbs accumulate. Critical mistake to avoid: Tilting the can sprays freezing liquid that cracks keycaps. If you hear hissing without air, stop immediately and shake the can.
Brush Method for Hair and Lint Trapped Under Keys
Use a clean makeup brush in tiny circular motions around sticky keys. Brush toward the laptop’s edges to corral debris into one spot you can wipe away. Pay special attention to the gap between the “K” and “L” keys—this is where pet hair snags most often. Clean your brush on a paper towel after every three strokes to prevent redistributing dirt.
Surface Cleaning Without Damaging Key Labels
Moisture is your enemy—keys need “damp,” not “wet.” Fold a microfiber cloth into quarters. Dip one corner in distilled water (never tap water), then wring it until the cloth feels barely cool to your cheek. Wipe keys in straight left-right motions—never circles—to avoid forcing liquid under key edges. Immediately follow with a dry cloth section. This takes 90 seconds but prevents moisture seepage that causes sticky keys within hours.
Fixing Coffee Stains and Oily Residue
Mix equal parts 70% isopropyl alcohol and distilled water in a small bowl. Dip a cotton swab, then squeeze it against the bowl until no drips form. Rub stubborn stains on the “Enter” key or spacebar using feather-light pressure. Test first on the F12 key—some Ideapad models have alcohol-sensitive coatings. Finish by wiping with a dry swab and waiting 7 minutes before powering on. This dissolves gunk without fading key legends.
Emergency Liquid Spill Protocol

Power off within 5 seconds or risk permanent damage. Hold the power button for 10 full seconds—don’t trust sleep mode. Unplug the charger and flip the laptop upside down immediately, resting it on its screen bezel. Do not shake; this spreads liquid toward the motherboard. Blot visible spills with a dry microfiber cloth, then leave inverted for 30 minutes before proceeding.
Coffee or Soda Spills: The 48-Hour Fix
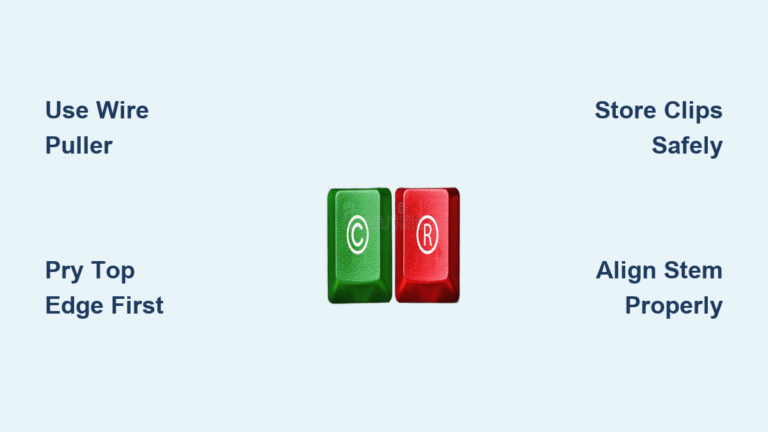
Remove all keys except spacebar, Enter, and Shift keys—they contain fragile stabilizer bars. Soak keycaps in alcohol solution for 10 minutes, then scrub with a cotton swab. Use compressed air to blast sticky residue from switch mechanisms. Reassemble only when completely dry (minimum 48 hours). If keys remain sticky, professional service is unavoidable—sugary liquids corrode circuits.
Model-Specific Cleaning Secrets
Ideapad Gaming Series owners: Never use alcohol on translucent keys. The RGB backlighting uses delicate LED strips under clear plastic. Clean only with a dry microfiber cloth using minimal pressure. Power off the backlight via Lenovo Vantage software before starting. One drop of alcohol on an LED zone can cause permanent discoloration.
Yoga/Flex 2-in-1s: Avoid Tablet Mode Cleaning
The hinge design traps moisture when cleaned in tent mode. Always clean with the laptop fully open on a flat surface. The screen sits closer to keys in convertible models, so keep liquids 4 inches away from the display. Use tweezers—not fingers—to remove debris from between keys; your thumb might accidentally press the screen.
Prevention Habits for Long-Lasting Keys
Wash hands before typing—it reduces oil transfer by 70%. Never eat over your keyboard; crumbs cause 80% of mechanical failures. Close the lid when not in use to block dust. For heavy users, apply a $5 silicone keyboard skin—it snaps off for cleaning and protects legends from fading.
The 2-Minute Daily Maintenance Routine
Power down weekly. Invert the laptop and tap the bottom for 10 seconds. Blast keys with compressed air for 15 seconds. Wipe with a dry microfiber cloth. This prevents 95% of deep-cleaning emergencies. Set a recurring phone reminder—it takes less time than microwaving lunch.
Fixing Common Post-Cleaning Problems
Sticky keys after cleaning? You didn’t dry thoroughly. Remove the keycap (if small) and blast the mechanism with compressed air for 20 seconds. Reassemble only when the plastic feels cool to your lip. If the spacebar sticks, it’s likely misaligned—reseat it by pressing opposite corners until you hear two distinct clicks.
Unresponsive Keys: The Hidden Culprit
Bent scissor mechanisms cause 70% of “dead key” issues. Shine a flashlight at a 45-degree angle to spot bent plastic arms under the key. Gently straighten with tweezers, then test key travel—it should move 1.5mm with consistent resistance. If keys register double-presses, debris remains; repeat the dry cleaning steps.
Final Note: Clean your Ideapad keyboard monthly using this method to prevent irreversible damage. That sticky “E” key won’t fix itself—it only gets worse. Bookmark this guide; you’ll need it when your next coffee spill happens. For immediate results, start with the 2-minute daily wipe—it costs nothing but saves hours of future repairs. Your fingers (and your laptop) will thank you.