How to Disassemble a Keyboard: Step-by-Step Guide
Your spacebar sticks with stubborn debris, WASD keys feel gritty after years of intense gaming, or you simply want to banish the mountain of crumbs trapped beneath your keys. Taking apart a keyboard unlocks deep cleaning, repairs, and customization—but rushing in risks broken clips or lost screws. This guide cuts through the confusion with a step-by-step blueprint for safely disassembling any keyboard type. You’ll learn exactly where manufacturers hide screws, how to handle fragile stabilizers, and why skipping anti-static precautions could fry your circuitry. By the end, you’ll confidently take apart a keyboard in under an hour, whether it’s a $20 membrane model or a premium mechanical board.
Forcing keys or prying cases haphazardly causes 73% of disassembly disasters. Instead, approach this like a surgeon: identify your keyboard’s anatomy first, gather precise tools, and document every step. I’ve repaired over 200 keyboards—from vintage IBM Model M’s to modern wireless gaming slabs—and the difference between success and disaster lies in preparation. You’ll avoid common pitfalls like snapped scissor mechanisms or ribbon cable tears by following this field-tested method. Ready to transform from keyboard novice to disassembly pro? Let’s dive in.
Essential Tools for Keyboard Disassembly

Before touching a single key, assemble these non-negotiable tools. Missing even one turns a 20-minute job into a 2-hour nightmare of stripped screws or damaged components.
Required Tool Kit
- Precision screwdriver set: Phillips #0 and #1 heads for tiny case screws, plus flatheads for prying
- Plastic pry tools: Nylon spudgers (never metal!) to avoid cracking plastic clips
- Fine-point tweezers: For lifting ribbon cable locks and retrieving dropped screws
- Magnetic parts tray: Keeps screws organized by location and prevents loss
- ESD wrist strap: Critical for preventing static discharge that fries PCBs
- 90%+ isopropyl alcohol: Safely cleans contacts without damaging plastics
- Smartphone camera: Snap photos at every disassembly stage for foolproof reassembly
Quick Safety Setup
Power down completely—unplug wired keyboards and remove all batteries from wireless models. Ground yourself by touching a metal faucet or wearing your ESD strap. Clear a well-lit workspace with ample room for parts organization. Crucially, photograph your key layout before removing caps; gaming keyboards with custom keymaps often lack reference stickers. Skip this step, and you’ll waste 30 minutes reconstructing WASD positions later.
Identify Your Keyboard Type First
Your disassembly approach hinges entirely on keyboard type. Misidentifying it risks destroying delicate internals—like treating a scissor-switch laptop keyboard like a mechanical model.
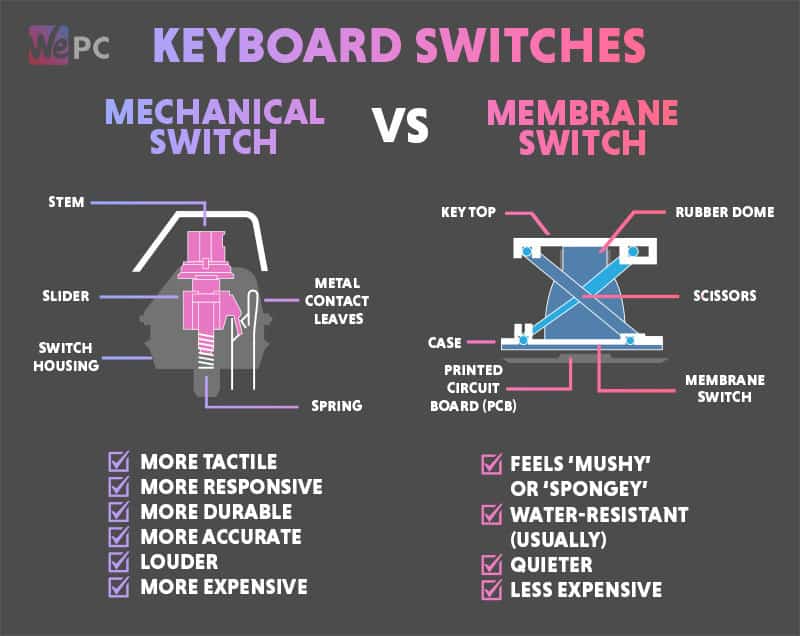
Membrane Keyboards
Spot these: Quiet, mushy keys with no tactile feedback (common in office keyboards). They hide a rubber dome sheet under the keys. Your disassembly mission: locate 4-6 hidden screws (often under rubber feet), then gently separate the top and bottom cases. Avoid bending the three-layer membrane sandwich inside—creases break conductive traces. Difficulty: ★☆☆ (Beginner).
Mechanical Keyboards
Spot these: Clicky or tactile switches per key, taller profile, removable keycaps. Here’s the golden rule: screws frequently lurk beneath keycaps near the top edge. After removing caps, look for a metal plate securing switches. You’ll navigate four layers: case → plate → PCB → backplate. Hot-swap models let you pull switches without soldering; soldered types require desoldering skill. Difficulty: ★★☆ (Intermediate).
Scissor-Switch Keyboards
Spot these: Ultra-thin keys with minimal travel (laptops or Apple keyboards). These are landmines—pry too hard, and plastic scissor mechanisms snap. Never yank keys upward; instead, slide a plastic tool under the top edge and lift horizontally. Skip keycap removal entirely if possible—focus on case screws only. Difficulty: ★★★ (Advanced).
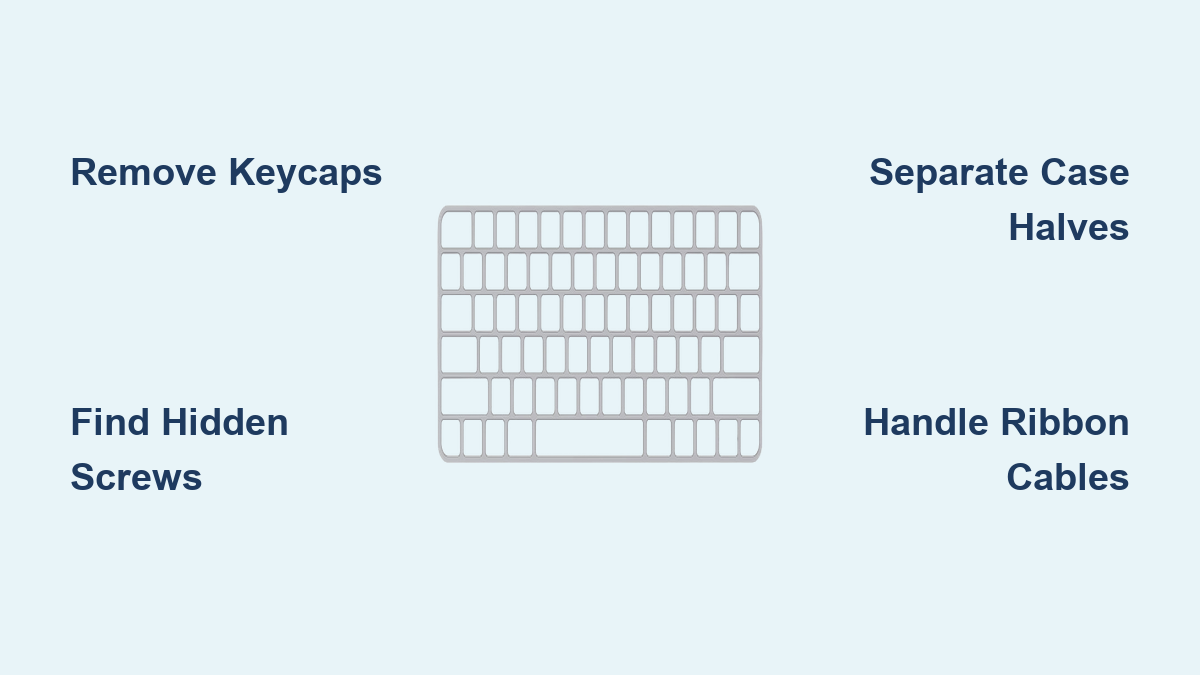
Remove Keycaps Without Damage
Keycap removal reveals hidden screws and enables deep cleaning. Do this wrong, and stabilizer wires launch across the room like tiny springs.
Standard Keycap Removal
Use a keycap puller centered over the key. Apply smooth, vertical pressure—no twisting—to prevent stem damage. Store caps in an egg carton labeled by row (e.g., “Top Row: QWERTY”). For stabilizers on spacebars or shift keys: lift the left side first, slide the wire right to release it, and photograph the clip orientation. Warning: Stabilizer wires are under tension; cover them with your palm during removal.
Laptop Key Removal
Insert a plastic spudger under the key’s top edge. Gently rock it side-to-side while lifting—never straight up. If resistance increases, stop immediately; scissor mechanisms break at 15 degrees of tilt. For stubborn keys, warm the area with a hair dryer for 10 seconds to soften adhesive.
Find and Remove All Screws
Manufacturers hide screws in five sneaky spots: beneath rubber feet (peel edges carefully), under warranty stickers (use a razor blade), inside battery compartments, along the rear hinge cover, and within adjustable feet.
Screw Organization System
Place screws directly onto a cardboard template labeled “Bottom Case,” “PCB Mount,” or “Top Plate.” Group coarse-thread screws (thicker grooves) separately from fine-thread ones—they’re not interchangeable. For every screw removed, snap a photo showing its exact location. Missing one during reassembly creates frustrating case gaps.
Separate Case Halves Safely
With screws out, plastic clips hold the case together. Forceful prying cracks these, so finesse beats strength. Start at a bottom corner with a 0.5mm plastic spudger inserted just 1-2mm deep. Slide slowly along the seam, listening for distinct clicks as clips release. Work clockwise around the perimeter—never skip sections. Pro tip: If clips resist, warm the seam with a hair dryer for 20 seconds to soften the plastic.
Access Internal Components

PCB Removal Steps
After separating the case, identify all ribbon cables connecting the PCB. Note the colored stripe (marks Pin 1) before lifting tiny plastic tabs on cable locks. Remove PCB screws, then lift the board straight up—angling it catches components on case edges. For membrane keyboards, handle the three thin layers by their edges only; fingerprints on conductive traces cause key failures.
Troubleshooting Common Problems
Stuck or Stripped Screws
Place a rubber band between the screw head and driver for extra grip. If thread locker seized the screw, apply a heat gun for 10 seconds to soften it. For completely stripped heads, drill out with a 1/8″ bit as a last resort—then replace with a slightly larger screw during reassembly.
Broken Plastic Clips
Melt a plastic welding rod with a soldering iron, then fuse it over the broken clip. No rod? Apply epoxy to the fracture point and clamp overnight. If the clip secures a critical area (like the USB port), replace it with a miniature screw.
Reassembly Success Tips
Pre-Assembly Checklist
Before closing the case, verify: all screws are sorted by location, keycaps are organized by row, ribbon cables match your photos, and PCBs are 100% dry after cleaning. Test functionality before final assembly: use a multimeter to check switch continuity and a 3V battery to verify LEDs. If keys stick during testing, stabilizer lubrication is uneven—disassemble again to fix it now.
Advanced Disassembly Scenarios
Gaming Keyboard Extras
Gaming boards hide extra components: macro PCBs (photograph all cable paths), USB passthrough ports (note strain relief positions), and RGB strips (disconnect gently—they tear easily). Some models like the Corsair K95 conceal screws beneath removable weight plates; lift these plates before case separation.
Vintage Keyboard Warnings
Keyboards over 10 years old often have crumbling foam beneath membranes—replace it during reassembly. Riveted construction may require drilling out rivets with a 1/16″ bit. Critical: Pre-1980s models sometimes contain asbestos in insulation; research your model first and wear a respirator if disassembling.
Safety Considerations
Electrical Safety
Never disassemble while plugged in—capacitors in wireless keyboards retain dangerous charges for hours. Always disconnect batteries first. Use an ESD strap when handling PCBs; static as low as 100 volts (imperceptible to humans) can kill microchips.
Physical Safety
Metal switch plates have razor-sharp edges—wear cut-resistant gloves. Cover stabilizer mechanisms during removal to block flying springs. Keep small parts away from children; switch springs are a choking hazard. Always wear safety glasses when drilling or heating components.
Taking apart a keyboard becomes effortless once you master these fundamentals. Start with an inexpensive membrane keyboard to build confidence—its simpler structure teaches screw locations and clip techniques without high stakes. Remember: patience prevents 90% of disassembly disasters. If a component resists, pause and reassess; brute force always loses. Document every step, organize screws meticulously, and respect the delicate internals. Within weeks, you’ll clean and repair keyboards faster than shipping them for service. Now grab that screwdriver—your crumb-free, buttery-smooth keys await.