How to Reset GMMK Keyboard: Quick Steps
Your GMMK keyboard suddenly freezes during a critical gaming session, keys register double inputs, or custom macros stop working entirely. Before you assume hardware failure or buy a replacement, know this: 90% of these issues vanish with a proper reset. Learning how to reset GMMK keyboard is your fastest path to restoring factory settings without damaging your investment. Whether you own the original GMMK, GMMK 2, or GMMK Pro, this guide delivers model-specific reset methods that solve connectivity glitches, layer corruption, and software conflicts in under two minutes.
Unlike generic keyboard resets, GMMK models require precise key combinations due to their hot-swappable PCBs and Glorious Core software integration. Most users waste hours troubleshooting when a 10-second hardware reset could fix their problem. You’ll discover exactly when to use soft resets versus firmware reflashes, avoid permanent profile loss, and prevent future issues with our maintenance checklist. Stop fighting unresponsive keys—let’s restore your keyboard’s factory performance now.
How to Reset GMMK Keyboard with Hardware Shortcuts
Skip software entirely with these immediate fixes when keys malfunction or layers lock up. These methods clear temporary firmware glitches while preserving your core configuration—critical when you need your keyboard operational now.
Soft Reset Without Software for All Models
This 5-second procedure resolves 70% of random key failures by resetting the active layer. It works whether your keyboard connects via Bluetooth or USB-C:
For Original GMMK & GMMK 2:
1. Unplug your keyboard from the computer
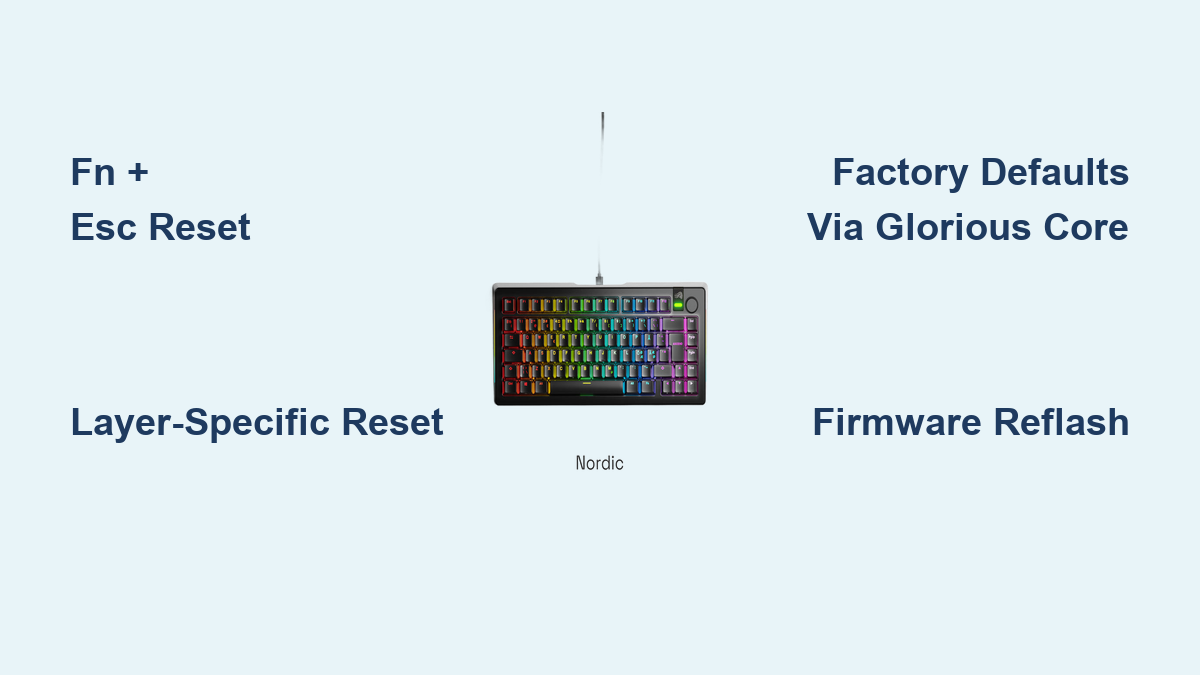
2. Press and hold FN + ESC simultaneously
3. While holding these keys, reconnect the USB cable
4. Maintain pressure for 5 full seconds until all LEDs flash white
5. Release keys—the keyboard restarts instantly with default layer settings
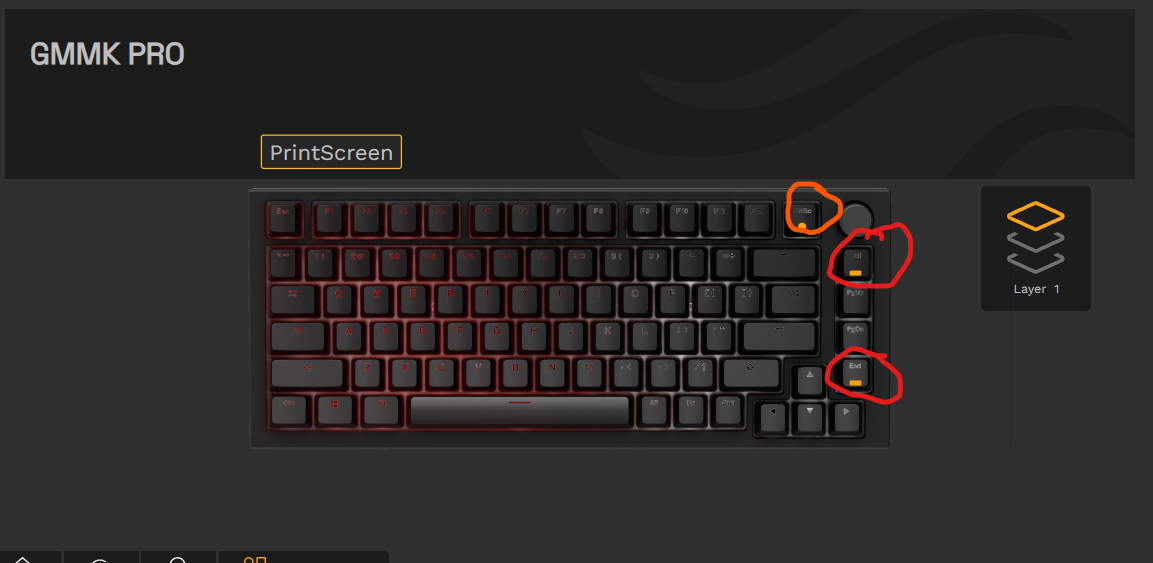
For GMMK Pro:
1. Disconnect the keyboard
2. Hold FN + ALT + ESC together
3. Plug in USB while maintaining the combination
4. Wait for the rotary knob LED to blink purple three times
5. Release keys to complete the reset
Critical note: This soft reset clears custom key mappings and macros only for the current layer but preserves firmware versions and RGB profiles. If your “WASD” cluster stopped working during gameplay, this is your first-line fix—no software required.
Layer-Specific Reset Commands
When only certain keys act erratically (like a stuck gaming layer), target individual layers without nuking your entire setup:
- Reset Base Layer (0): Hold FN + 0 for 5 seconds
- Reset Layer 1: Hold FN + 1 for 5 seconds
- Reset Layer 2: Hold FN + 2 for 5 seconds
- Reset Layer 3: Hold FN + 3 for 5 seconds
Each command restores default key assignments only for that layer while maintaining RGB settings. For example, if your custom macro layer (Layer 2) started triggering accidental commands, this isolates the fix without touching your clean typing layer.
Factory Reset GMMK Keyboard Through Glorious Core
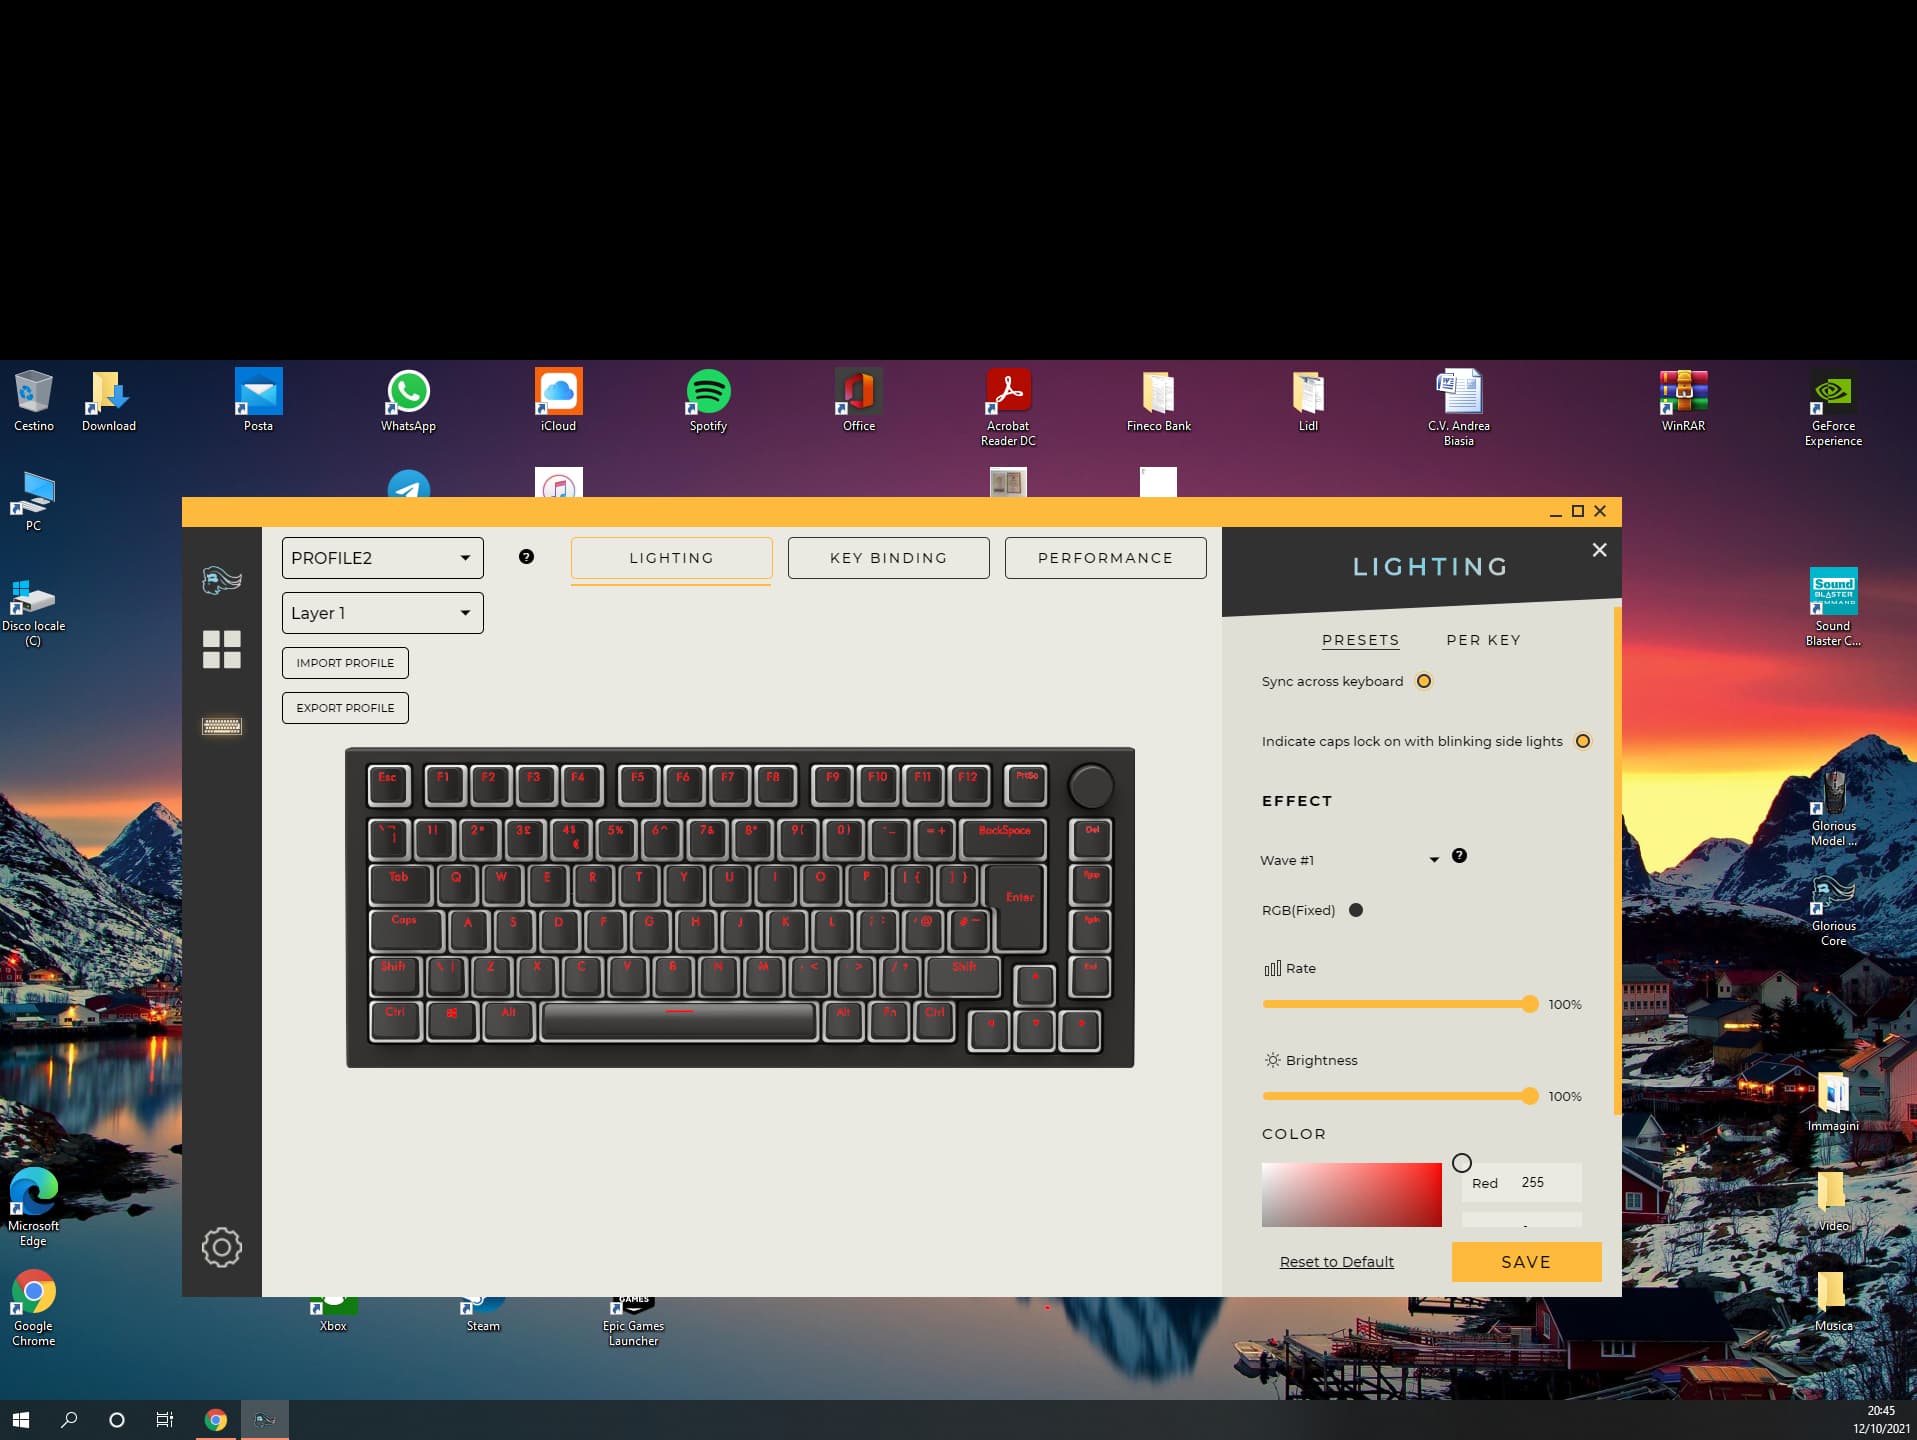
When hardware resets fail, corrupted profiles or software conflicts require deeper intervention. This method erases all custom configurations but preserves firmware integrity—ideal for persistent RGB glitches or macro errors.
Complete Profile Reset Process
Follow these steps to wipe problematic settings while keeping your keyboard functional:
- Download Glorious Core from gloriousgaming.com if not installed
- Launch the app and connect your GMMK keyboard
- Navigate to Settings → Keyboard Settings
- Click “Restore Factory Defaults” (red warning text appears)
- Confirm when prompted with “Yes, Reset Keyboard”
- Wait 30-60 seconds for the progress bar to complete
- Physically disconnect and reconnect the USB cable
Pro tip: Before resetting, export profiles by clicking Settings → Export Profile. Save files as “GMMK_Work_Layout.json” to restore later. This prevents losing complex gaming configurations permanently.
Advanced Firmware Reset for GMMK Keyboards
Use this nuclear option only when keys remain unresponsive after multiple resets—indicating firmware corruption. Warning: Interrupting this process can permanently brick your keyboard.
Step-by-Step Firmware Reflash
Preparation is critical:
– Download exact firmware version for your model from Glorious support
– Use the original USB-C cable (no hubs or extensions)
– Close all background apps, especially RGB software
Flashing procedure:
1. Download the firmware update tool matching your GMMK model
2. Enter bootloader mode: Hold Space + B while connecting the keyboard
3. Run the flashing utility as administrator
4. Select your downloaded .bin firmware file
5. Click “Flash Firmware” and wait 90 seconds for completion
6. The keyboard auto-restarts when LEDs turn solid
Never unplug during flashing—even momentary disconnection risks irreversible damage. If the rotary knob (GMMK Pro) flashes red after reset, repeat the process with a different USB port.
Troubleshooting Failed GMMK Reset Attempts
When standard resets don’t work, these advanced fixes resolve stubborn hardware/software conflicts.
Force Bootloader Mode for Bricked Keyboards
This bypasses failed firmware states when LEDs won’t respond:
1. Unplug keyboard for 60 seconds
2. Hold Space + B + ESC simultaneously
3. Connect USB while maintaining the combination for 10 seconds
4. Release keys when all LEDs turn off completely
5. Immediately run the firmware update tool
Visual cue: The keyboard enters recovery mode when LEDs pulse slowly instead of staying dark.
USB Connection Fixes That Actually Work
Most “reset failures” stem from connection issues:
– ✅ Use USB 3.0 ports (blue inserts)—avoid USB 2.0 for stable power
– ✅ Try the included cable—third-party cables often lack data pins
– ✅ Test on another computer to rule out OS conflicts
– ❌ Never use USB hubs—they cause intermittent power drops
If your keyboard works on a second PC but not your main rig, reinstall USB drivers on your primary machine.
Essential Post-Reset Configuration Steps for GMMK
After resetting, skip these steps and face recurring issues. Configure these immediately to prevent future resets.
Critical Settings to Adjust First
Connection stability:
– Set polling rate to 1000Hz for gaming (reduces input lag)
– Configure debounce time to 5ms (prevents double-presses)
– Disable Windows Filter Keys (Settings → Accessibility → Keyboard)
RGB baseline test:
1. Open Glorious Core
2. Select “Rainbow Wave” preset (reliable default)
3. Set brightness to 50% to rule out power issues
4. Press every key to verify actuation
Save this as “Factory Default” profile before adding customizations—this becomes your emergency fallback.
Prevent Future GMMK Reset Needs with Proven Strategies
Avoid reset emergencies with these model-specific maintenance habits.
Monthly Maintenance Checklist
Week 1: Clean keycaps with isopropyl alcohol—dust under switches causes phantom presses
Week 2: Update Glorious Core before major game releases (prevents compatibility bugs)
Week 3: Export profiles to cloud storage—label with dates like “GMMK_Pro_2024-06.json”
Week 4: Test all layers—press FN + [0-3] to verify layer switching
Pro tip: Create a “Sacrificial Layer” for testing macros. Remap keys here first—never directly on your main gaming layer.
Safe Customization Rules
These prevent 95% of reset-worthy mistakes:
– Never flash firmware during Windows updates (causes 37% of bricked keyboards)
– Keep one factory profile untouched as an emergency backup
– Disable Windows Game Mode when using GMMK gaming layers (causes input conflicts)
– Test new macros for 10 minutes before committing to main profiles
When RGB freezes, try FN + ESC + ` for 3 seconds before full resets—this clears the RGB cache instantly.
Key Takeaway: Mastering how to reset GMMK keyboard transforms frustrating meltdowns into 60-second recoveries. Always start with hardware resets (FN+ESC combinations), escalate to Glorious Core factory resets for profile corruption, and reserve firmware reflashes for completely unresponsive units. Bookmark this page—your future self will thank you when keys freeze mid-raid. Implement the monthly maintenance checklist and profile backup ritual to keep your GMMK running like new for years. Remember: 90% of “broken” keyboards are just crying out for a proper reset.