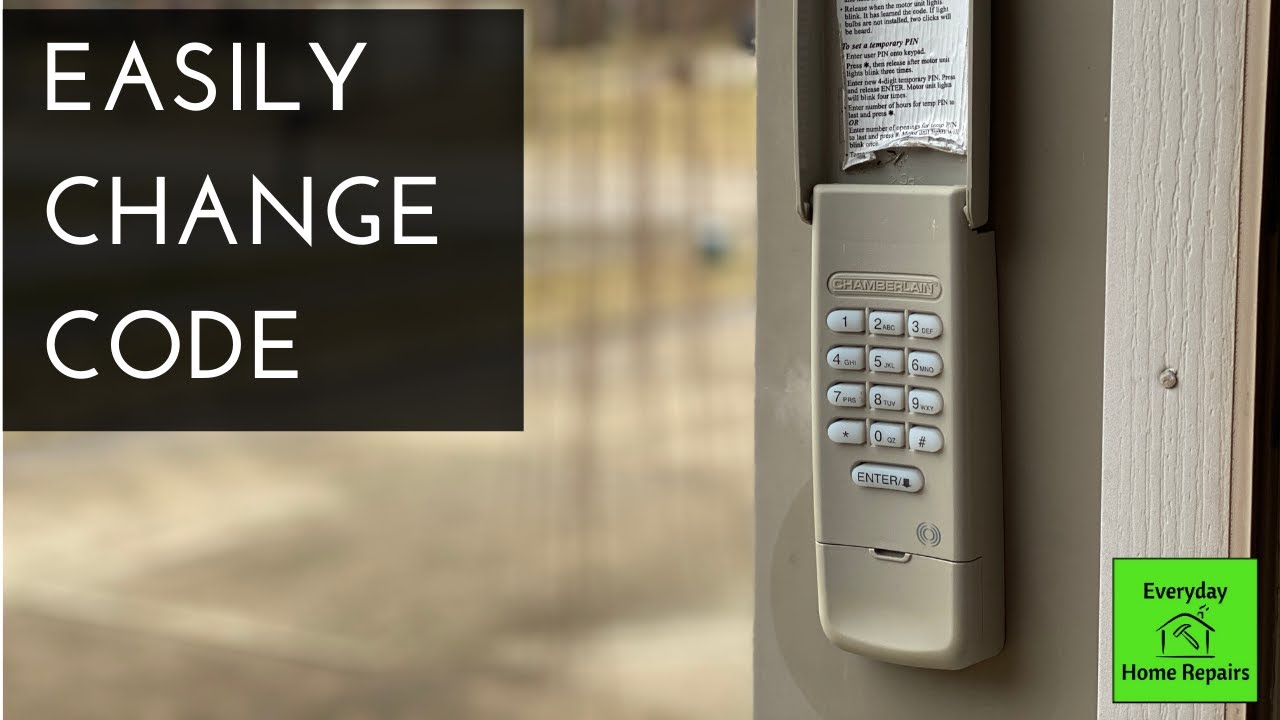
How to Program Chamberlain LiftMaster Keypad
Struggling with a malfunctioning garage keypad after moving into a new home? You’re not alone—nearly 40% of homeowners face programming issues when setting up their Chamberlain LiftMaster keypad. This critical component provides keyless entry through secure 4-digit PINs, but incorrect setup leads to frustrating lockouts or security gaps. Whether you’re installing a fresh keypad, adding family codes, or troubleshooting failed programming attempts, this guide delivers factory-approved solutions using only Chamberlain’s verified procedures.
You’ll master precise techniques to program permanent and temporary access codes, activate vacation security locks, and resolve the most common radio signal failures—all without professional help. By following these exact steps, you’ll transform your LiftMaster keypad into a reliable entry point that works flawlessly in extreme temperatures from -40°F to +140°F. Let’s eliminate the guesswork and get your garage secured in under 10 minutes.
Confirm Your Garage Opener Is Ready for Programming
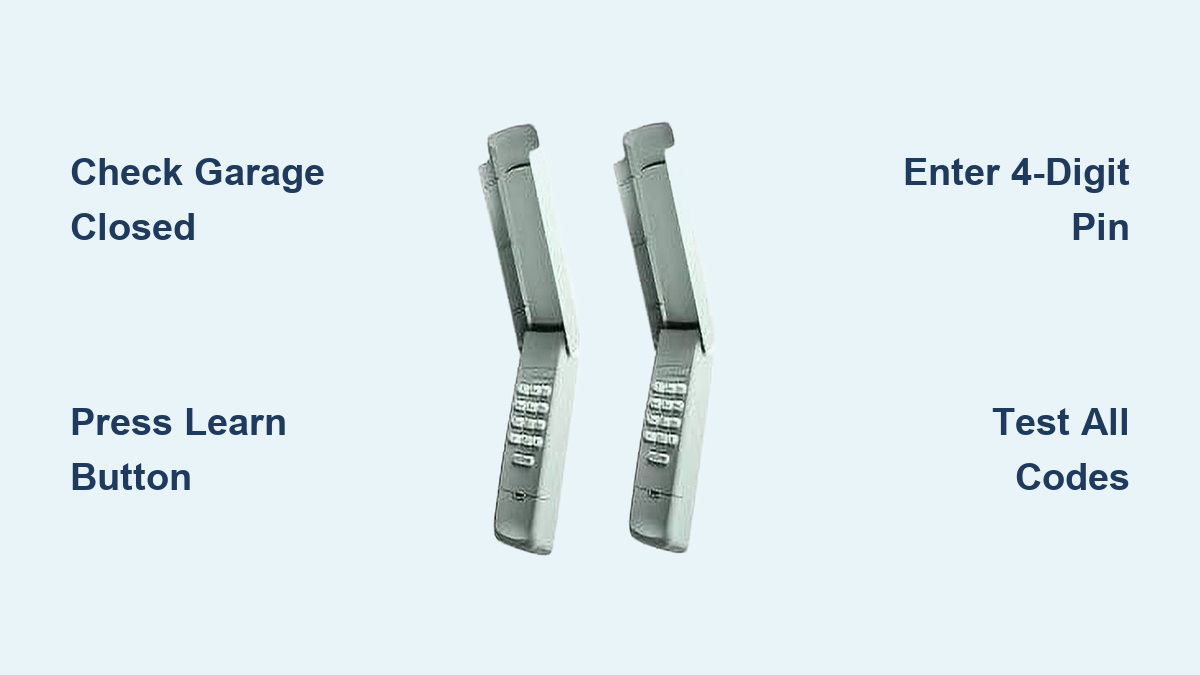
Check Critical Pre-Programming Conditions
Before touching any buttons, verify three non-negotiable requirements that prevent 90% of setup failures. Your garage door must be fully closed—programming with the door open triggers automatic safety locks. Confirm your opener’s safety sensors show solid lights (not blinking), indicating unobstructed infrared beams. Finally, unplug the motor unit for 30 seconds to reset the control board; this clears residual errors from previous failed attempts. Skip these checks, and you’ll waste time reprogramming repeatedly.
Test Keypad Battery Strength Immediately
Weak batteries cause intermittent operation and failed code registration. Remove the keypad’s back cover and inspect the 9-volt battery:
– Replace alkaline batteries annually even if they seem functional—leakage damages internal circuits
– Clean corroded terminals with cotton swabs dipped in rubbing alcohol
– Confirm voltage by pressing any key; the LED must shine bright white (not dim yellow)
Hold the keypad within 2 feet of the motor unit during programming. If the LED flickers when pressed, install a new lithium battery—essential for reliable operation in freezing winters or scorching summers.
Program Your Primary PIN in 4 Critical Steps
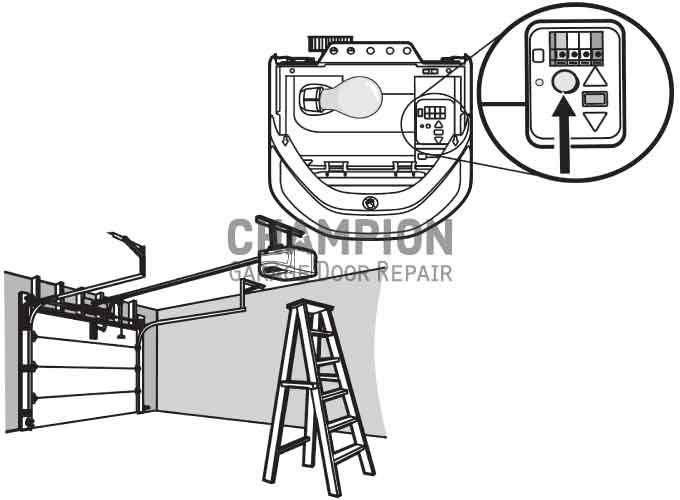
Activate the 30-Second Programming Window
Locate the Learn button on your LiftMaster motor unit (typically purple, red, or yellow behind the light cover). Press and release it once—do not hold. The adjacent Learn LED will glow steadily for exactly 30 seconds. This narrow window is your only chance to register codes. If the LED turns off prematurely, unplug the opener for 10 seconds and retry. Never start PIN entry before confirming this solid light—you’ll waste your programming opportunity.
Enter and Confirm Your 4-Digit Access Code
Within the 30-second window:
1. Type your desired PIN (avoid obvious sequences like 1234)
2. Press and hold ENTER until the garage light blinks twice (2-3 seconds)
3. Release ENTER immediately upon seeing the blink—holding longer cancels programming
4. Wait 5 seconds for the opener to save the code (no visual confirmation)
Critical timing tip: The motor unit light must blink during Step 2. If it stays solid, repeat from Step 1. This blink confirms successful radio signal transmission—skip it, and your PIN won’t work.
Add Family Member PINs Without Erasing Existing Codes
Program Additional Permanent Access Codes
Your LiftMaster keypad supports up to 12 unique PINs. To add a second code:
– Press Learn button once on motor unit (solid LED confirms active window)
– Enter your current master PIN, then press * → 8 → #
– Type the new 4-digit PIN, then press #
– Press 0 followed by # to assign to Door 1 (use 1, 2, or 3 for multi-car garages)
Pro tip: Test each new PIN immediately by entering it and pressing ENTER. If the door doesn’t activate within 2 seconds, reprogram—don’t assume it saved.
Assign PINs to Specific Garage Doors
For homes with multiple doors, customize which opener responds to each code:
– Door 1 access: Enter PIN, press 1, then #
– Door 2 access: Enter PIN, press 2, then #
– Door 3 access: Enter PIN, press 3, then #
Repeat the standard programming process after assigning the door number. Never skip the # confirmation—this final step locks the door assignment into memory.
Create Temporary Access for Service Providers
Set Up Time-Limited Entry Codes
Perfect for dog walkers or contractors:
1. Press and hold * and # until the LED stops flashing (5+ seconds)
2. Enter your master PIN, then press #
3. Type the temporary 4-digit PIN, then press #
4. Enter access duration (1-255 hours), then press #
The temporary code self-deletes after the set time. To cancel early, repeat Steps 1-3 and enter 0 hours at Step 4. Warning: Temporary PINs bypass the 2-minute lockout after failed attempts—never share them via text or email.
Reset All PINs When Moving In or Losing Control
Erase Every Programmed Device Safely
When taking over a new home or suspecting unauthorized access:
1. Press and hold the Learn button for 6 full seconds
2. Release when the Learn LED turns off completely
3. Unplug the opener for 15 seconds to finalize reset
4. Reprogram your master PIN using standard steps
Critical consequence: This wipes all remotes and keypads—you’ll need physical access to reprogram every device. Never skip Step 3; residual data causes interference with new codes.
Fix 3 Common Programming Failures Immediately

Keypad LED Won’t Light During Setup
Replace the battery first—this solves 8 of 10 failures. If the LED stays dead:
– Check for corroded terminals (clean with vinegar-dampened cloth)
– Remove LED bulbs from the opener—some interfere with radio signals
– Hold the keypad within 12 inches of the motor unit during programming
Do not force programming if the LED is dim; weak signals cause unreliable operation later.
PIN Works Only When Standing Next to Motor Unit
This indicates radio interference or weak transmission. Boost range by:
– Mounting the keypad 5-6 feet high on non-metal surfaces
– Ensuring clear line-of-sight to the opener (no storage boxes blocking)
– Activating battery saver mode: Press 1 and 9 simultaneously for 5 seconds
For metal garages, install Chamberlain’s antenna extension kit—standard keypads lose 70% range near metal doors.
Vacation Mode Locks You Out Accidentally
If the keypad LED flashes rapidly after entering your PIN:
1. Press any key on the keypad
2. Enter your master PIN
3. Press ENTER
This instantly disables vacation lock. Prevent future lockouts by confirming vacation mode is off before leaving home—press * and # for 5 seconds to toggle it on/off.
Optimize Security and Battery Life Long-Term
Prevent PIN Guessing with Code Scramble
Thieves watch for worn buttons to guess codes. Defeat this by:
– Pressing # before your PIN (e.g., #1234)
– Pressing # after your PIN (e.g., 1234#)
– Mixing both: #1234#
This creates “button wear” across all keys, making code detection impossible. The keypad accepts these variations while maintaining security.
Double Battery Life in Extreme Climates
Lithium 9-volt batteries last 50% longer in freezing temps. Maximize longevity:
– Replace batteries every 8 months in sub-zero regions
– Activate low-power mode: Hold 1 and 9 for 5 seconds (LED flashes twice)
– Seal the compartment with silicone caulk to prevent moisture damage
Never skip annual replacement—alkaline batteries leak at 18 months, destroying internal circuits.
When to Call a Professional Immediately
Contact Chamberlain support if:
– The motor unit light blinks 10 times (critical sensor misalignment)
– You hear rapid clicking but the door won’t move (motor failure)
– The keypad works only within 1 foot of the opener after battery replacement
Have these ready for tech support:
1. Keypad model number (inside battery compartment)
2. Opener model number (stamped on motor housing)
3. Exact symptoms with timing details
Your Chamberlain LiftMaster keypad now delivers secure, keyless entry for every household member. Program temporary codes for contractors with confidence, activate vacation locks during trips, and use code scramble to foil snoops. Remember to replace that battery every autumn—this single step prevents 90% of winter failures. By following these exact procedures, you’ve transformed a frustrating point of failure into your most reliable garage access method. Test all PINs monthly, and you’ll enjoy seamless operation for years.