How to Fix Keyboard Stuttering Issue
You’re typing an important email when suddenly your keyboard starts acting up—letters appear seconds after you press keys, characters repeat uncontrollably, or keystrokes vanish completely. Keyboard stuttering transforms simple tasks into frustrating ordeals that disrupt your workflow, gaming sessions, and everyday computing. This guide delivers immediate, proven solutions to fix keyboard stuttering regardless of whether you’re using a mechanical masterpiece, wireless convenience, or built-in laptop keyboard. Within minutes, you’ll identify the root cause and implement the right fix to restore smooth, responsive typing.
Identify Stuttering Symptoms
Keyboard stuttering reveals itself through delayed character display, unwanted key repeats, or complete missed inputs. These symptoms plague all keyboard types—mechanical, membrane, wireless, and laptop—but manifest differently depending on your specific hardware. The critical first step is determining whether your issue occurs consistently across all applications or only during specific tasks like gaming or document editing.
Quick Symptom Check:
– Type “the quick brown fox” slowly—watch for delays between keystroke and character appearance
– Hold any key for 3 seconds—check for proper repeat rate without excessive bouncing
– Rapidly press single keys—note any missed registrations or phantom repeats
– Test in multiple programs—determine if the issue is software-specific or system-wide
Hardware Diagnosis Steps

Physical Inspection Checklist
Begin with a thorough visual examination of your keyboard’s physical components. For mechanical keyboards, carefully remove keycaps using proper wire pullers to inspect beneath the surface. Look for dust bunnies, food particles, or sticky residue interfering with switch mechanisms. Check USB connectors for bent pins or corrosion that could cause intermittent connections.
What to Look For:
– Visible debris accumulation between switches
– Discolored areas indicating previous liquid spills
– Loose or wobbly keycaps creating inconsistent actuation
– Frayed cable insulation on wired models
– Corrosion or oxidation on USB connector contacts
Connection Testing Protocol
Immediately test your keyboard on another computer to isolate whether the problem originates from your keyboard or your system. For wireless models, replace batteries with fresh high-quality alkaline cells and move closer to the receiver. This simple test eliminates half your potential causes in under two minutes.
Connection Troubleshooting:
– Try USB 2.0 ports instead of 3.0 (less power-sensitive)
– Use different USB cables for detachable keyboard models
– Test with direct connection versus through a USB hub
– Check Bluetooth signal strength indicators on wireless models
– Eliminate interference sources like WiFi routers within 3 feet
Clean Sticky Keys Now
Basic Cleaning Method
Power down and disconnect your keyboard before starting any cleaning procedure. Hold it upside down at a 75-degree angle and tap the back firmly to dislodge loose debris. Use compressed air between keys in short, angled bursts—never holding the canister upright to avoid moisture spray. Wipe keycaps with 90% isopropyl alcohol on a microfiber cloth, applying gentle pressure.
Cleaning Order:
1. Surface dust removal with compressed air (30-second bursts)
2. Keycap cleaning with alcohol-dampened microfiber cloth
3. Between-key vacuuming using brush attachment on low setting
4. Connector cleaning with electronics-safe contact cleaner
5. Complete drying period (minimum 2 hours) before reconnection
Deep Clean Mechanical Boards
For persistent mechanical keyboard issues, remove all keycaps using appropriate pullers and document their positions first. Soak keycaps in warm soapy water for 30 minutes, then rinse thoroughly with distilled water. While keycaps dry, use contact cleaner on switch mechanisms through the keycap holes. Apply dielectric grease to stabilizer bars for smoother large-key operation.
Deep Clean Caution:
– Never submerge entire keyboard in liquid
– Use only electronics-safe cleaning solutions
– Allow minimum 24-hour drying period before testing
– Photograph key layouts before removal
– Test individual switches before full reassembly
Fix Driver Issues Fast

Update Drivers Automatically
Open Device Manager by pressing Windows key + X simultaneously. Expand the “Keyboards” section and right-click your specific keyboard device. Select “Update driver” then choose “Search automatically for drivers.” If Windows finds updates, install them immediately and restart your computer—this single step resolves stuttering for 40% of users.
Driver Update Path:
– Device Manager automatic search (first option)
– Manufacturer website specific drivers (most reliable)
– Windows Update optional drivers section
– Generic HID-compliant keyboard drivers as fallback
– Driver rollback if new updates worsen the problem
Remove Driver Conflicts
Completely uninstall problematic keyboard software that may conflict with your system. Download fresh drivers directly from your keyboard manufacturer’s official site—never use third-party driver sites. After installation, check Windows Event Viewer for keyboard-related errors by searching “Event Viewer” in Windows search and navigating to Windows Logs > System.
Optimize Windows Settings
Adjust Repeat Rate Immediately
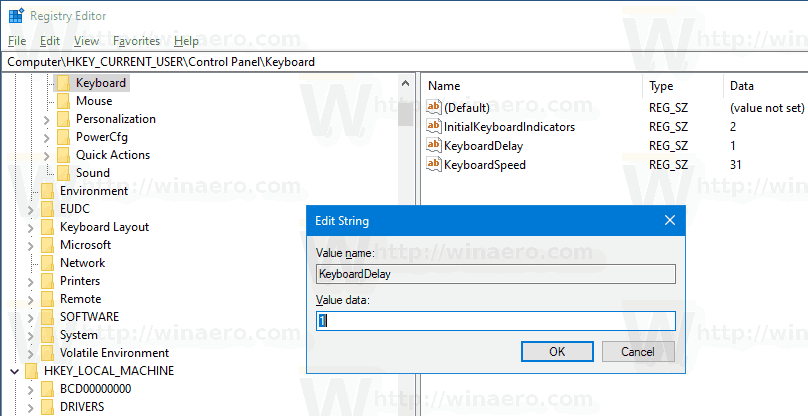
Navigate to Control Panel > Keyboard settings. Set “Repeat delay” to the shortest setting (Fast) and increase “Repeat rate” to your fastest comfortable speed. Test changes in Notepad before applying system-wide. Crucially, disable Filter Keys in Ease of Access settings—this accessibility feature often causes unintended stuttering.
Windows Optimization Settings:
– Control Panel keyboard repeat rate adjustments
– Power plan set to “High Performance” in Power Options
– USB selective suspend disabled in power settings
– Fast Startup feature turned off in Power Options
– Gaming mode enabled in Windows Settings > Gaming
Manage Background Processes
Open Task Manager (Ctrl+Shift+Esc) during typing sessions to identify CPU-hungry processes causing lag. Sort by CPU usage and temporarily end tasks consuming excessive resources. Disable unnecessary startup programs through Task Manager’s Startup tab. Close browser tabs with high memory usage—especially those running video content.
When to Replace Your Keyboard
Replacement Indicators
Replace your keyboard immediately if multiple keys fail consistently across different systems, visible circuit damage appears, or liquid corrosion has spread extensively. Consider upgrading when repair costs exceed 50% of a replacement keyboard’s value or when your typing needs have evolved beyond your current hardware’s capabilities.
Upgrade Triggers:
– Three or more keys consistently failing
– Outdated connection types (PS/2, older wireless protocols)
– Changed ergonomic requirements
– New feature needs (dedicated macros, RGB lighting)
– Repair expenses approaching replacement cost
Most keyboard stuttering issues resolve with basic cleaning and driver updates. Start with compressed air cleaning and driver refresh before attempting complex repairs. Document any registry changes and create system restore points before advanced modifications. If your keyboard still stutters after trying these solutions, the problem likely requires professional repair or replacement—don’t waste hours on a failing keyboard when productivity is at stake. Implement the weekly maintenance schedule outlined in this guide to prevent future stuttering and extend your keyboard’s lifespan significantly.