How to Clean Razer Blade Keyboard: Easy Steps
Your Razer Blade’s keyboard has seen battle—crumbs from midnight snack runs, coffee spills during intense raids, and years of gaming sweat clogging those precision mechanical switches. When your low-profile keys start sticking or your RGB lighting dims under grime, it’s not just unsightly—it sabotages your gameplay. This guide delivers the exact method to revive your keyboard’s responsiveness and restore vibrant lighting without risking damage to your $2,000 investment. You’ll learn proven techniques tested on Razer Blade 14, 15, and 16 models that prevent costly repairs and keep your machine tournament-ready.
Most gamers make the critical mistake of cleaning while the laptop’s powered on or using household cleaners that corrode RGB components. Skip this step, and you’ll fry circuits or void your warranty. Instead, follow this precise sequence: First, power down completely—no sleep mode shortcuts. Unplug every cable, including the power adapter and USB-C hub. Let the chassis cool 15-20 minutes after gaming sessions; blasting cold air on hot components causes thermal shock that cracks solder joints. Then, discharge static by touching a metal radiator pipe or wearing an anti-static wrist strap. Work on a microfiber towel to avoid palm rest scratches. This isn’t just prep—it’s your warranty’s first line of defense.
Power Down Safety First
Shut Down Completely
Never clean your Razer Blade while powered on or in sleep mode. Residual electricity interacting with cleaning fluids can short-circuit the keyboard matrix controller. Fully shut down through Windows settings, then physically disconnect the power adapter and all peripherals. If you’ve been gaming, wait 15-20 minutes for internal components to cool. Cleaning hot hardware risks condensation forming inside the chassis when alcohol evaporates rapidly—a silent killer of RGB lighting circuits.
Static Prevention Setup
Static discharge destroys sensitive keyboard controllers faster than liquid spills. Before touching any keys, ground yourself by holding a bare metal pipe for 10 seconds or wear an anti-static wrist strap clipped to unpainted laptop metal. Work in 40-60% humidity environments—dry winter air increases static risk. Always place your Blade on a microfiber cloth; fabric surfaces generate static that transfers to key mechanisms during cleaning.
Essential Cleaning Tools
Must-Have Items
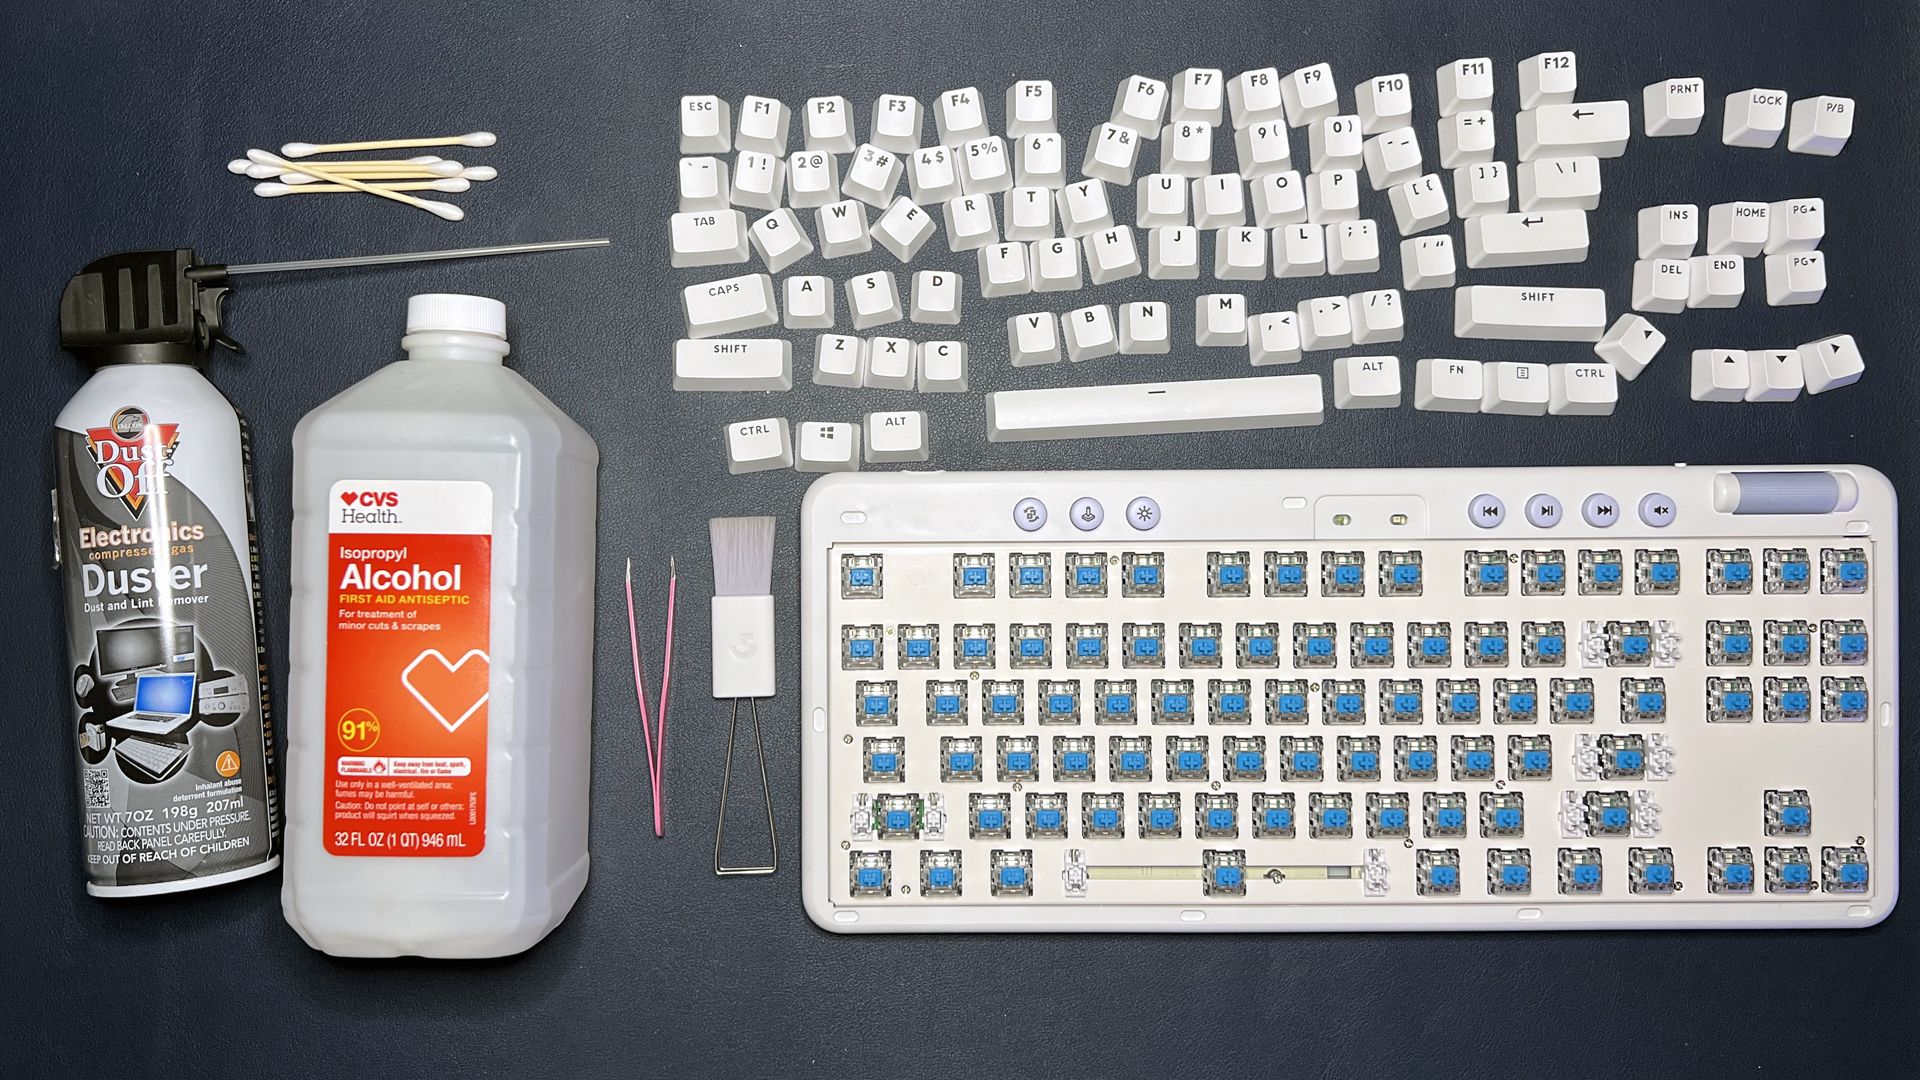
Skip paper towels or window cleaners—they leave fibers that jam scissor switches. You need:
– Compressed air (90+ PSI): Hold 6-8 inches from keys to avoid dislodging mechanisms
– 99% isopropyl alcohol: Lower concentrations leave residue that attracts more dust
– Three microfiber cloths: Dedicated damp, dry, and polish cloths prevent cross-contamination
– Plastic spudger: Metal tools scratch keycap coatings and conduct static
– Camera lens brush: Soft bristles clean between keys without damaging RGB diffusers
Optional Upgrades
For heavy buildup, add a Razer-specific keycap puller (low-profile switches require angled insertion) and an LED flashlight to spot debris under spacebars. Avoid vacuums—they generate static unless using a brush attachment on lowest suction.
Remove Surface Debris Fast
Compressed Air Technique
Tilt your Blade 75 degrees toward you so debris falls away from internals. Blast short 1-second bursts at 45-degree angles between keys—never perpendicular, which forces particles deeper. Target sticky zones: spacebar corners, shift key edges, and WASD cluster. Rotate the laptop upside-down for 30 seconds; gravity pulls dislodged crumbs out through bottom vents. Repeat sideways for enter key debris. One can of air typically handles two full cleanings before pressure drops below 90 PSI.
Brush Away Remaining Dust
After air blasts, use the lens brush in downward strokes following key rows—left to right on top row, then descending. Random brushing pushes dust under keycaps. For stubborn gunk near arrow keys, combine brushing with upward air bursts. If you see glitter-like particles (common with RGB wear), shine an LED light sideways across keys to reveal hidden debris.
Deep Clean Keycaps Properly
Alcohol Wipe Method
Dampen one microfiber corner with alcohol—wring until no drips form. Wipe keys in circular motions starting at ESC, moving left-to-right across rows. For sticky residue near Ctrl keys, twist a cotton swab in alcohol and scrub edges only. Immediately dry with a second cloth; alcohol evaporates in 20 seconds but pooling under keycaps causes switch failure. Never spray liquid directly—use cloth application to control saturation.
RGB Light Care
Translucent keycap edges dim when dust blocks light diffusion. Dampen a cotton swab tip (not the stick) and clean just the outer 1mm rim where light escapes. Test lighting before cleaning: note dim keys like WASD or spacebar. After cleaning, cycle through Razer Synapse profiles to reactivate dormant LEDs. If colors stay uneven, moisture remains—wait 30 minutes before retrying.
Fix Sticky Keys Permanently
Alcohol Penetration Trick
Identify sticky keys (common culprits: spacebar, left shift). Apply 2 alcohol drops around the key’s perimeter—never directly into switches. Press the key 25 times in slow, full-depth presses to work alcohol into the mechanism. Wait 8 minutes for evaporation, then test responsiveness. If sticking persists, repeat once; over-saturation causes mushy keys for hours. For gummy residue from sugary drinks, add 10 extra presses to dissolve buildup.
Keycap Removal Process
Only remove keycaps for visible debris under switches. Insert plastic spudger under the top edge of the keycap and gently lift upward—Razer’s scissor mechanisms snap off with sideways force. Once detached, blast air under the mechanism and swab with alcohol. To reattach, align the keycap’s stem with the scissor clips and press straight down until it clicks. Misaligned keycaps cause double-presses during gameplay.
Solve RGB Problems After Cleaning
Moisture-Related Issues
Flickering or dead zones mean moisture on LED contacts. Power cycle completely (hold power button 15 seconds), then wait 40 minutes—not 10—for full evaporation. Open Razer Synapse and rapidly toggle through 5+ lighting profiles; this redistributes electrical current to dormant LEDs. If issues persist after 24 hours, moisture penetrated deeper—seek authorized service immediately.
Color Calibration
Post-cleaning color shifts (e.g., red WASD keys turning orange) indicate uneven moisture drying. Reset to default profiles in Synapse, then manually recalibrate individual keys. Focus on clusters like the number row where debris accumulates. This redistributes voltage across the lighting matrix—critical for maintaining color accuracy in dark gaming environments.
Prevent Future Buildup
Daily Maintenance Habit
Spend 5 seconds after gaming: blast compressed air across keys while tilted. This removes 80% of daily debris before it hardens. Keep an air canister by your desk—consistency prevents deep cleaning every 3 months. Gamers who skip this develop “crumb volcanoes” under spacebars that require keycap removal.
Weekly Surface Care
Wipe keys with a dry microfiber cloth to remove skin oils that attract dust. Pay special attention to palm rest areas where sweat transfers to keys. For oily residue, use an alcohol-dampened cloth corner—never spray near trackpad. This maintains the matte finish that prevents finger slippage during quick movements.
Monthly Deep Schedule
Schedule cleaning after major game releases when you take gaming breaks. Focus on the bottom row (arrow keys, Ctrl) where debris hides longest. Use this rhythm: air blast → brush → alcohol wipe → dry. Consistent monthly care extends switch life by 2+ years—critical for tournament players relying on millisecond precision.
Handle Cleaning Disasters
Key Responsiveness Issues
Mushy keys post-cleaning mean trapped moisture. Test with online keyboard testers to isolate problem keys. Wait 2 hours minimum before re-cleaning—rushing causes damage. If unresponsive, repeat the alcohol penetration trick but reduce presses to 15 to avoid overworking wet mechanisms. Persistent issues? Contact Razer Support with your cleaning log—they waive labor fees for documented proper maintenance.
Keycap Reattachment
If keys wobble after reseating, inspect scissor clips for cracks (common on spacebars). Replacement keycaps cost $5-$15 through Razer’s Configurator. To reinstall, align the keycap’s inner hooks with the scissor mechanism’s outer arms. Press firmly downward until both sides click—uneven pressure causes binding during actuation.
Your Razer Blade keyboard now responds like new with vibrant RGB lighting. Maintain this peak condition by banning drinks near your setup, washing hands before gaming, and sticking to the 5-second daily air blast. These habits prevent the #1 killer of Blade keyboards: slow debris accumulation that degrades switches long before failure. For liquid spills, power off immediately and contact Razer Support—never attempt DIY fixes. With this routine, your mechanical switches will outlast three gaming generations, keeping you competitive when others’ keys start sticking. Ready for more? Master Razer Synapse lighting profiles next to maximize your newly cleaned keyboard’s visual impact.